PHOTOGRAPHY hiking
Introduction
Photography hiking: as the title says, these are hiking photography notes; this is an important point, since you will perhaps read here things on which many professional photographers will not agree. Since I am not a professional photographer, I must to write what comes to my kind, more based on first-hand experience and instinct than technical knowledge. As a matter of fact, while hiking we must find a compromise between what would be optimal or even only acceptable, from a photography perspective, and what is practical and feasible. I invite however people wishing to know more, to browse professional photographers web sites; many of them also organise specific outdoor seminars and courses.
The subjects
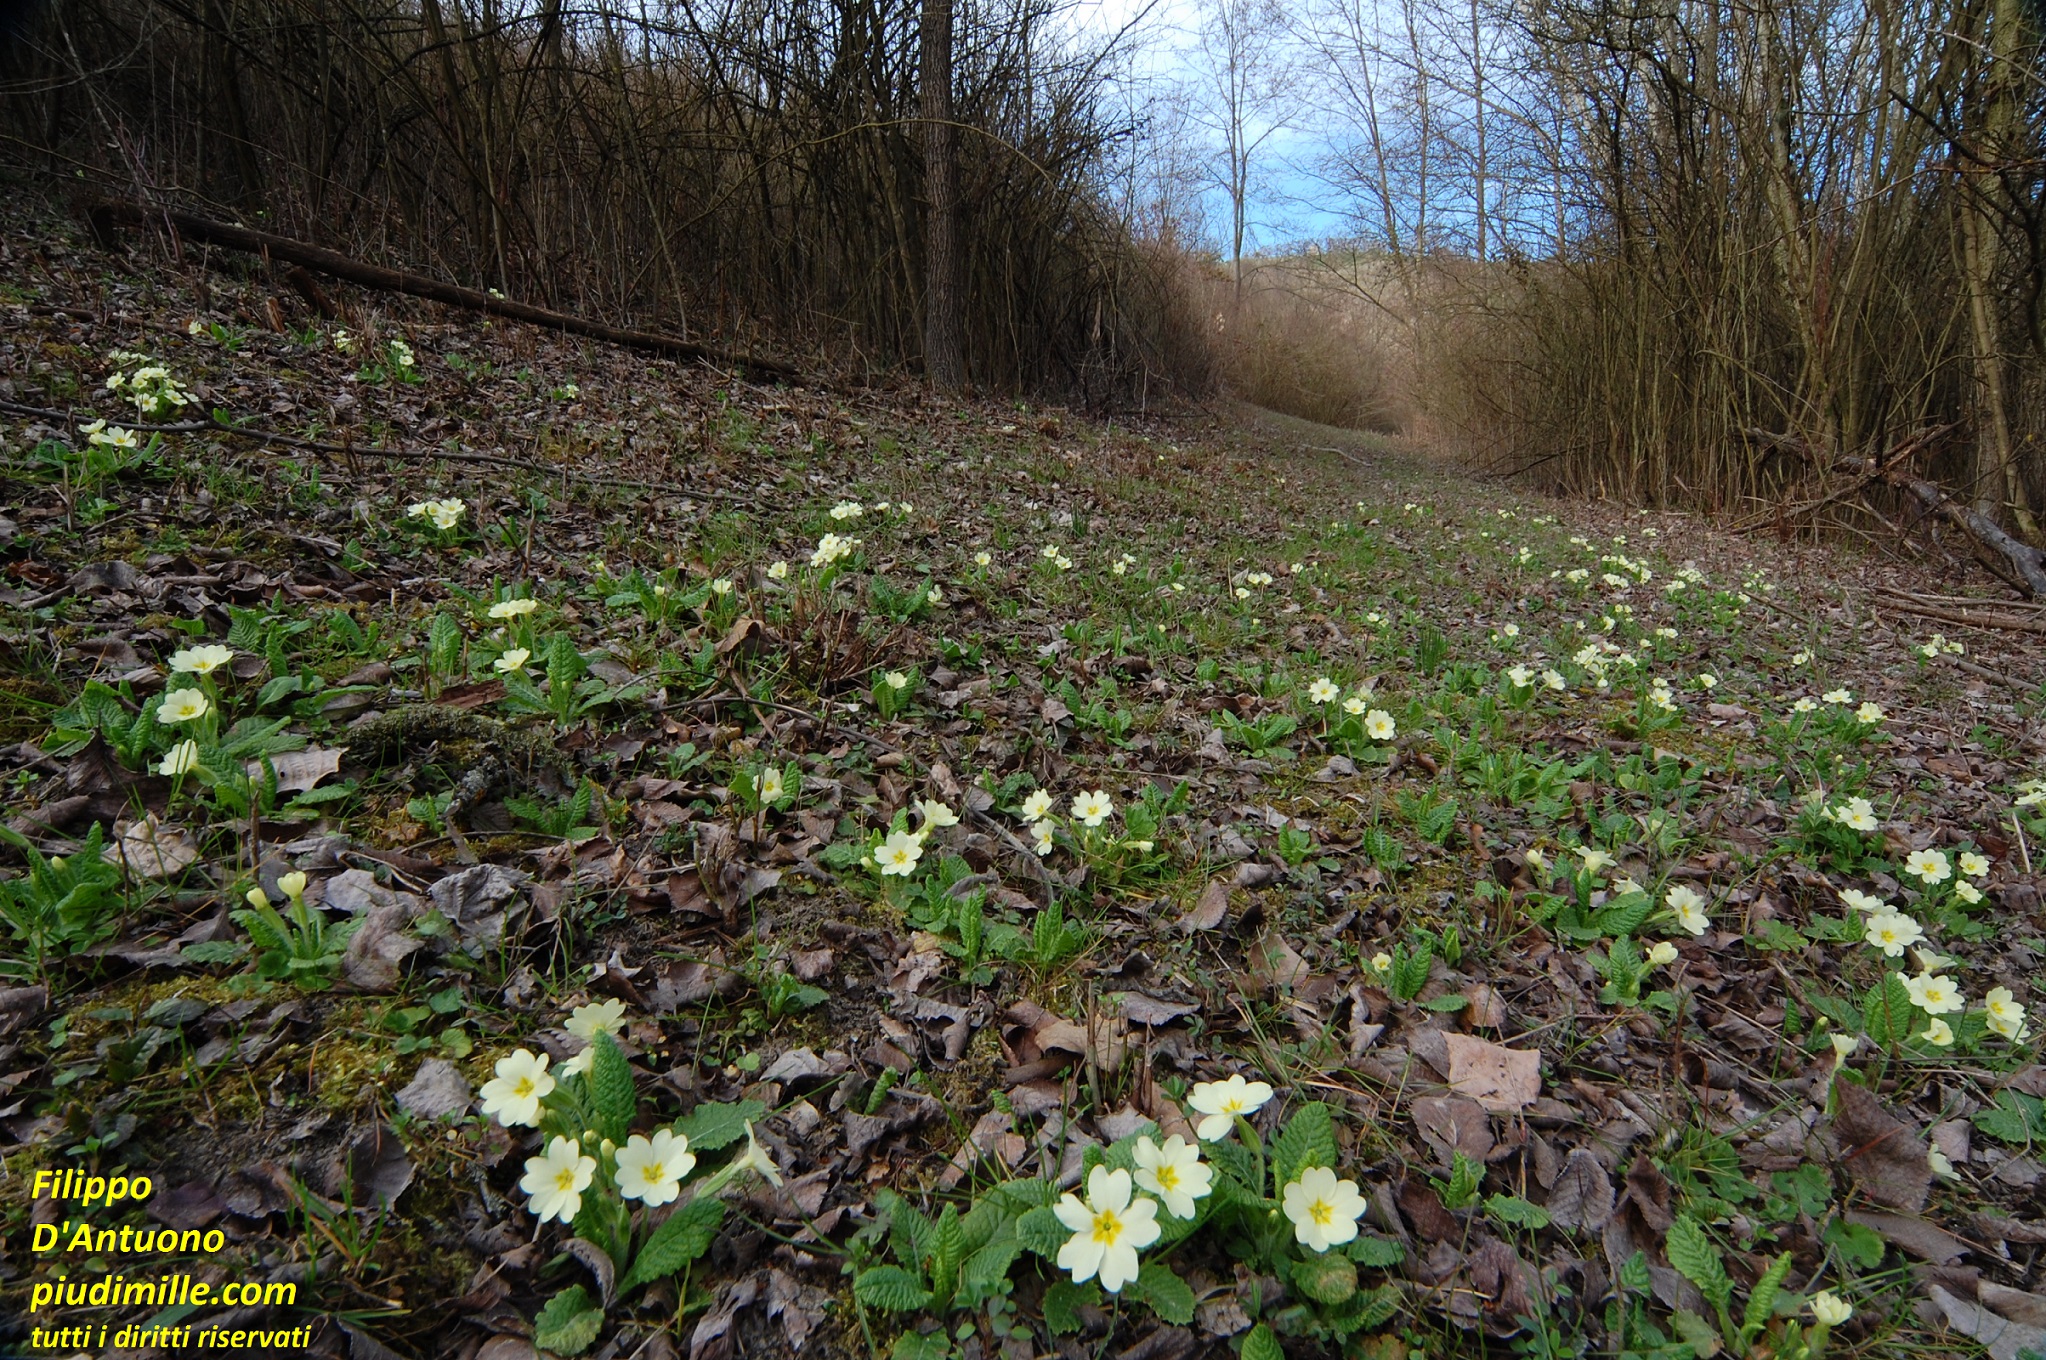
Speaking of hiking, the more common subjects will be natural places, landscapes, plants, animals, when possible, but often also architectural elements, like villages, buildings, churches etc. Also people, of course, but I am such a bad people photographer that I prefer not to compromise my reputation with this.
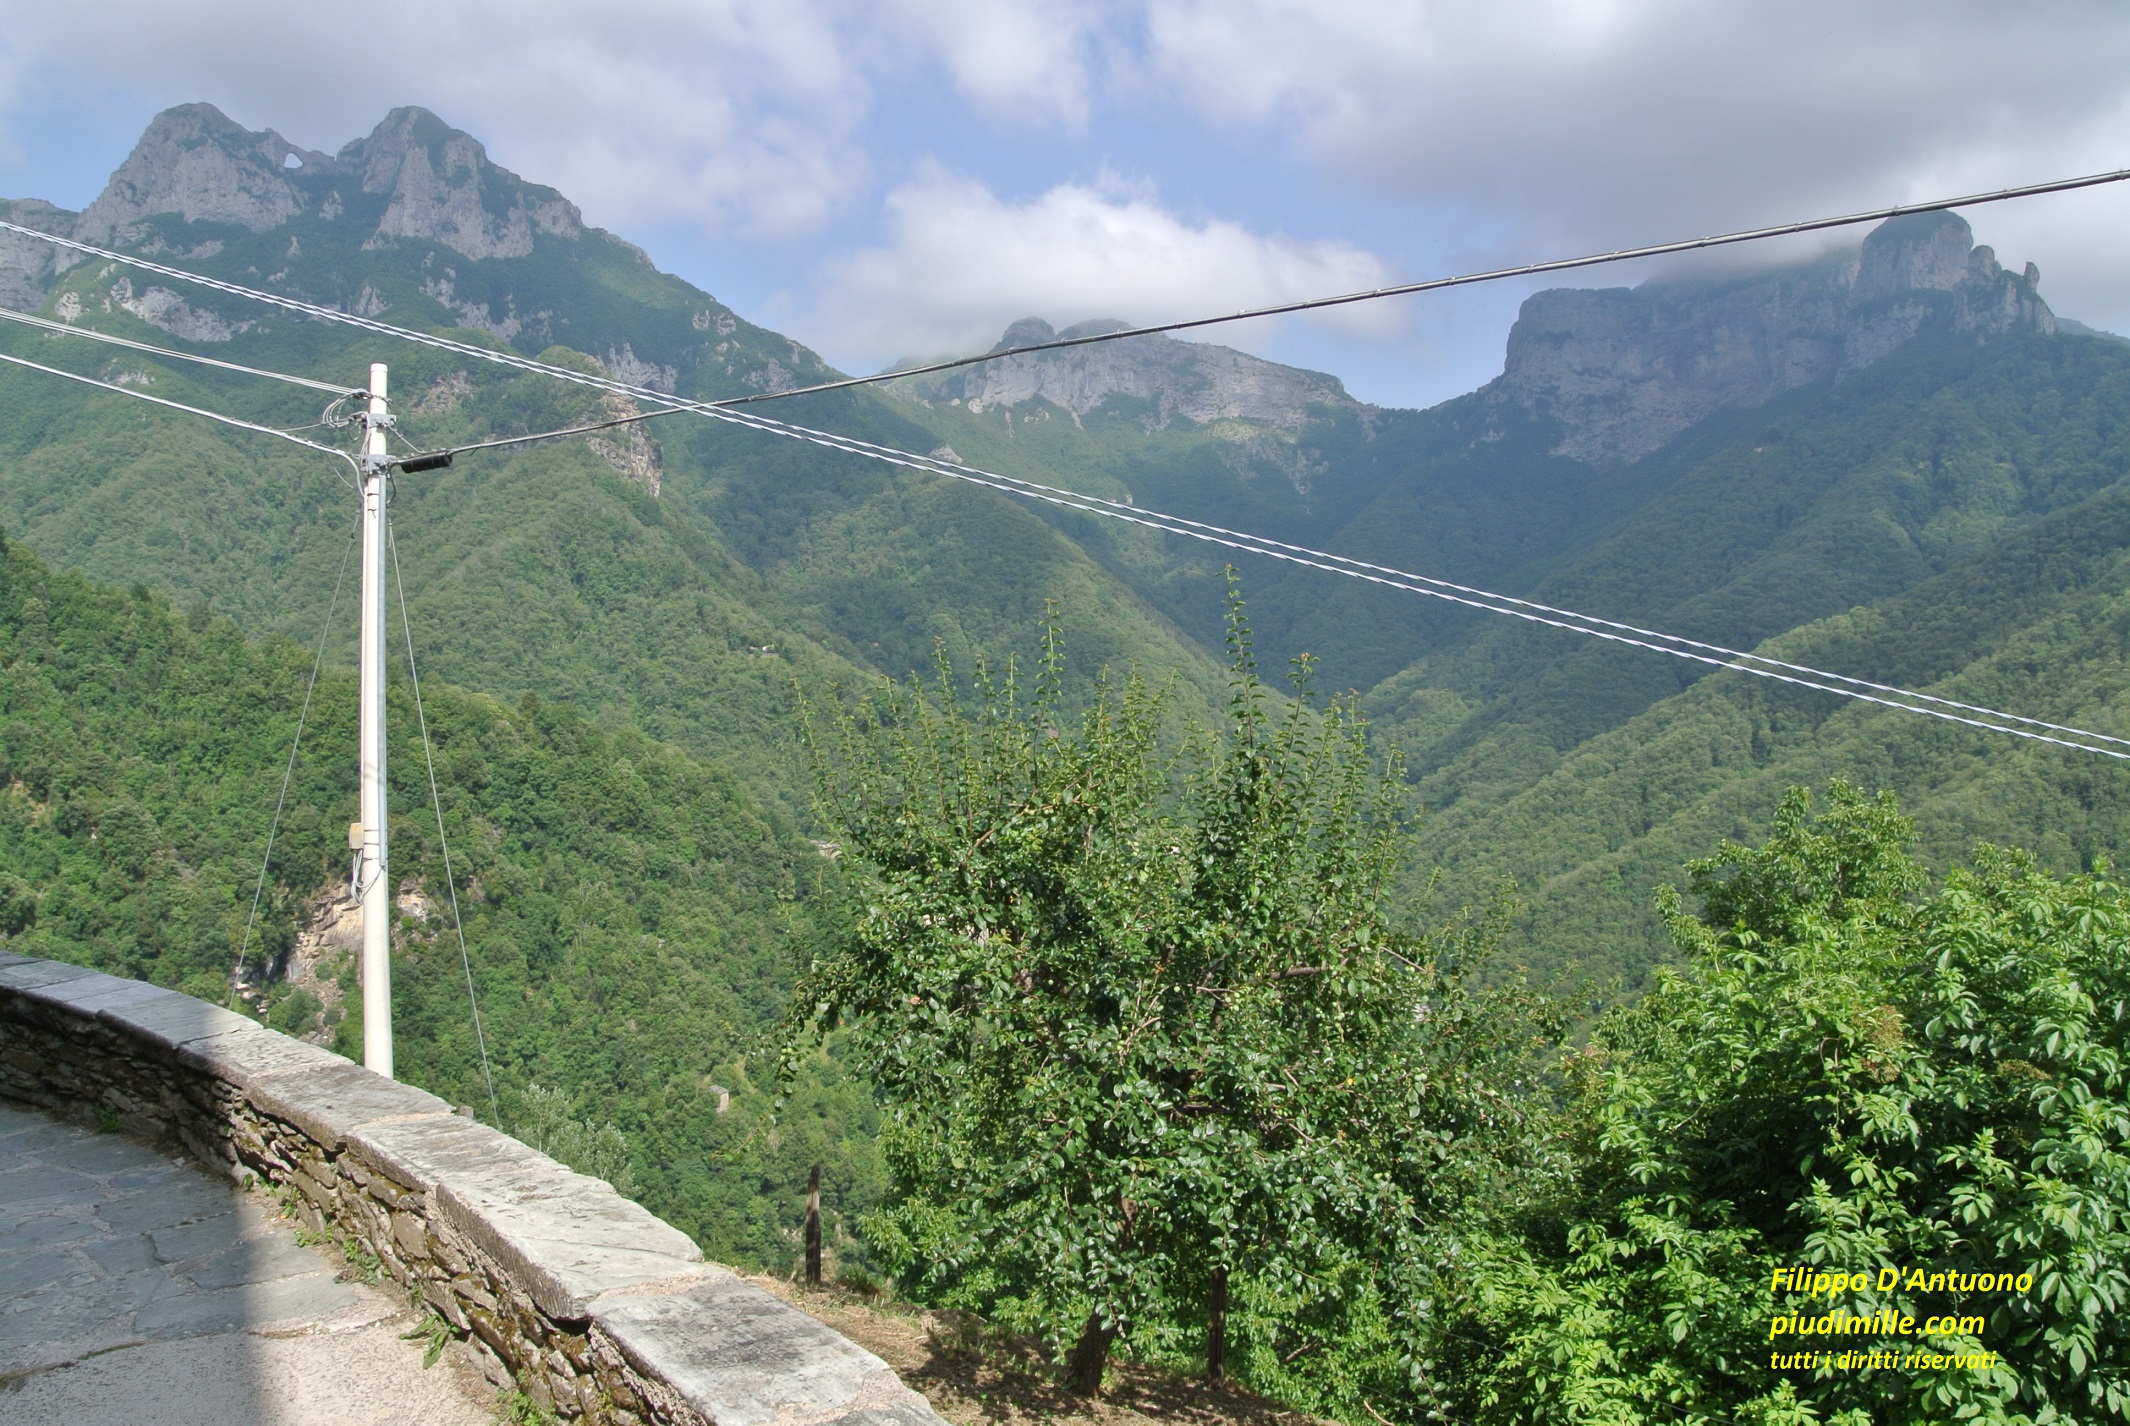
Photography hiking. piudimille.com
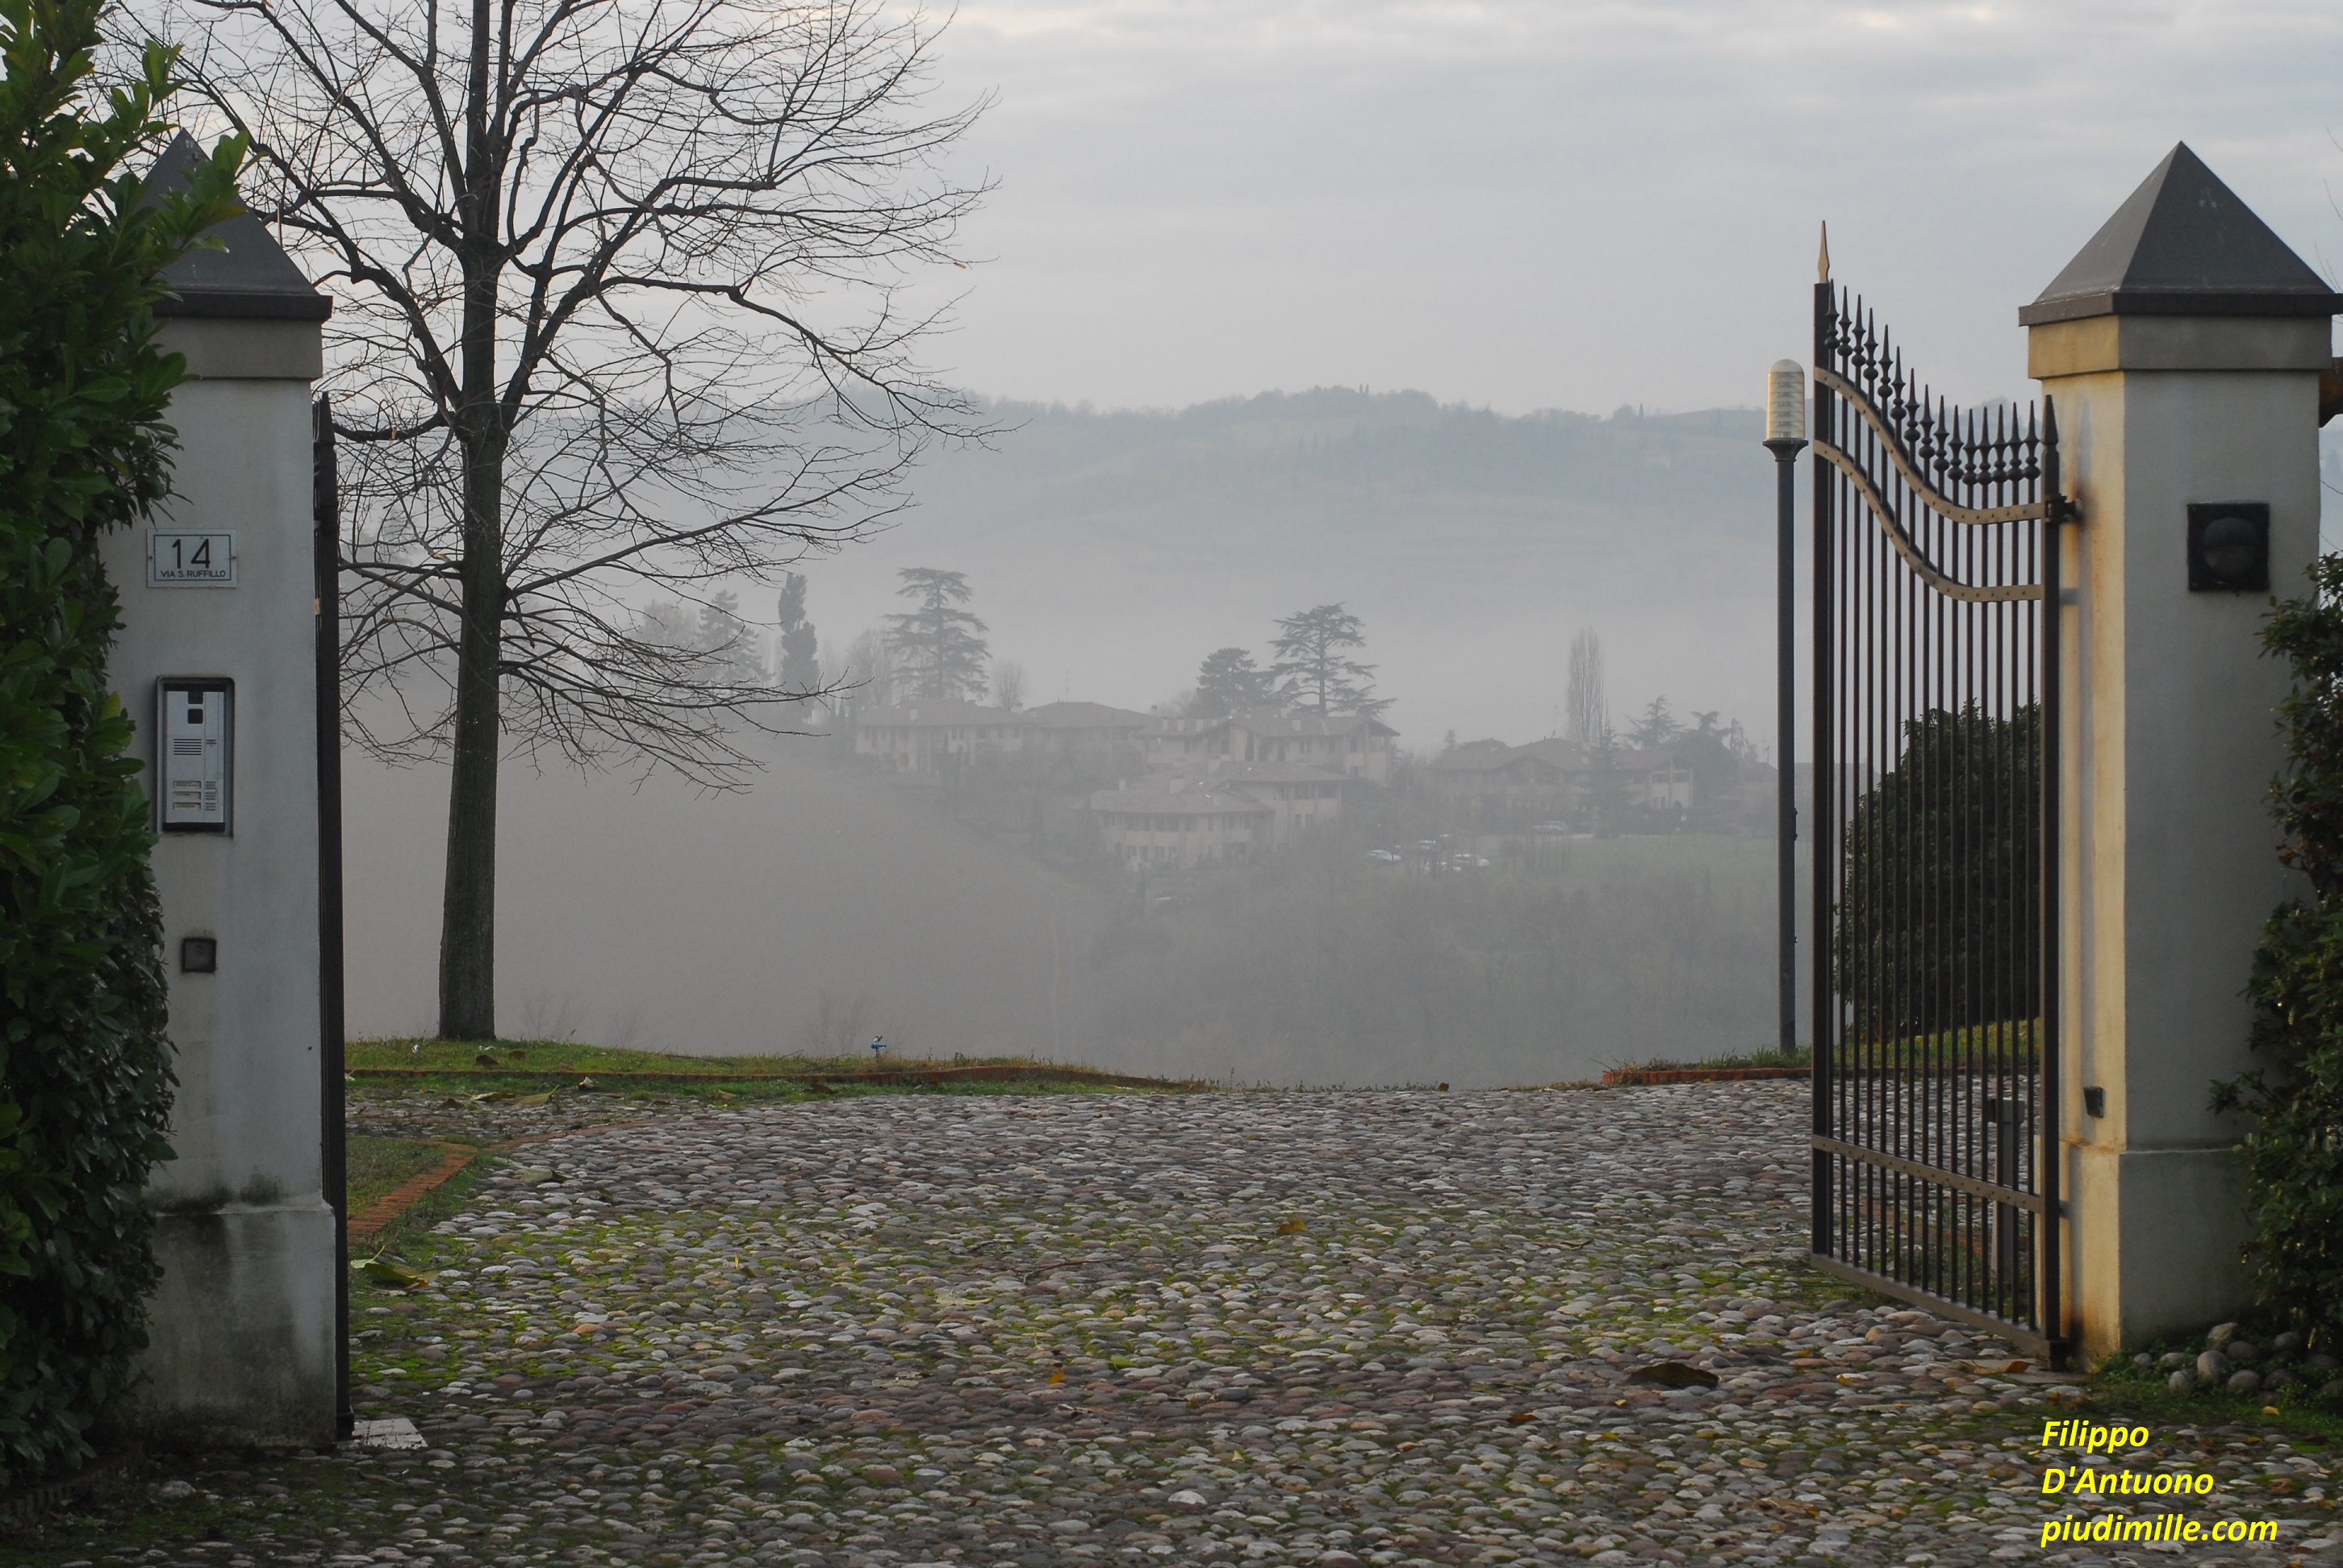
Photography can open doors on something unexpected
The camera
Let’s assume that we use a camera. Many people use nowadays a smartphone or a tablet; generally don’t, so I cannot be on any help with this issue.
For long time I brought with me my regular reflex, also together with some lenses. I was feeling a bit loaded, not really in my backpack, but rather on my neck or my shoulder. But I had little alternatives. I tried compact cameras, but I never fell in love with them. However, in some photo web sites it is possible to find pictures from compact cameras making mine miserably fading. Yes, it is a matter of the photographer; so, in case you get friendly with compact cameras them, take them into consideration; but they are not all the same, so read a bit further these general notes to make your choice; some of them are extremely sophisticated, with the size of a small reflex, of which they also have most functions, besides having often super zoom lenses.
But let’s come back to the point: weight. Hiking all the day with a couple of kg on the neck + a back pack can be a pain. With a reflex and an additional lens this can happen, even if nowadays we can make it with less weight, with some excellent entry models.
At a point I discovered the mirrorless reflex, with reduced sensor size, and I’ve been conquered. I reduced the load on my neck to 1/3 and I am happy with this. Now we are almost always together, at least for serious hikes. But, every now and then, I miss my regular reflex: its feeling of toughness, the speed, all the commands handy, and the possibility of holding it firmly; so I take it again but, generally not when I have 30 km to go. For several things an ordinary reflex is not easy replaceable; the lens array of lenses I have for my regular reflex, miss for my mirrorless.

A shot of me, of several years ago, with my ordinary reflex on my neck

And another one with my mirrorless: the difference does exist
Photography hiking. piudimille.com
An important characteristic: the viewfinder
Most compact cameras and some mirrorless only have the LCD screen. Help !!! With some light conditions, very frequent outdoors, you see almost nothing and so it is difficult to compose your subject. Then, the tendency (of beginners) looking in the LCD, is to hold the camera by their fingers, straight arms, and also arching the body backwards; this is the best way to have shaken images, even if the present day cameras do their best to help, using them in program mode. In any case, people using smartphones or tablets without any basic information are candidates to take shaken images.
So: on your compact or mirrorless camera, better to have also a viewfinder. An orientable LCD screen ? Modern cameras have it by default, so there is no choice. Orientable LCD can help taking angled shots without the need of twisting our body, bending on precipices, or laying on the ground; but, when hiking, the less things you have that may open and cling to something, the best. So, in theory, orientable LCD would not be essential.
The lenses
With compact cameras you cannot change the lens and must stay with what they have. There are however very different combinations: with some of them you can also do some close up shots. So you have to decide before buying. With reflex cameras, with or without mirror, you can change the lens.
Standard lenses
They reproduce an image with more or less the same size that we see by our eyes. For the classic 24×36 sensor size their focal length is about 50 mm. For many digital formats, also reflex, and for most mirrorless and all the compact cameras, the focal length of standard lenses is lower.
Wide angle lenses
They allow to include a wider angle of view in our shots, making the subjects farther and smaller. Beginners have a string tendency, difficult to abandon, to shot landscapes always using a wide angle, and this can be disappointing; everything inside, indeed, but too small, often with a wide foreground, without any relevant detail. The fact is that we are deceived by our view: our eyes cover quite a wide angle of view, keeping however the “natural” size of things (meaning the size that we area acquainted to see). The camera cannot do: as much as we widen the angle of view, the subjects become smaller. So, a wide angle lens is a must, but it should be used with common sense, especially to widen what is narrow and exploit its great field depth.
The use of a wide angle lens can create pleasant effects even with common subjects
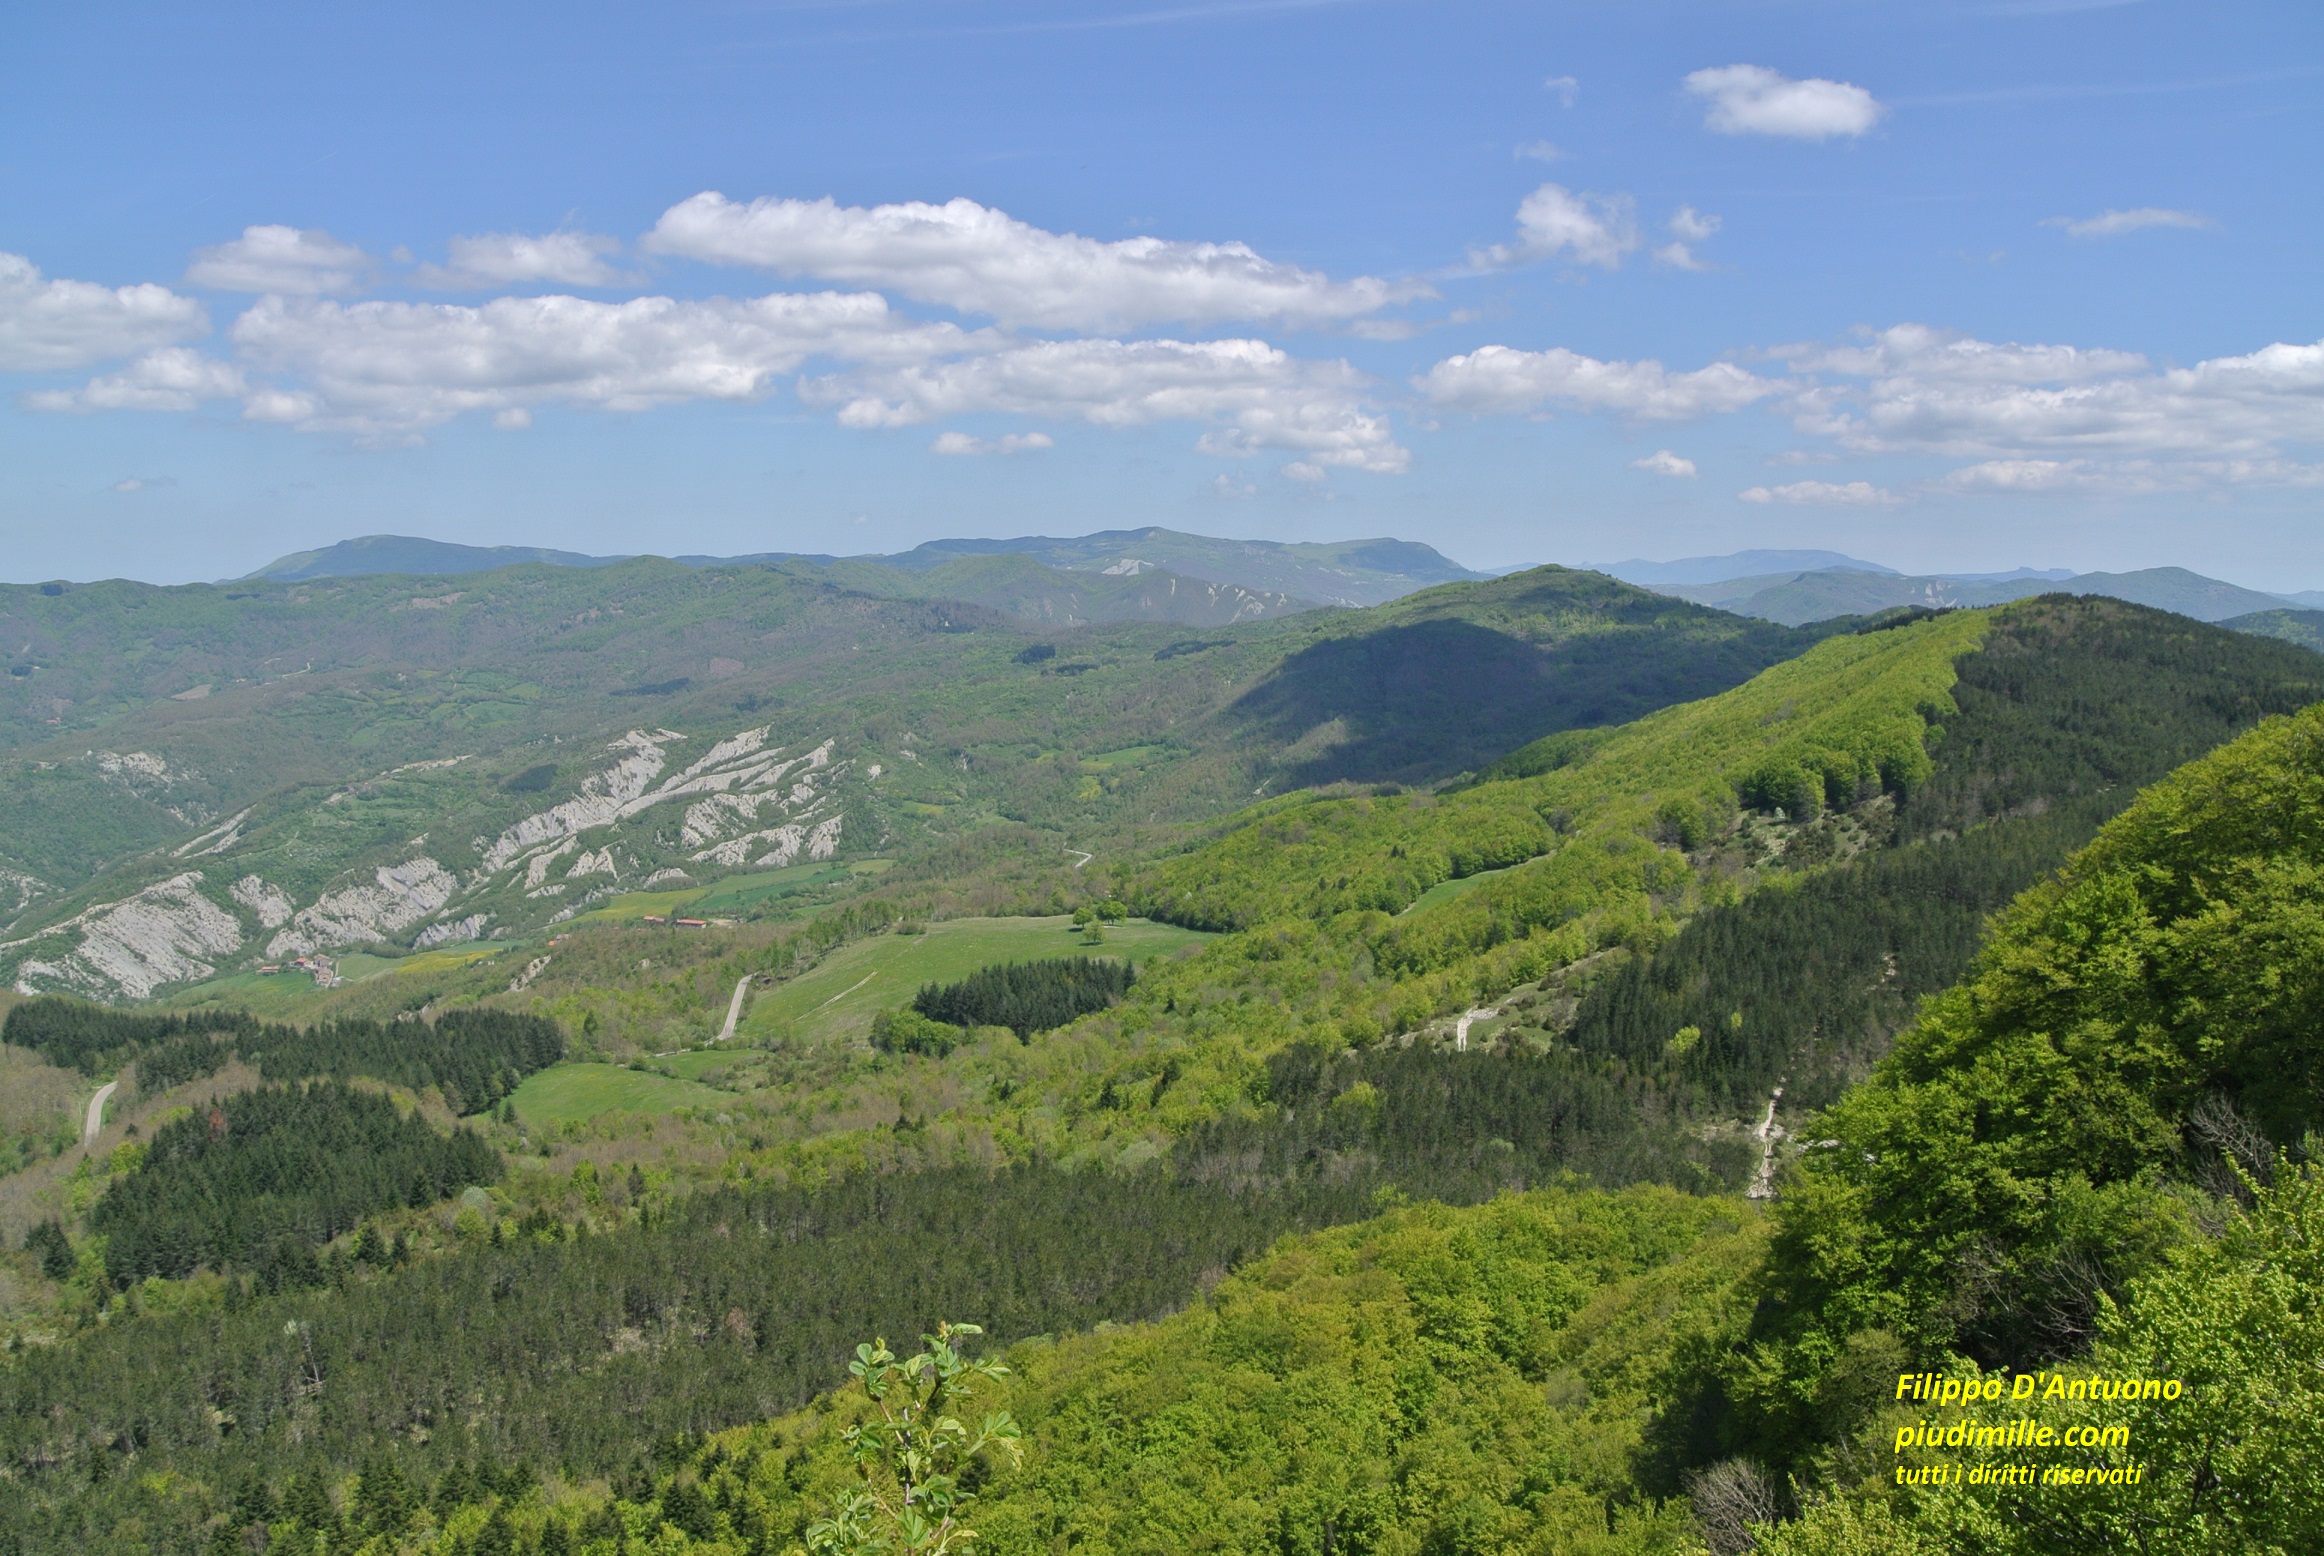
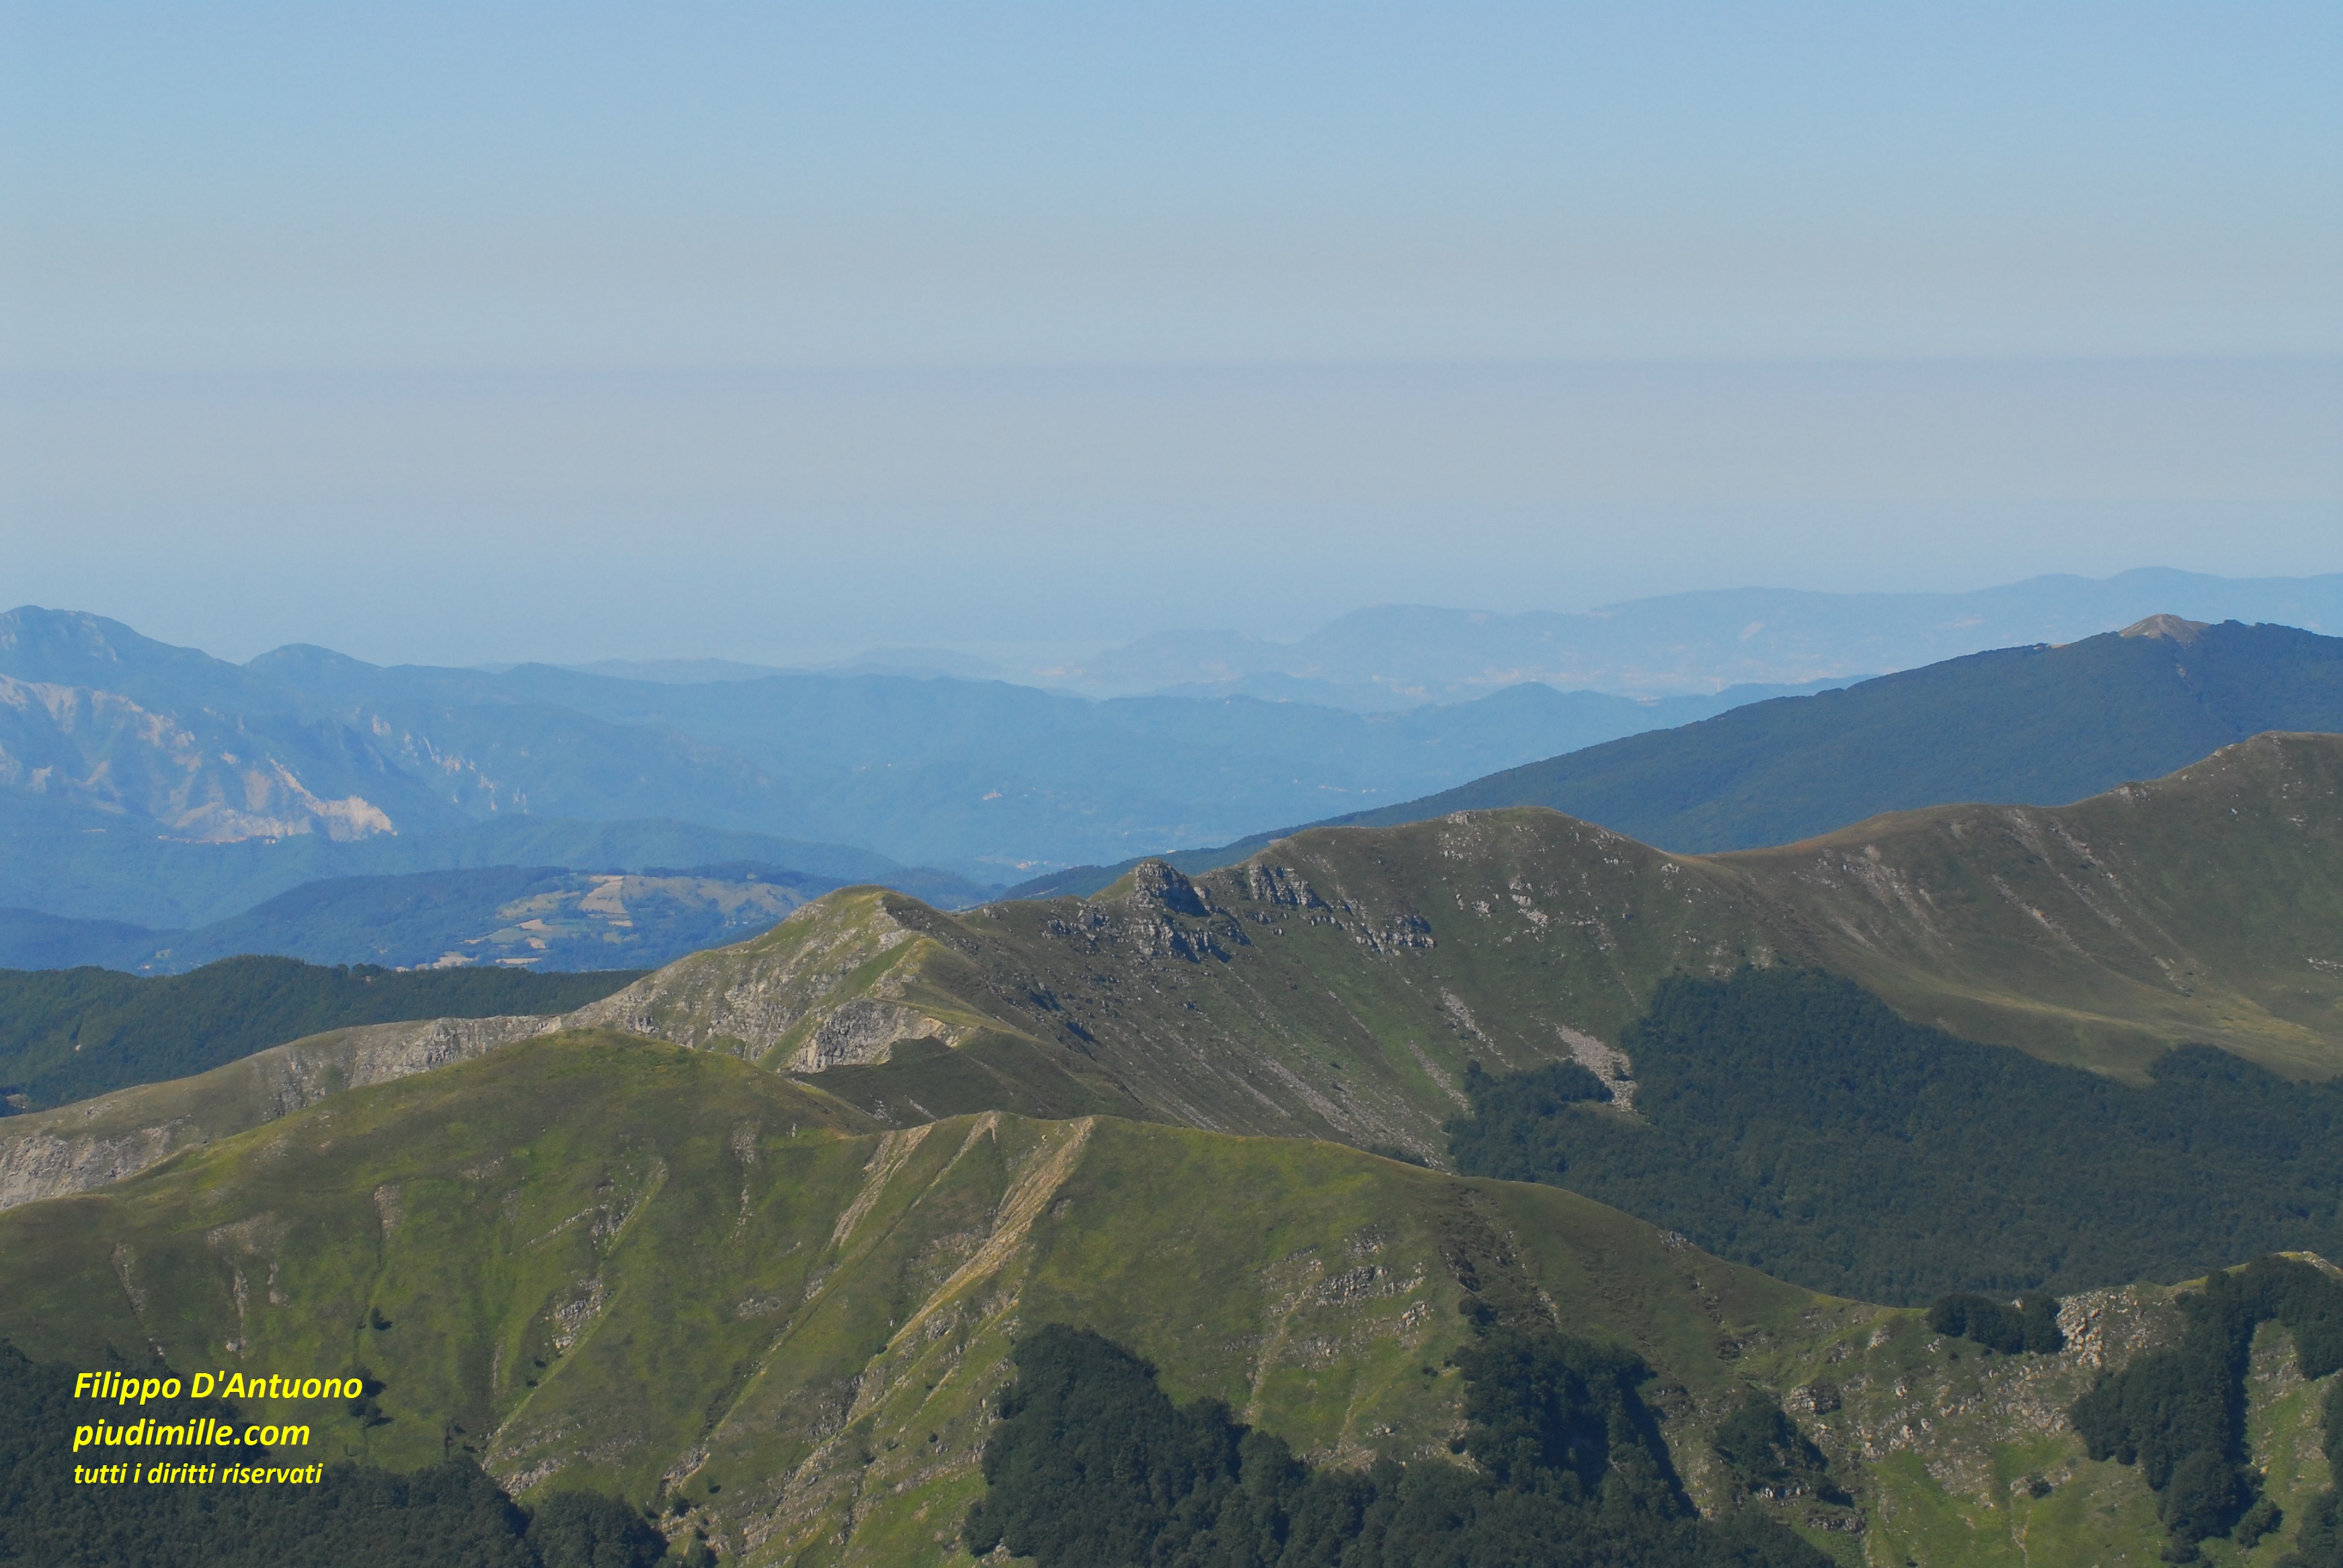
A landscape shot by a wide angle lens: many things are inside, but none is in evidence
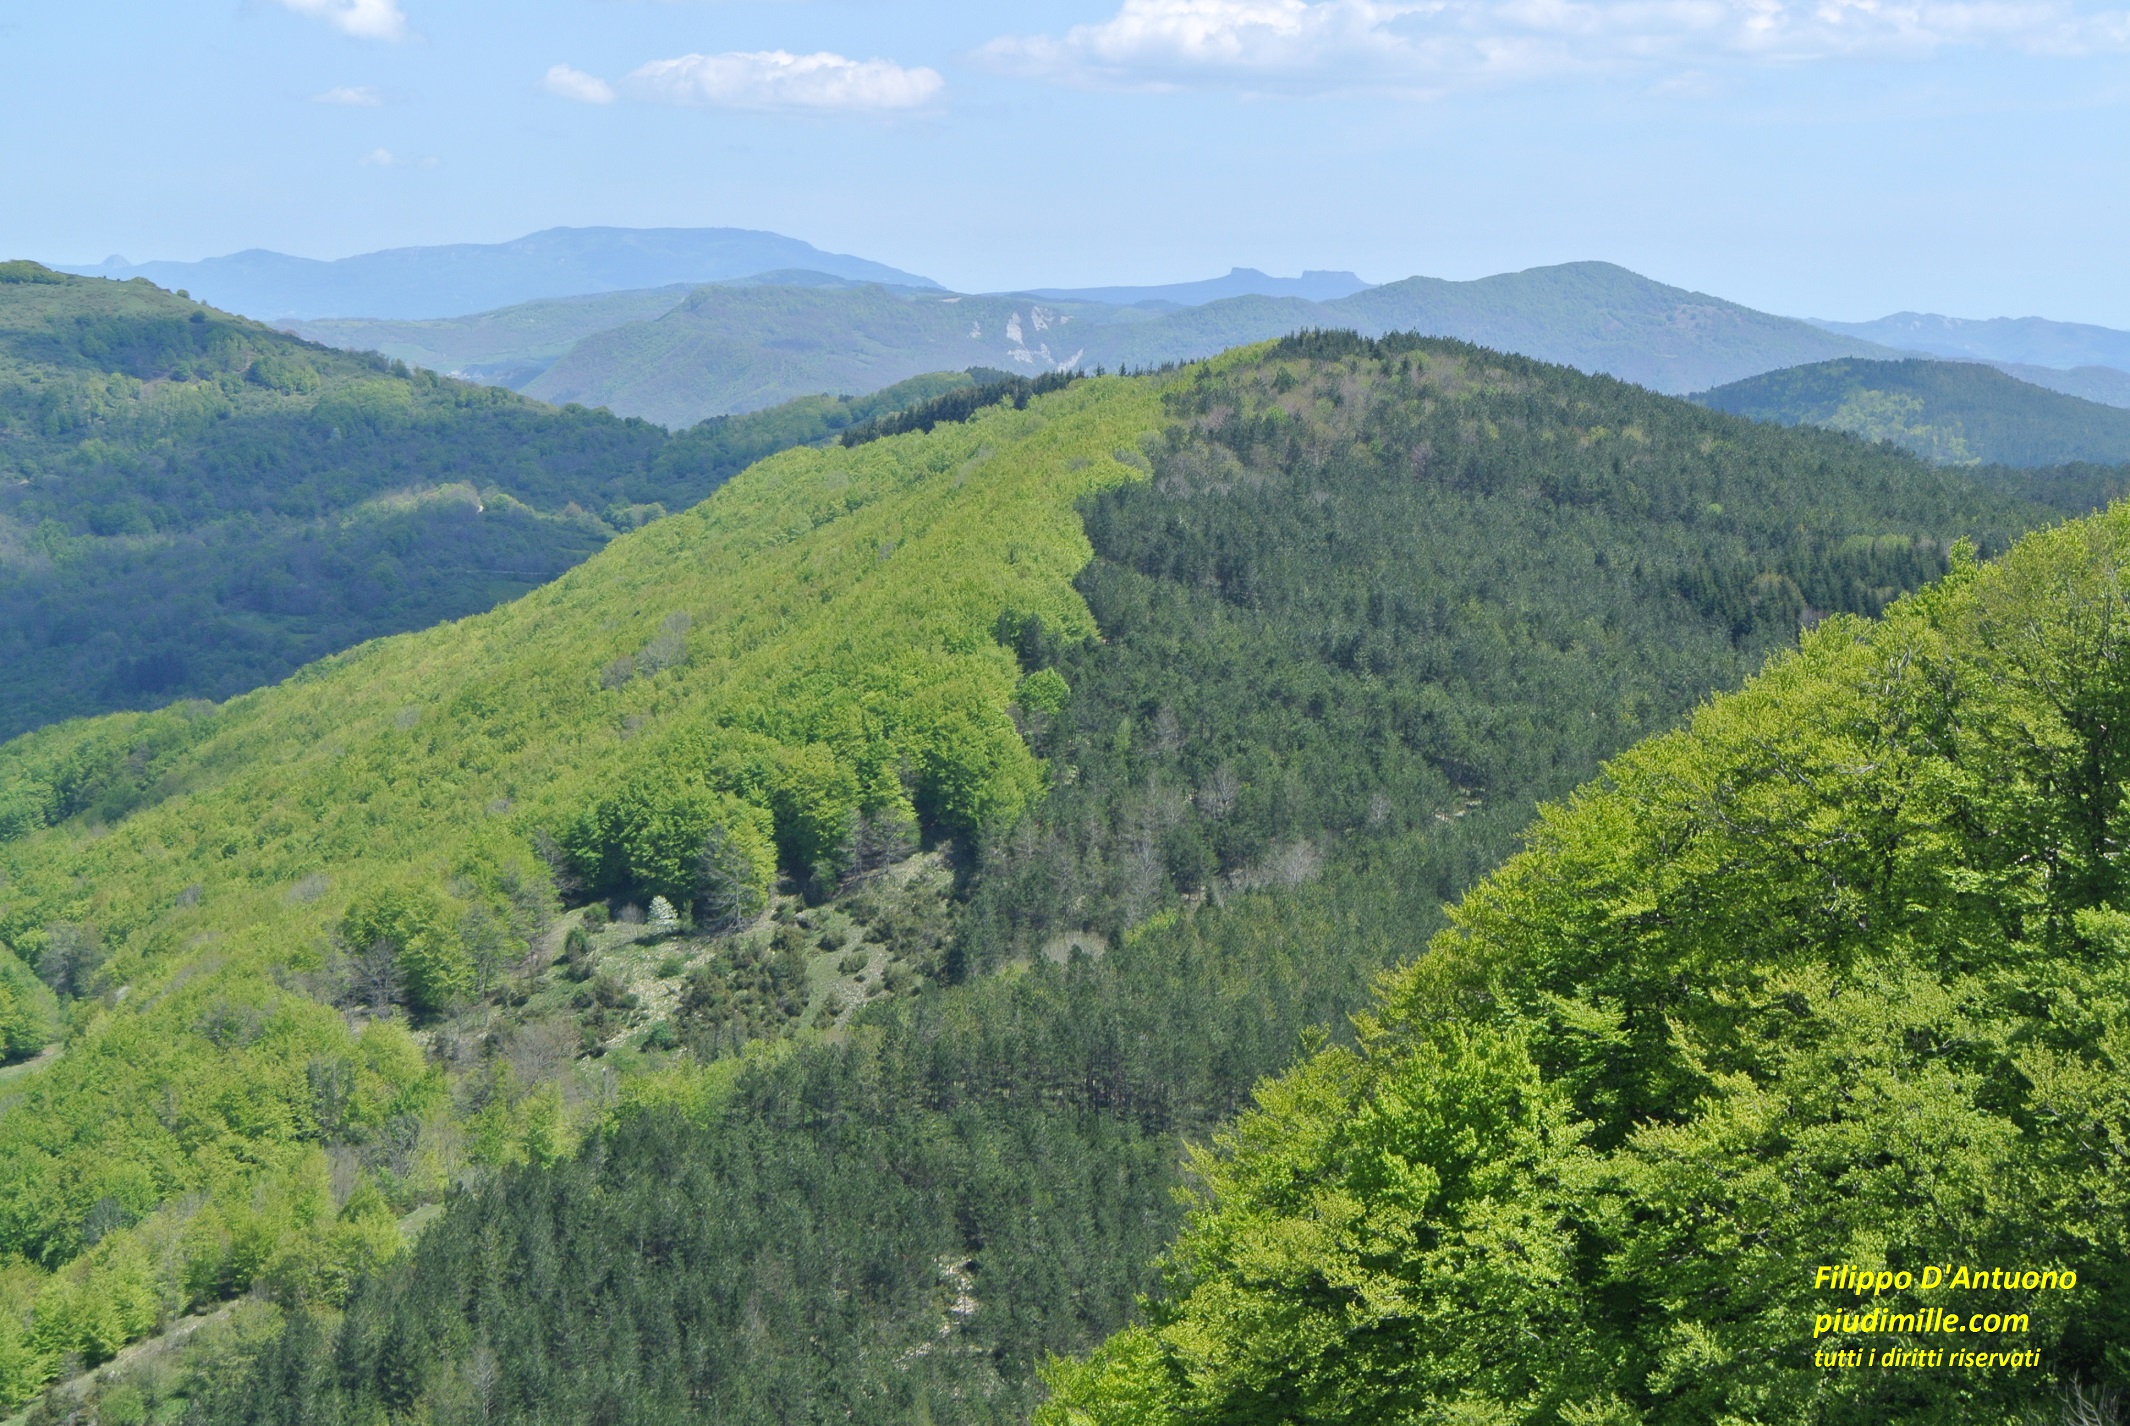
A more punctual composition puts in better evidence the difference among the two kinds of forests, from mount Penna della Verna
Telephoto lenses
They do the opposite of wide angles, magnify subjects and restricting the view. So they are ideal to shot distant subjects. The more extreme telephoto lenses are these sort of gun barrels that we see with nature photographers or sport reporters. They are fascinating but must be well understood. In the common way of thinking, it is enough to own a telephoto to be able to successfully shot all kind of animals but, unfortunately, this is not the case. To shot distant things, the air must be clear, otherwise images will be hazy. A telephoto lens us be held very firmly, since the risk of shaking is increased. Focusing by a telephoto is much more critical.
In this shot by a wide angle the sea is visible, on the background of a wide foreground
Tele converters
These optional accessories are made up of groups of lenses; mounted between the camera and the lens, they raise their multiply their focal lens by a specific factor; e.g. a 50 mm lens coupled with a 2x tele converter becomes a 100 mm.
They are appealing optionals, giving the hope of easily solve the problem of approaching subjects. In reality: a) the quality ones are expensive, almost like decent adaptable lenses; b) the image quality worsens anyway, sometimes drastically, you must use tele converters with quality lenses; c) consider that tele converters reduce light, so auto focusing can be impossible with “dark” lenses; d) in case you decide to buy one, preliminarily investigate its compatibility with the lenses you plan to couple to it.
In some cases a tele converter may also help in taking close-up shots.
In this shot, by a telephoto, the sea of gulf della Spezia is closer, but cannot be seen well, since the air is misty
A tele converter, coupled to a tele photo lens, may allow to shot from far also very tiny subjects. In the image: 2x tele converted with 300 mm tele photo lens
Close-up (macro) lenses
It is generally not possible to shot close up images using the above mentioned lenses; or, better, some wide angle lenses allow close up focusing, but the subject will remain small. For close-up shots, a specific macro (close-up) lens is required. They are quite expensive, not easy to use, but can give great satisfaction, for subjects as insects, flowers, but also other natural things, or subjects from everyday life. If you are not attracted by this kind of shooting, however do not invest a lot of money; rather use a standard lens or a small telephoto and then magnify a bit your subject in post-production: nowadays this is possible and easy, using some standard software of any computer. Also consider the fact that some standard or zoom lenses can focus pretty close to the subjects and can be very useful: each brand have some and it is only a matter of locating them. But, if you decide to buy a close up, prefer a tele macro lens: insects fly away if we get too close to them.
Some multi purpose zoom lenses allow good close up shots
Photography hiking. piudimille.com
Extension tubes
These are metal tubes, generally in series of three that, mounted between the lens and the camera, allow to take close-up shots, in relation to their total length: you can therefore use 1, 2 or 3 together. As an example, with a 50 mm tube (generally is the thickest of the three) and a 50 mm lens you obtain a 1:1 magnification, so you photograph at natural size.
Consider that: a) extension tubes are nowadays not easy to find; b) with short focal lenses you must go too close to the subject; their better use is perhaps coupled with a small telephoto; c) also extension tubes, although without any lenses, subtract light and this makes focusing quite problematic, also using rings that should retain the automatic focusing mechanism.
Zoom lenses
Zoom lenses have variable focal length. Nowadays they are known by all, even since they are standard in the compact cameras and even in smartphones, even if as electronic zooms. They are without any doubt practical lenses; find the one more suitable to our needs and we will hardly leave it home when going hiking.
Shift (and tilt) lenses
These are a bit my favourites, even if, at the end, I seldom use them, simply because I cannot carry them with me. Shift lenses allow, as main performance, to correct the convergence of the building vertical lines when shooting from a not centred perspective (e.g. from below). You will read that this aberration is easily corrected in post-production. But this requires time and skill, not considering the satisfaction of clean shot from the beginning. Shift lenses also allow to change the perspective when there is no need of correcting parallel lines, and this is also exciting. Tilt lenses also do different things, among which a selective focusing on specific parts of our shot. A small problem: these are extremely expensive lenses, with special respect to the last-generation ones.
Photography hiking. piudimille.com
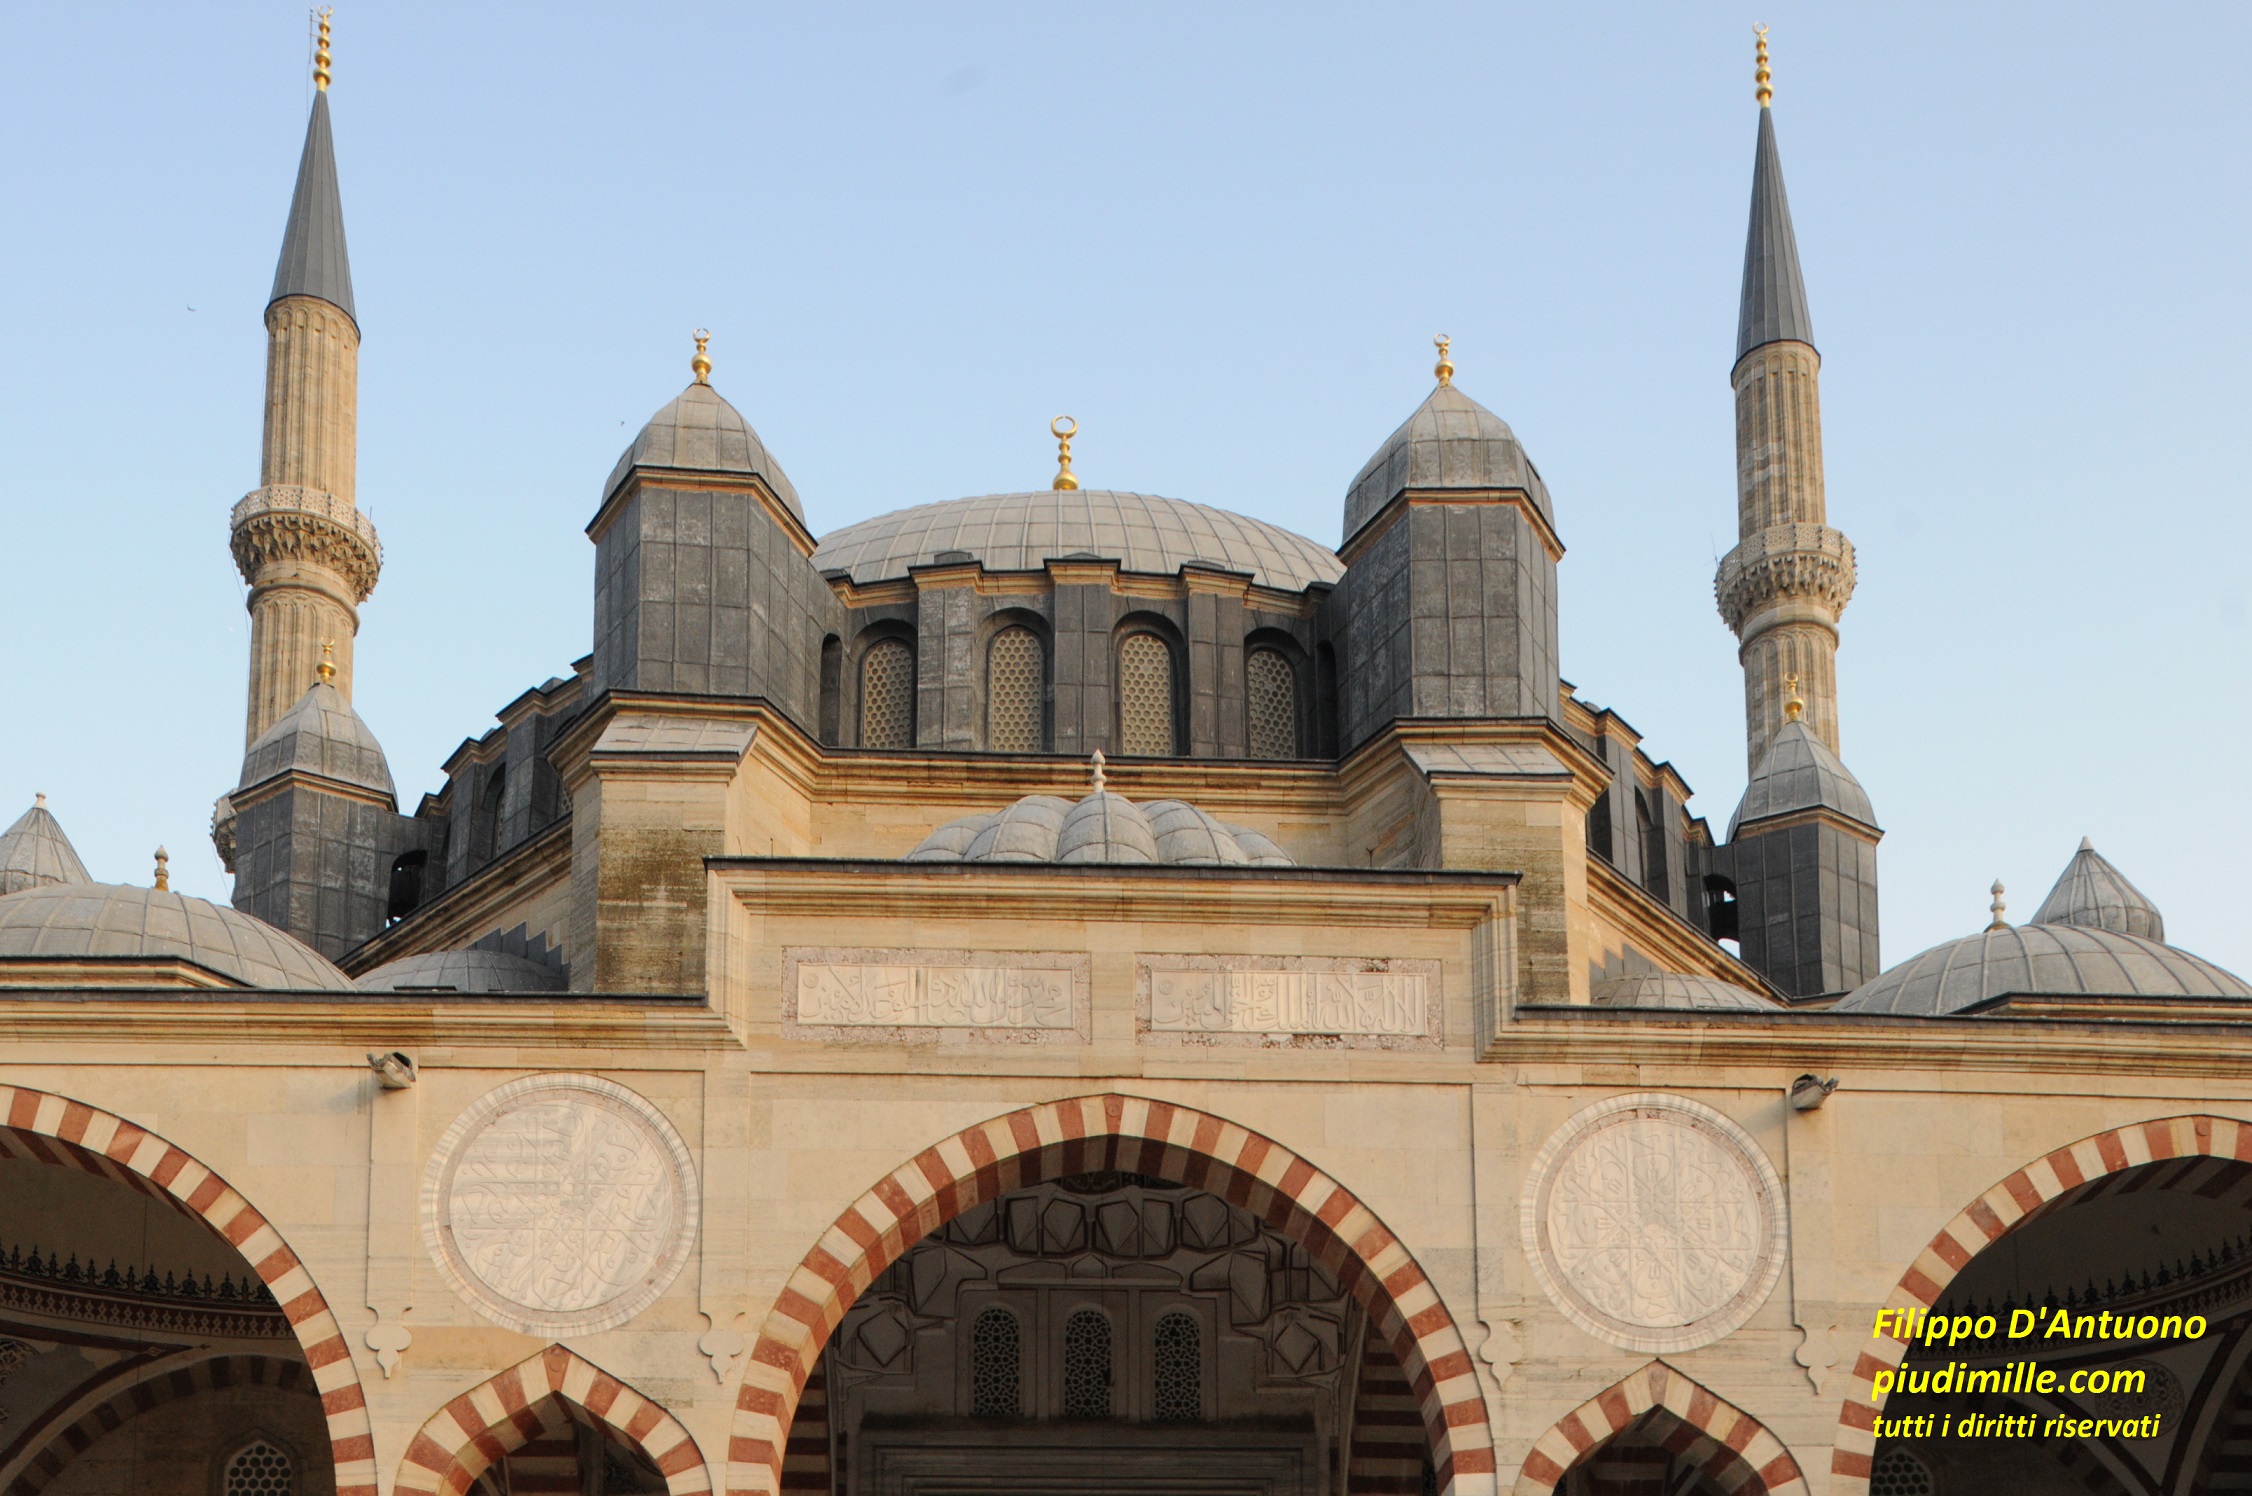
Miracles af a shift lens: shooting the Edirne mosque from close below, the minarets are straight
Light hood
This is an optional that is always quoted as a must. And indeed it is, since light diffraction may ruin our pictures. But hoods have some drawbacks. The modern ones are perfect and bulky; one of these things that, with your camera on the neck when hiking, will create some annoyance; then there is the risk of breaking or losing them. Forget to put light hood on and off when required: you will never do, when hiking. Unfortunately, I got to the conclusion of leaving them home. But, be very careful, to screen anyway light spots (that you see in your viewefinder), using your hand or a map, that you will certainly have with you.
Light diffraction spots the photos; winter light at mount Sillano
Tripod
This is a bit a similar story as for hoods. A tripod is an optional using which the quality of our shots can only improve: the reasons are explained in all the photo handbooks. The most obvious one is that a tripod prevents shaking when using long exposure times. Then, it helps to study the composition of our shots. But, when hiking, we will never take a tripod with us, if not when specifically going for shooting photographs. Luckily nowadays cameras have such a range of sensor sensitivity, that we can almost always get through.
Filters
I am not an expert of special filters. I can only tell that, holding our camera on our neck when hiking, and throwing it every now and then inside our back pack, a neutral protecting filter for your front lens is an absolute must.
Taking a decent shot in these conditions of low light and close to the ground would have been impossible, without a tripod
Photography hiking. piudimille.com
Soft cases
It is more or less a story like for filters. When hiking, we will not carry dedicated photographic bags, so a protective soft case is almost a must.
Flash
Most cameras have a built-in one, that can be very useful. Let’s say that the attainable sensitivity of the sensors now can make the use of flash less important than in the past. Taking good shots with artificial light, also outdoors and close up, however requires the use of external flashes, and is among the most difficult things to do, generally not done when hiking.
Conclusions
If you are not yet acquainted, you will soon realise that serious hikes are little compatible with carrying loads of photographic materials. At the end, the light solution and the so-called all-purpose lenses, allowing to afford the more common situations, have a tendency to win. There are excellent combinations, also allowing some close up shots. But it may also happen that to not obtain the expected results. So we may be tempted to target some more specific lenses, perhaps bringing them with us only in specific circumstance or during light hikes.
An important note: it is possible to change the lens of our reflex camera; however, when hiking, be cautious. A blow of air is enough to make something getting inside the camera’s body, spotting the sensor. Try, to believe (with a second camera with you): as an example, spring pollens are a catastrophe. At worst, if you do not yet have a zoom covering the focal length you need, having a second camera body, with two different lenses would be better, if compatible with finances and weight. Costs are presently a problem but, if you want to build up your kit, do not neglect second-hand material, if guaranteed.
Finally, do not think about putting the camera in your back pack and taking it out when needed: 1) you will never do; 2) a time will come that you will miss some nice shots. You must have your camera ready, holding it in your hand, around neck or shoulder. You will put it in your back pack only when you have to afford some difficult stretches, where it will be an annoyance, or you risk to slam it here and there, or when it starts raining. Consider that having your camera handy is not compatible with the use of two trekking poles; at maximum, you can try with only one.
Photography hiking. piudimille.com
Holding your cameraComposing the subjec
Look at most people taking shots by a smartphone or tablet, and do not do like them. You have to hold your camera firmly, that does not mean using strength, but staying in the correct position, to avoid shaking. It is not true that small cameras can be more easily held firmly. On the contrary, regular reflex cameras are better, and oblige to hold them firmly, since you cannot handle them with three fingers. Using the viewfinder instead of the LCD, irrespective of light conditions, will be even better.
Composing the subject
I am still realizing how this is important. When hiking, there is a tendency to shot in hurry. The difference between a professional and an amateur (including me) is that professionals have the eye and the coolness to compose well, in all situations, the amateurs far less. So: look well what you are shooting in order to: a) include what you want to be in (e.g., the feet of people); b) exclude what you do not want (e.g., garbage trays); c) compose an overall nice subject, following the “rules” that you may learn reading handbooks or attending seminars.
A hurried composition: the top of the tree is missing
Here the tree is whole
How to do ?
For static subjects, don’t be in hurry; use your zoom; try different positions; if your camera has this option, activate the grid of your viewfinder.
For mobile subjects, it is also a matter of luck. If you expect to have to deal with such situations, be prepared; train yourself a bit; keep your camera switched on; use a rather high sensitivity; use an automatic mode of exposure or, even better, a manual mode with automatic selection of the sensitivity: if you set adequate time and diaphragm you may also shoot by simply focusing.
Photography hiking. piudimille.com
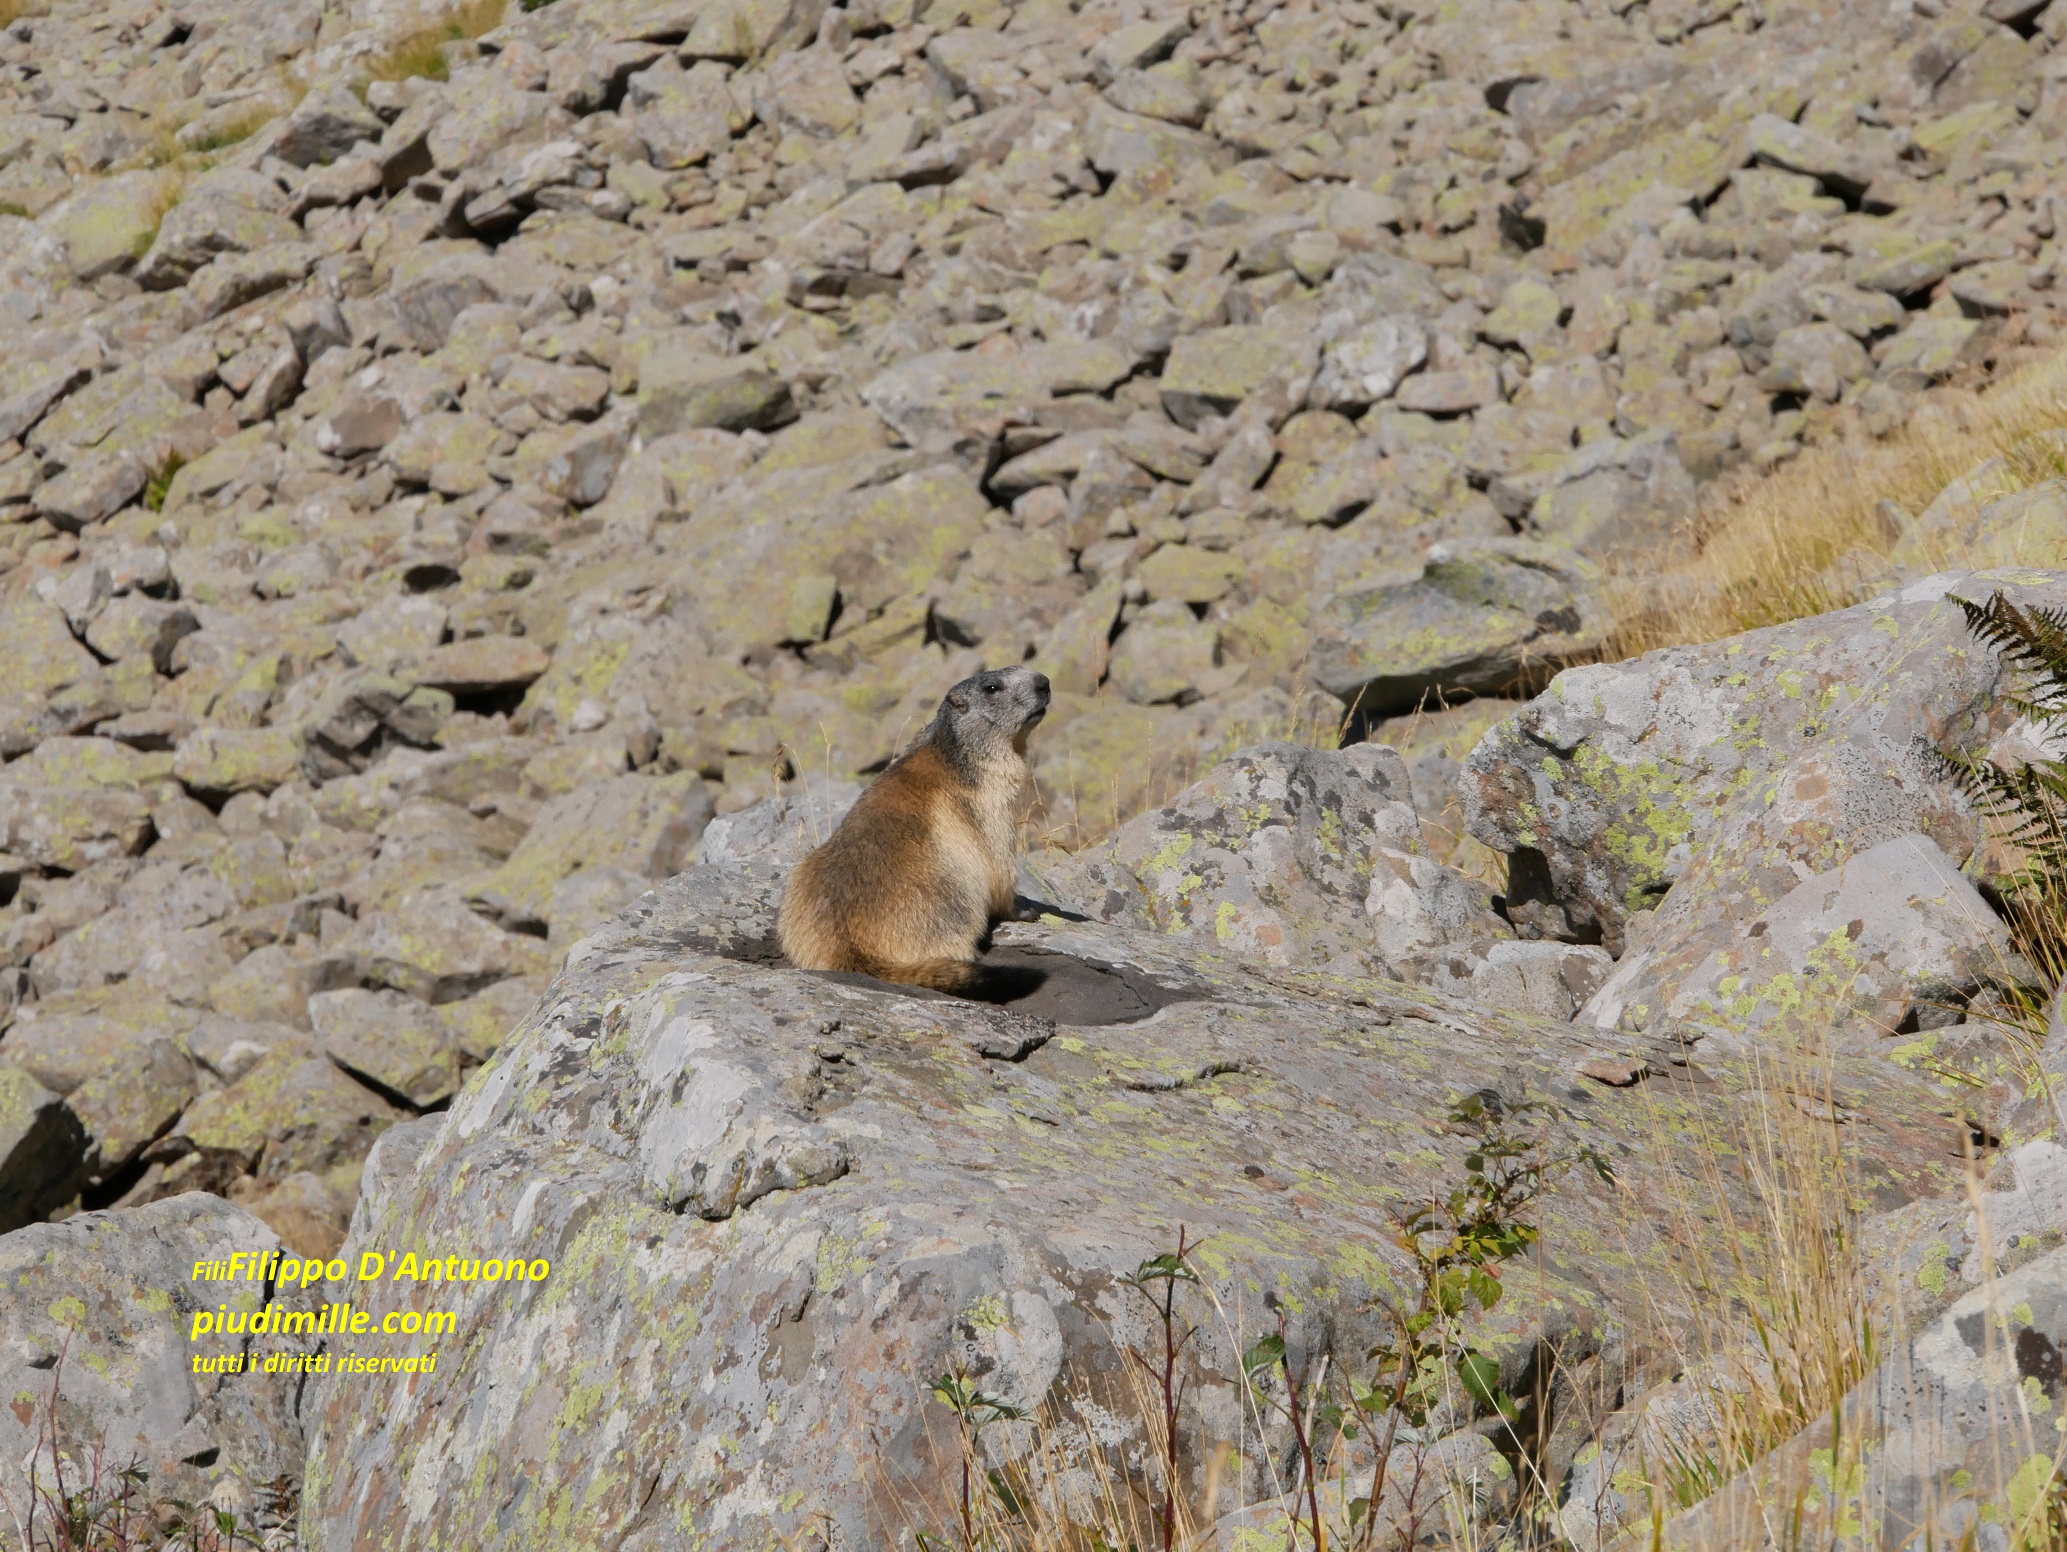
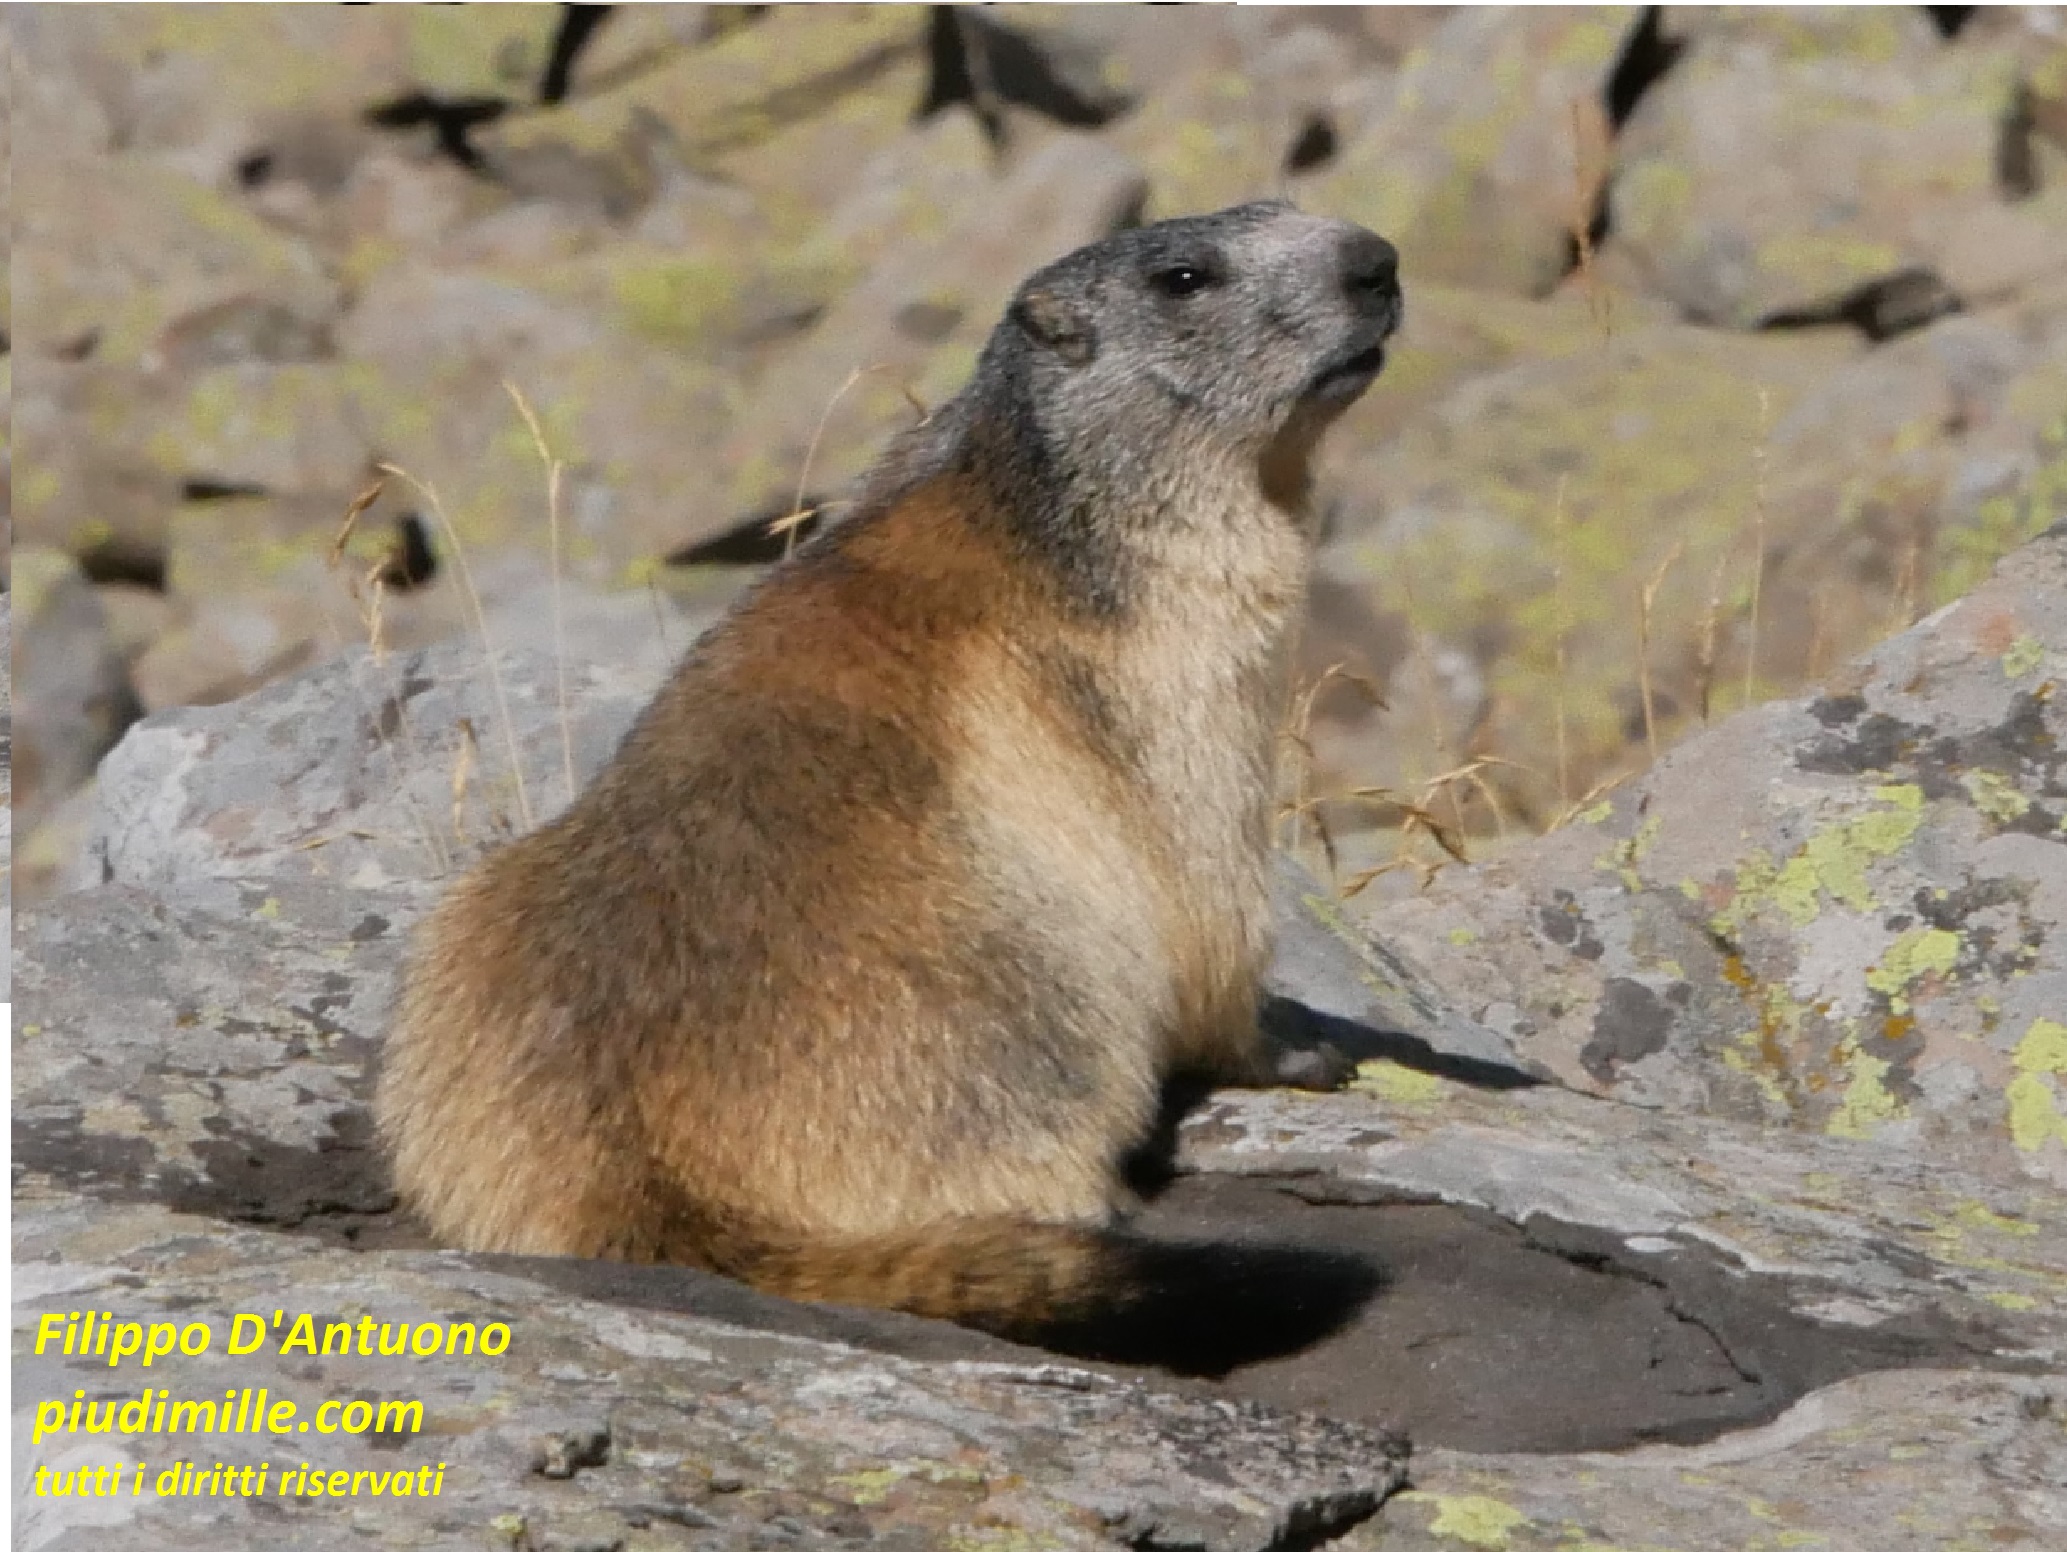
Shooting animals
I always refer to extemporary shots that you may take when hiking. Consider that the wonderful images that you see in expositions or magazines are hardly extemporary; besides the perfect techniques of the photographer, they are the result of patient stalking, strategies to approach and sometimes to attract the animals. Mammals are becoming more and more confident to human beings; but they are still more frequently seen at dawn or dusk. The often more easily detect movement that shapes; so, in case you see them in advance and stay immobile, sometimes they also stay for a while. Shooting insects and reptiles is easier when they are less mobile, so early morning or during cool days. All animals are mobile however, so a training to shoot quickly is fundamental. Using a telephoto lens is almost a must.
Photography hiking. piudimille.com
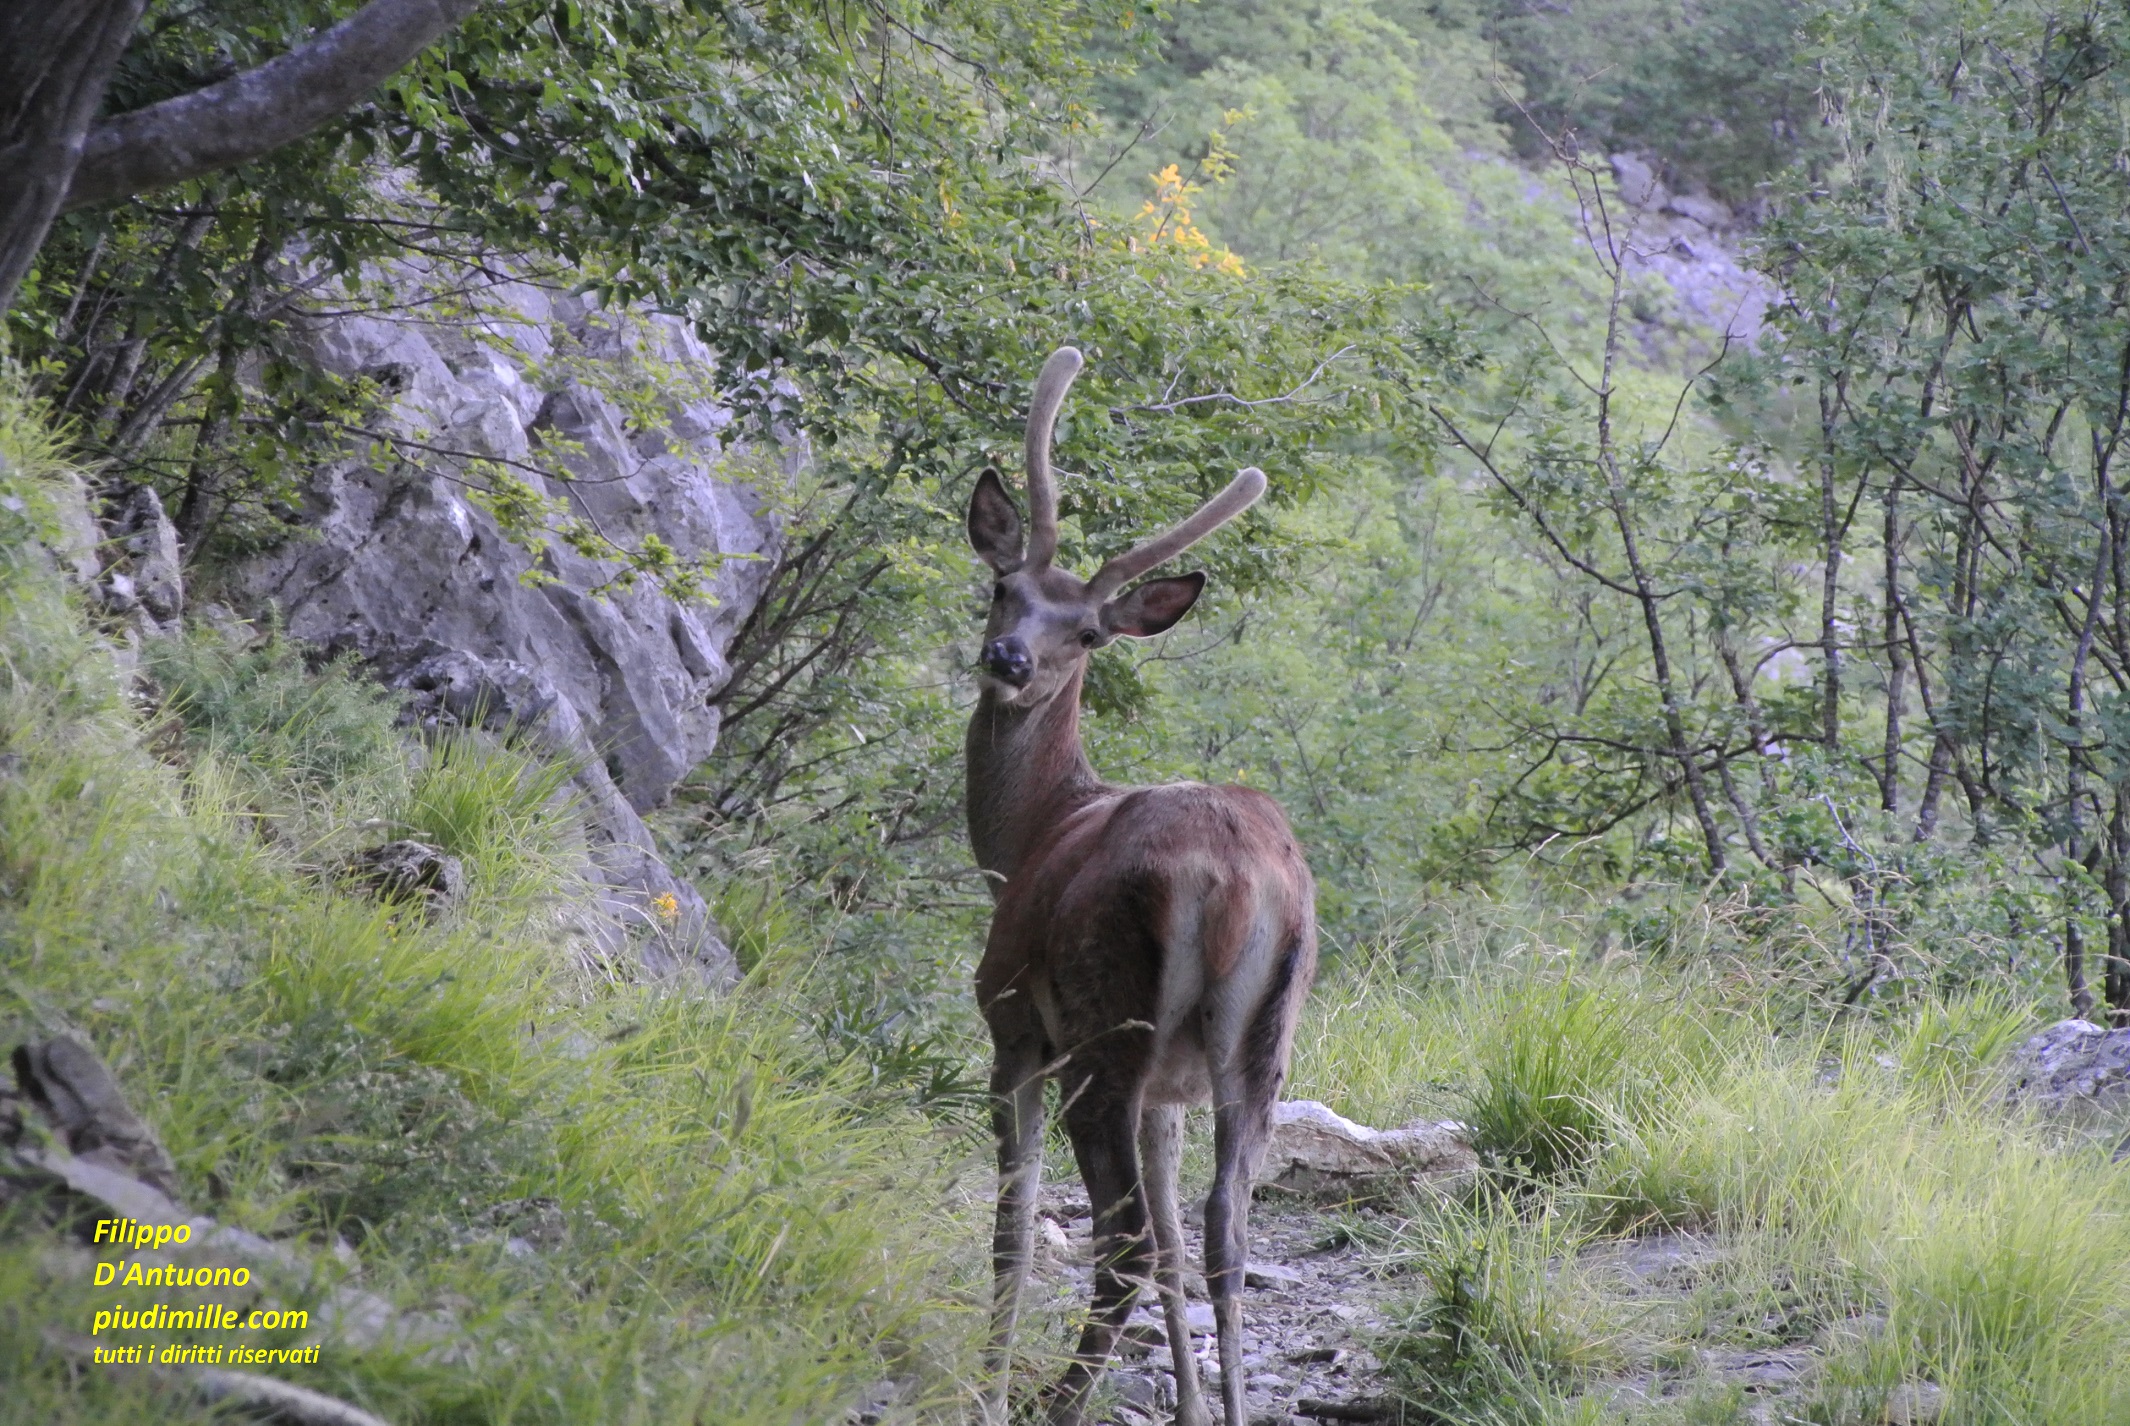
The animal stayed few seconds; but a skilled professional would not have cut its feet, even since there was plent of spece above

Using a telephoto lens, it is possible to shot from home balcony
If the subject can escape, first take one shot…
… then try to get closer
Close-up photo
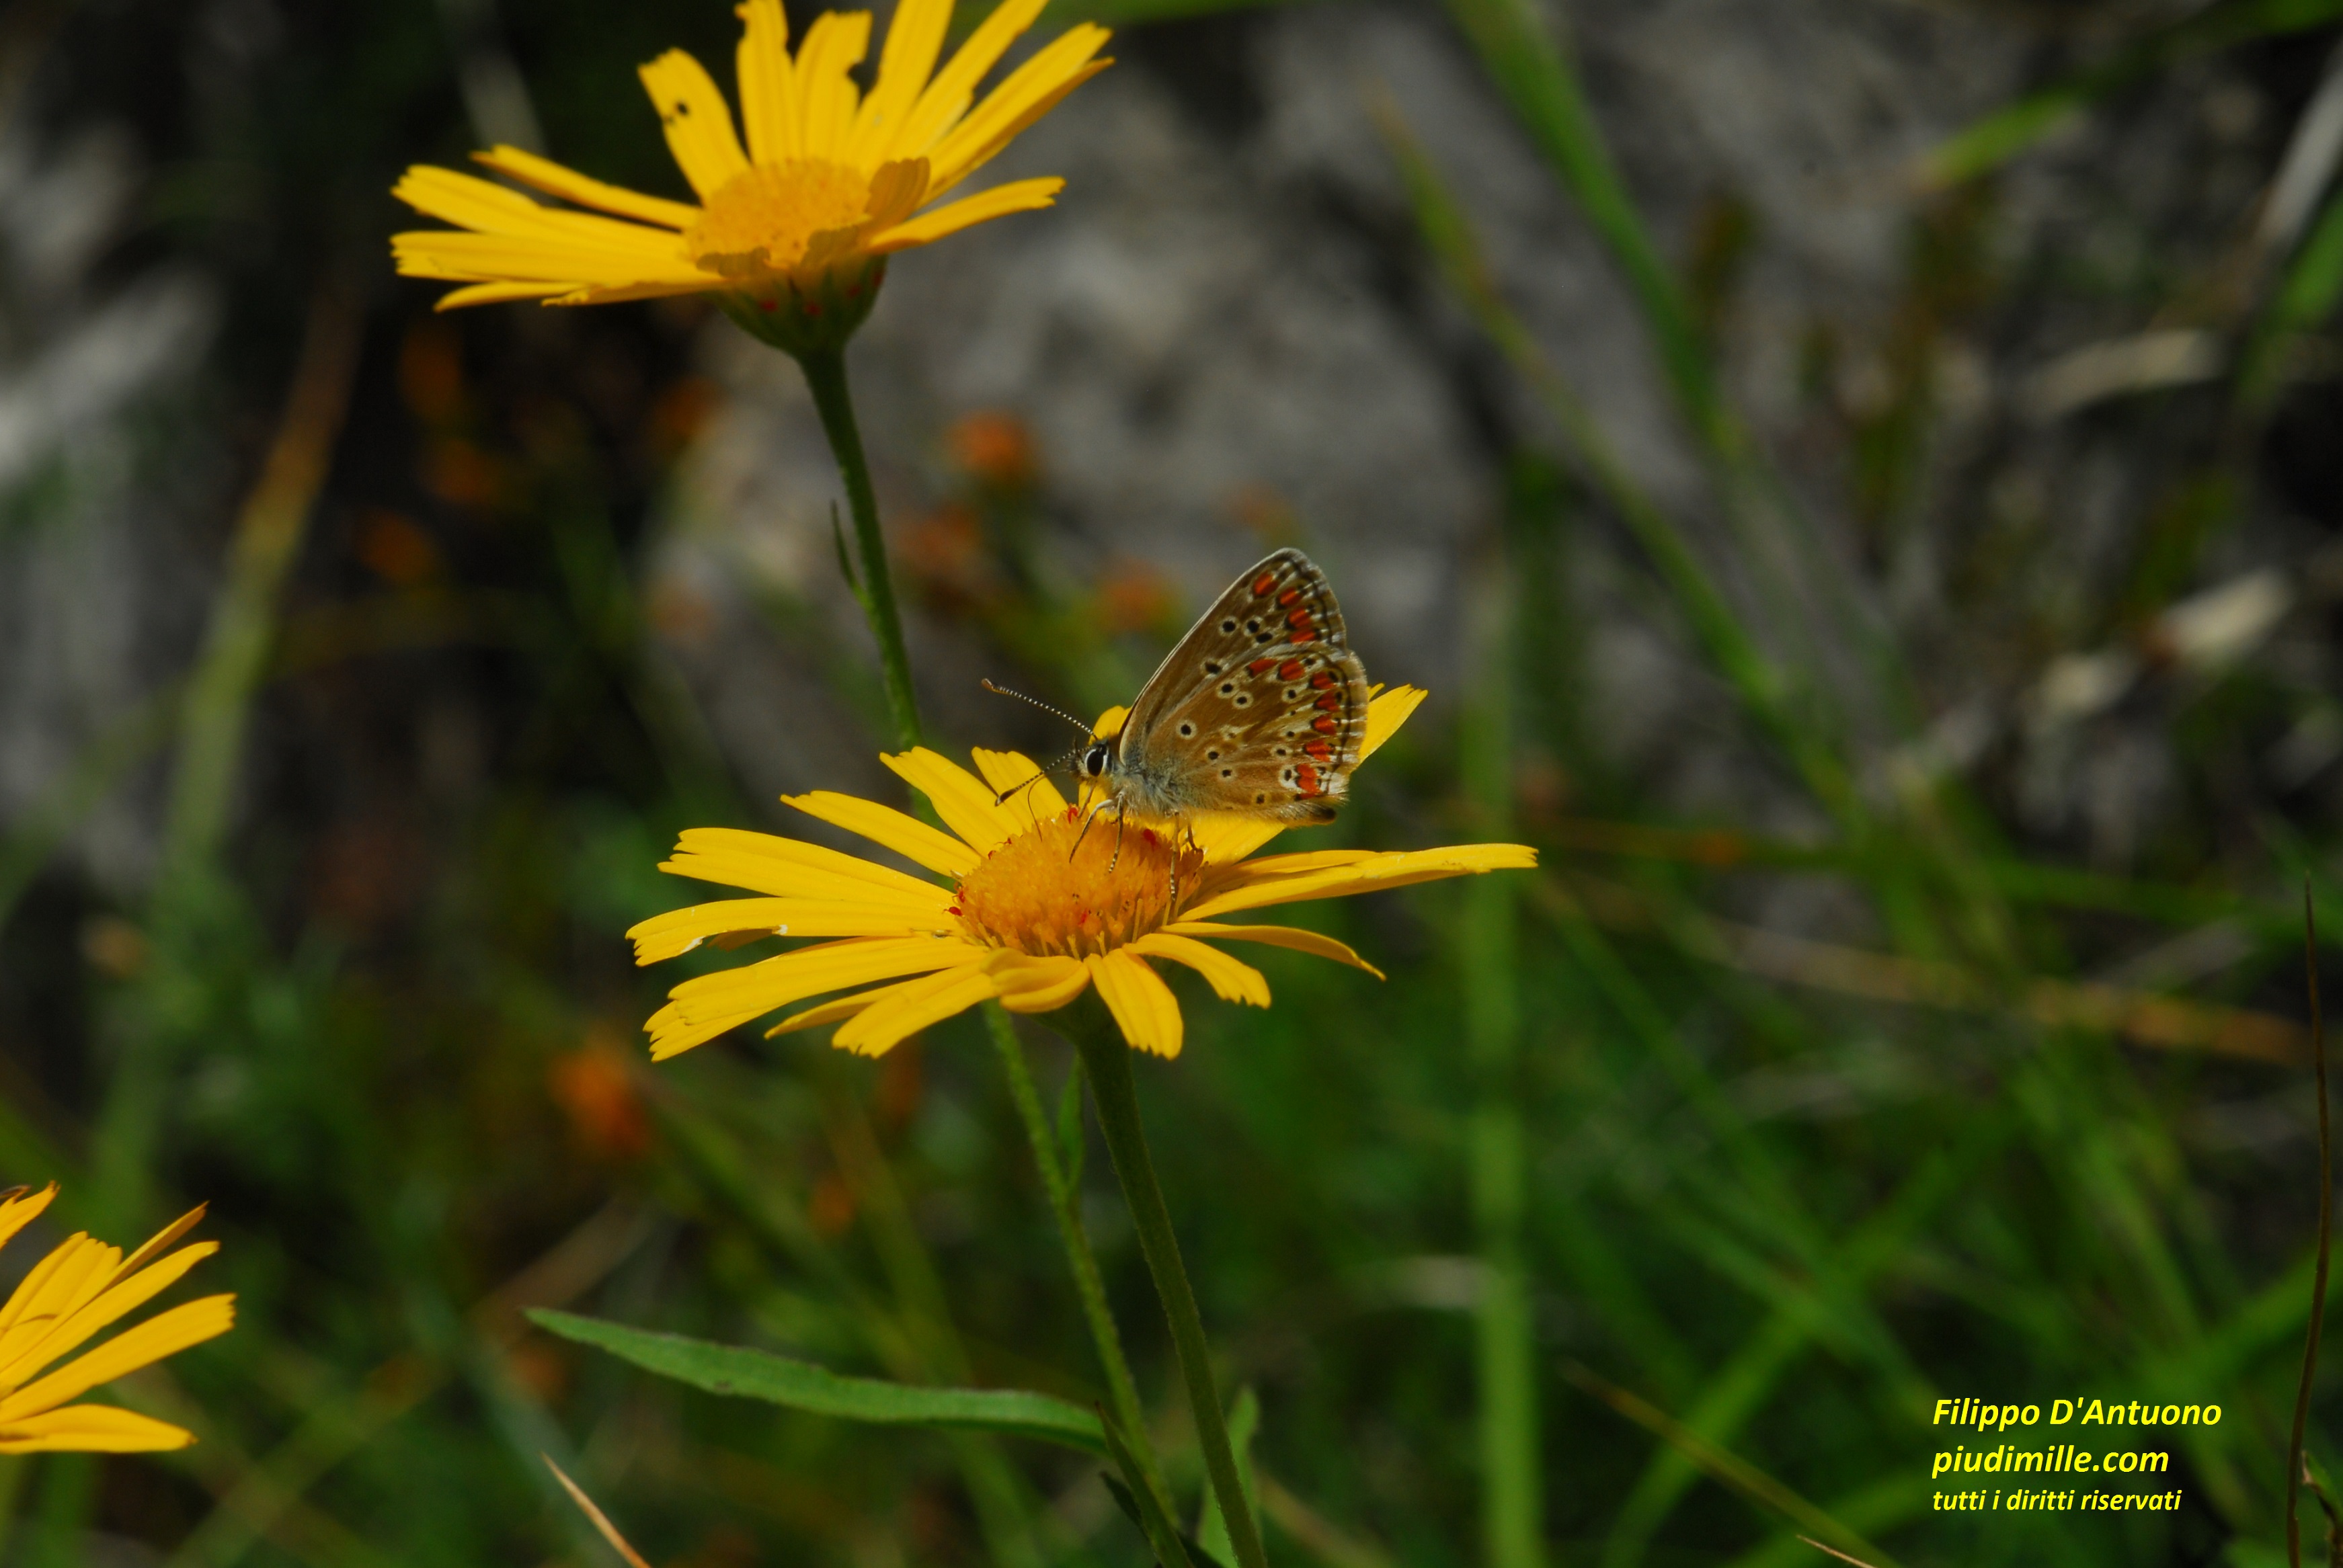
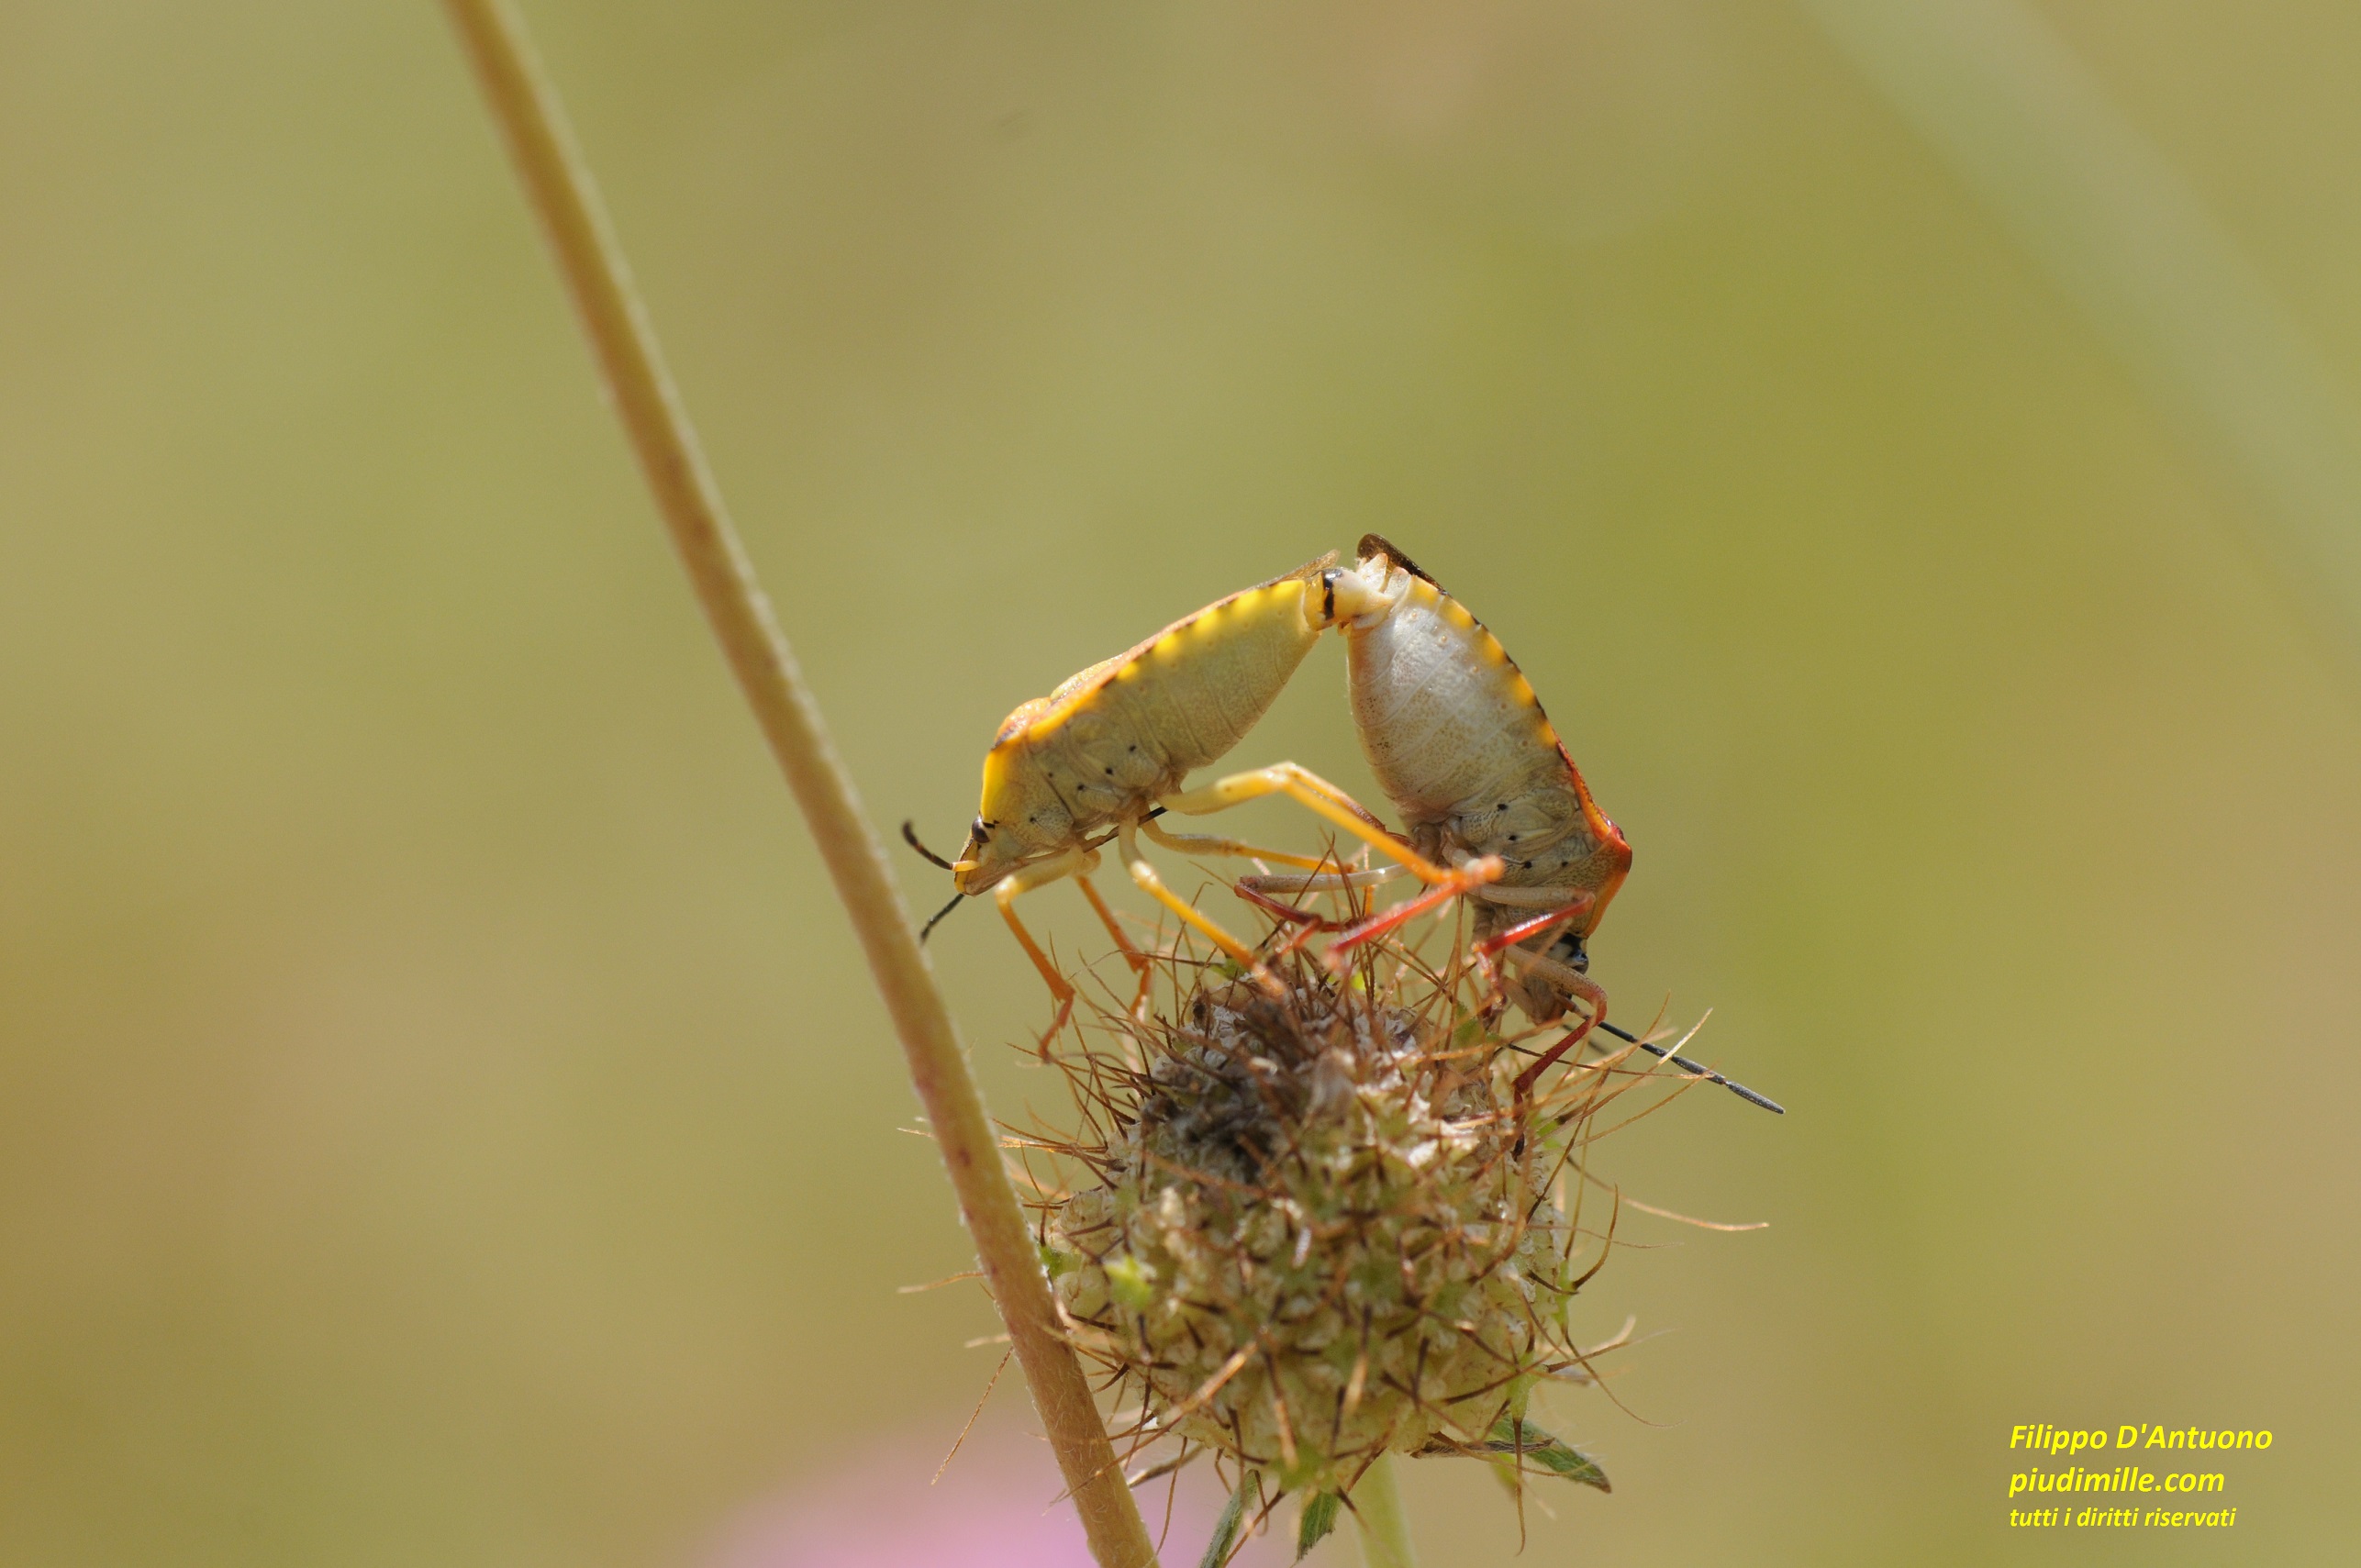
It can deal with different subjects; most commonly, they are small animals, generally insects, spiders and similar, flowers, mosses, buds etc. Wind is the worst enemy of close up photo, so also that of insects staying on grass twigs or leaves. The depth of field, so the thickness within which the subjects are correctly focused, is notoriously low in close up photo. It is also known that this problem can be partially managed by closing the diaphragm; however this must be compensated by a longer time of exposure, and this is not always possible, even if the wide range of sensitivity of present day sensors helps a lot. So some caution must be adopted.
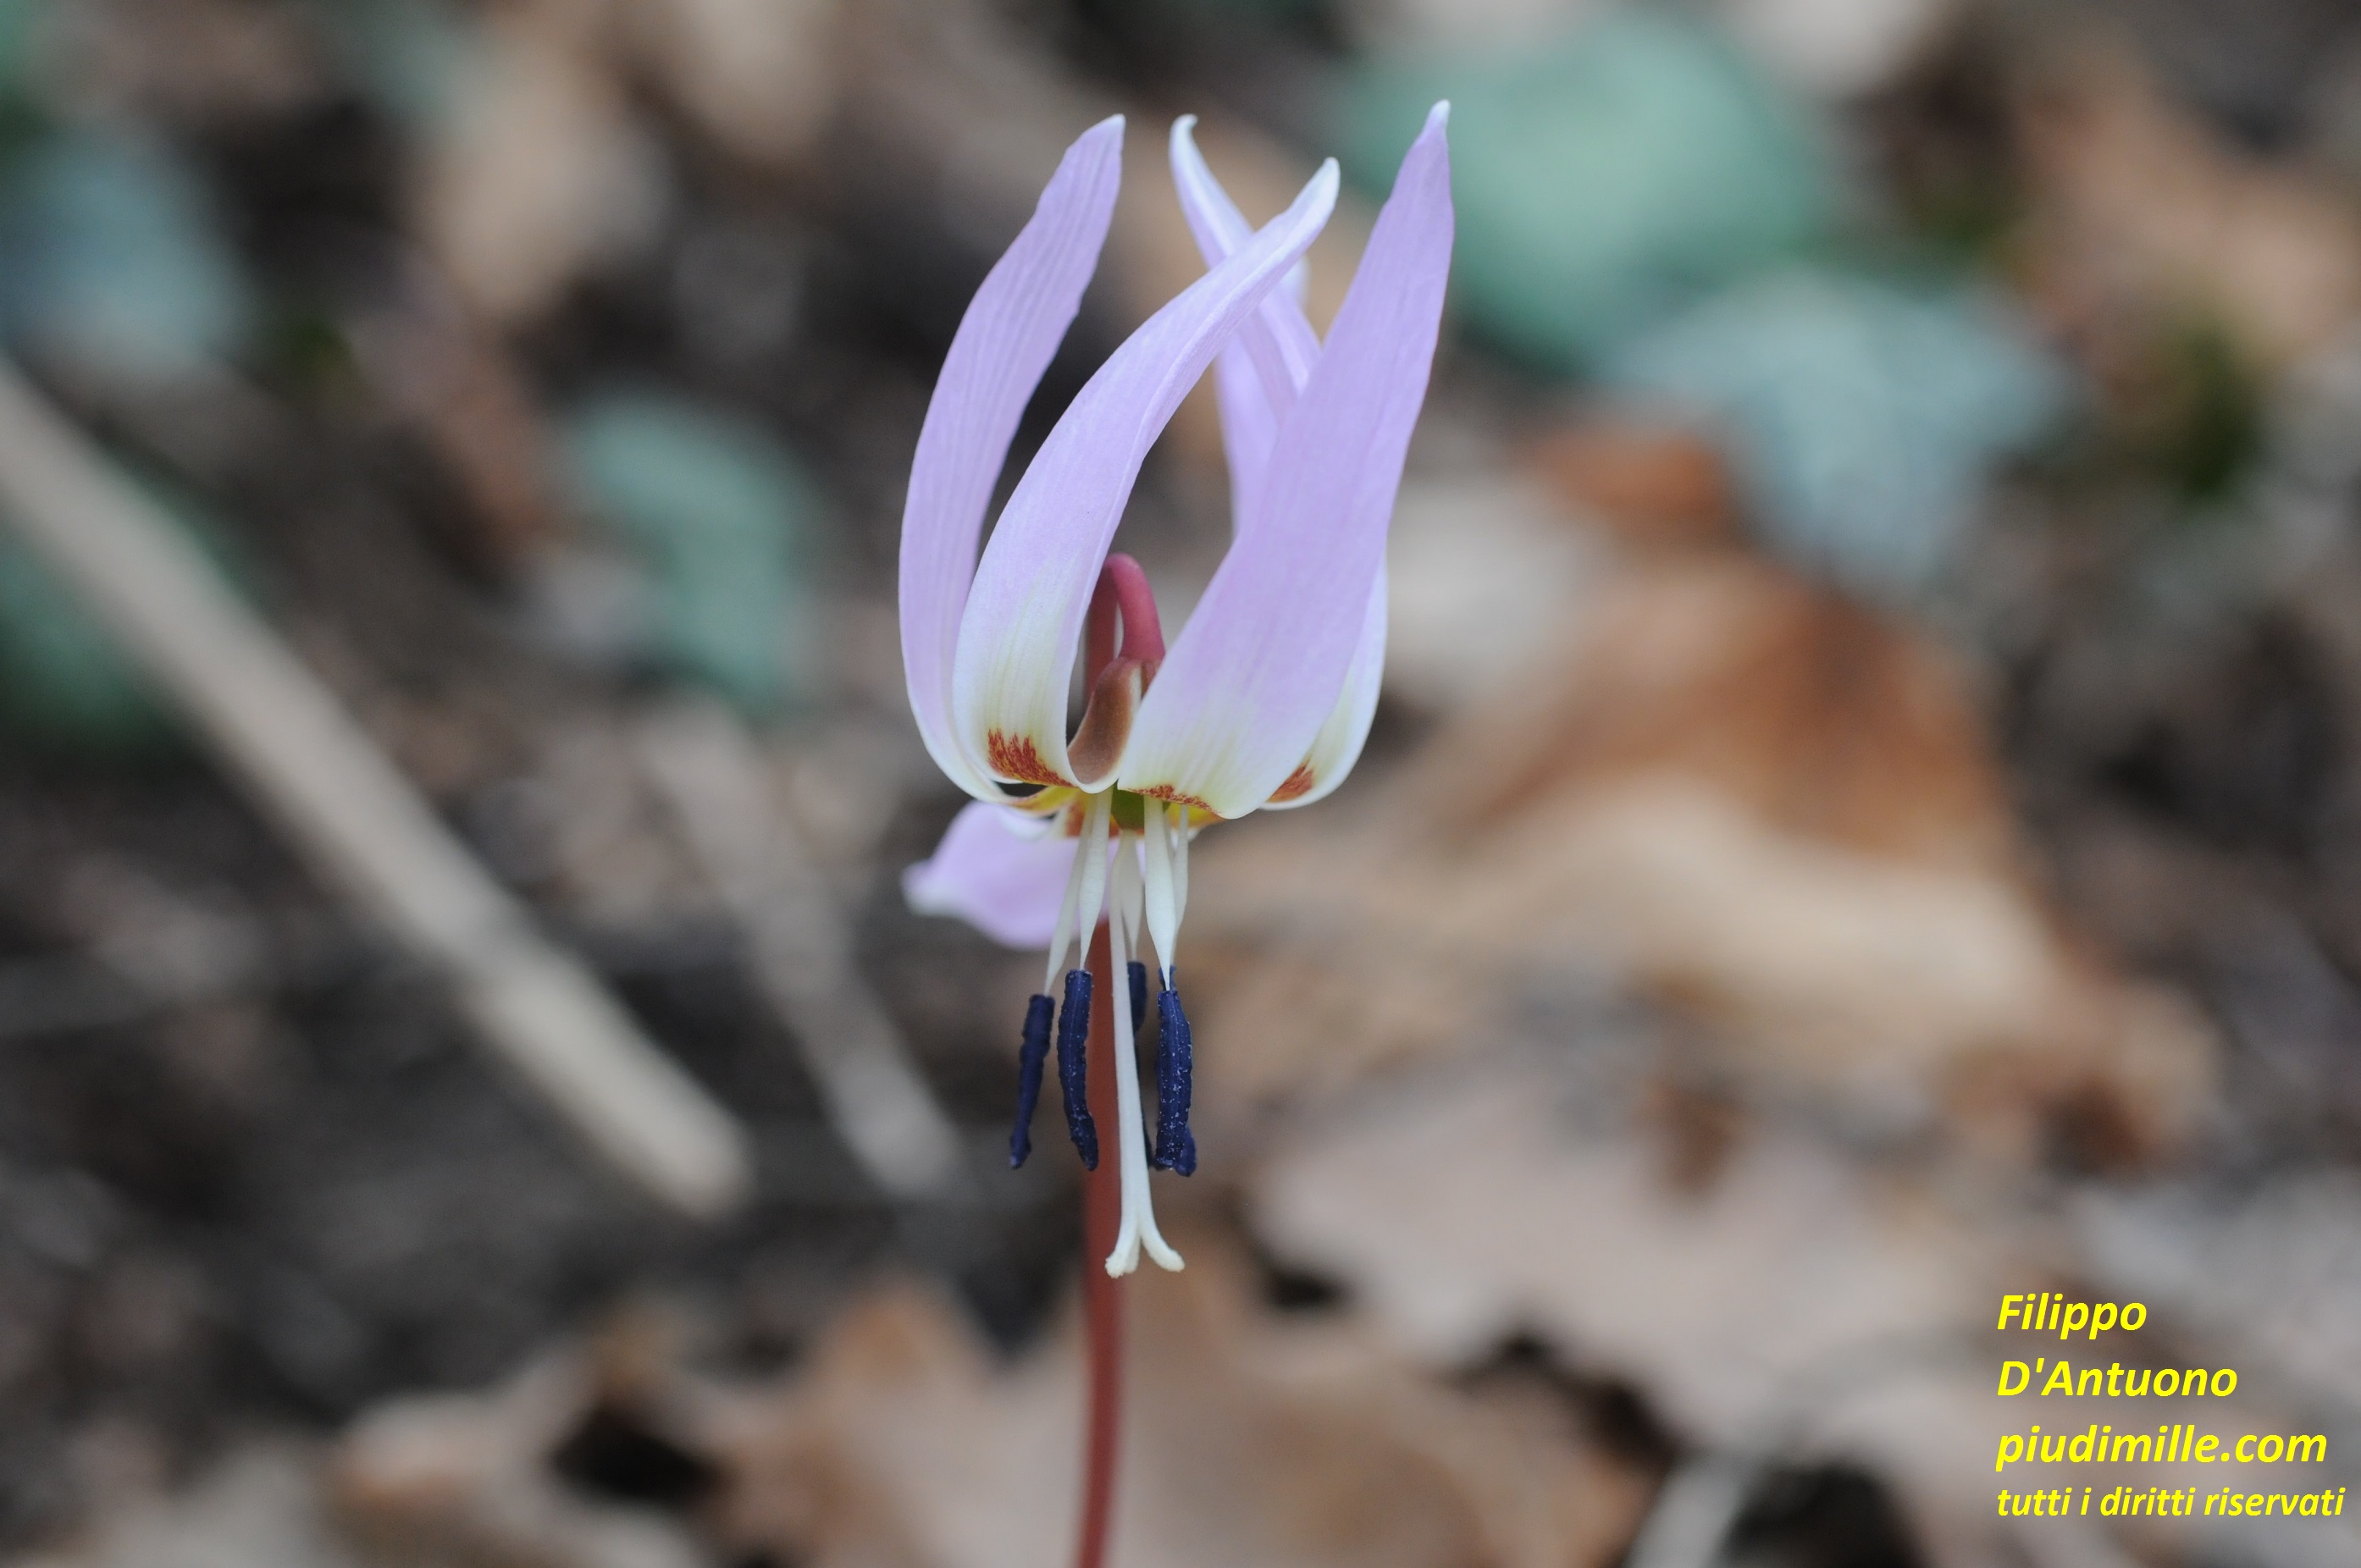
In flowers, stamens and gynoecium are generally the parts on which devote more attention while focussing
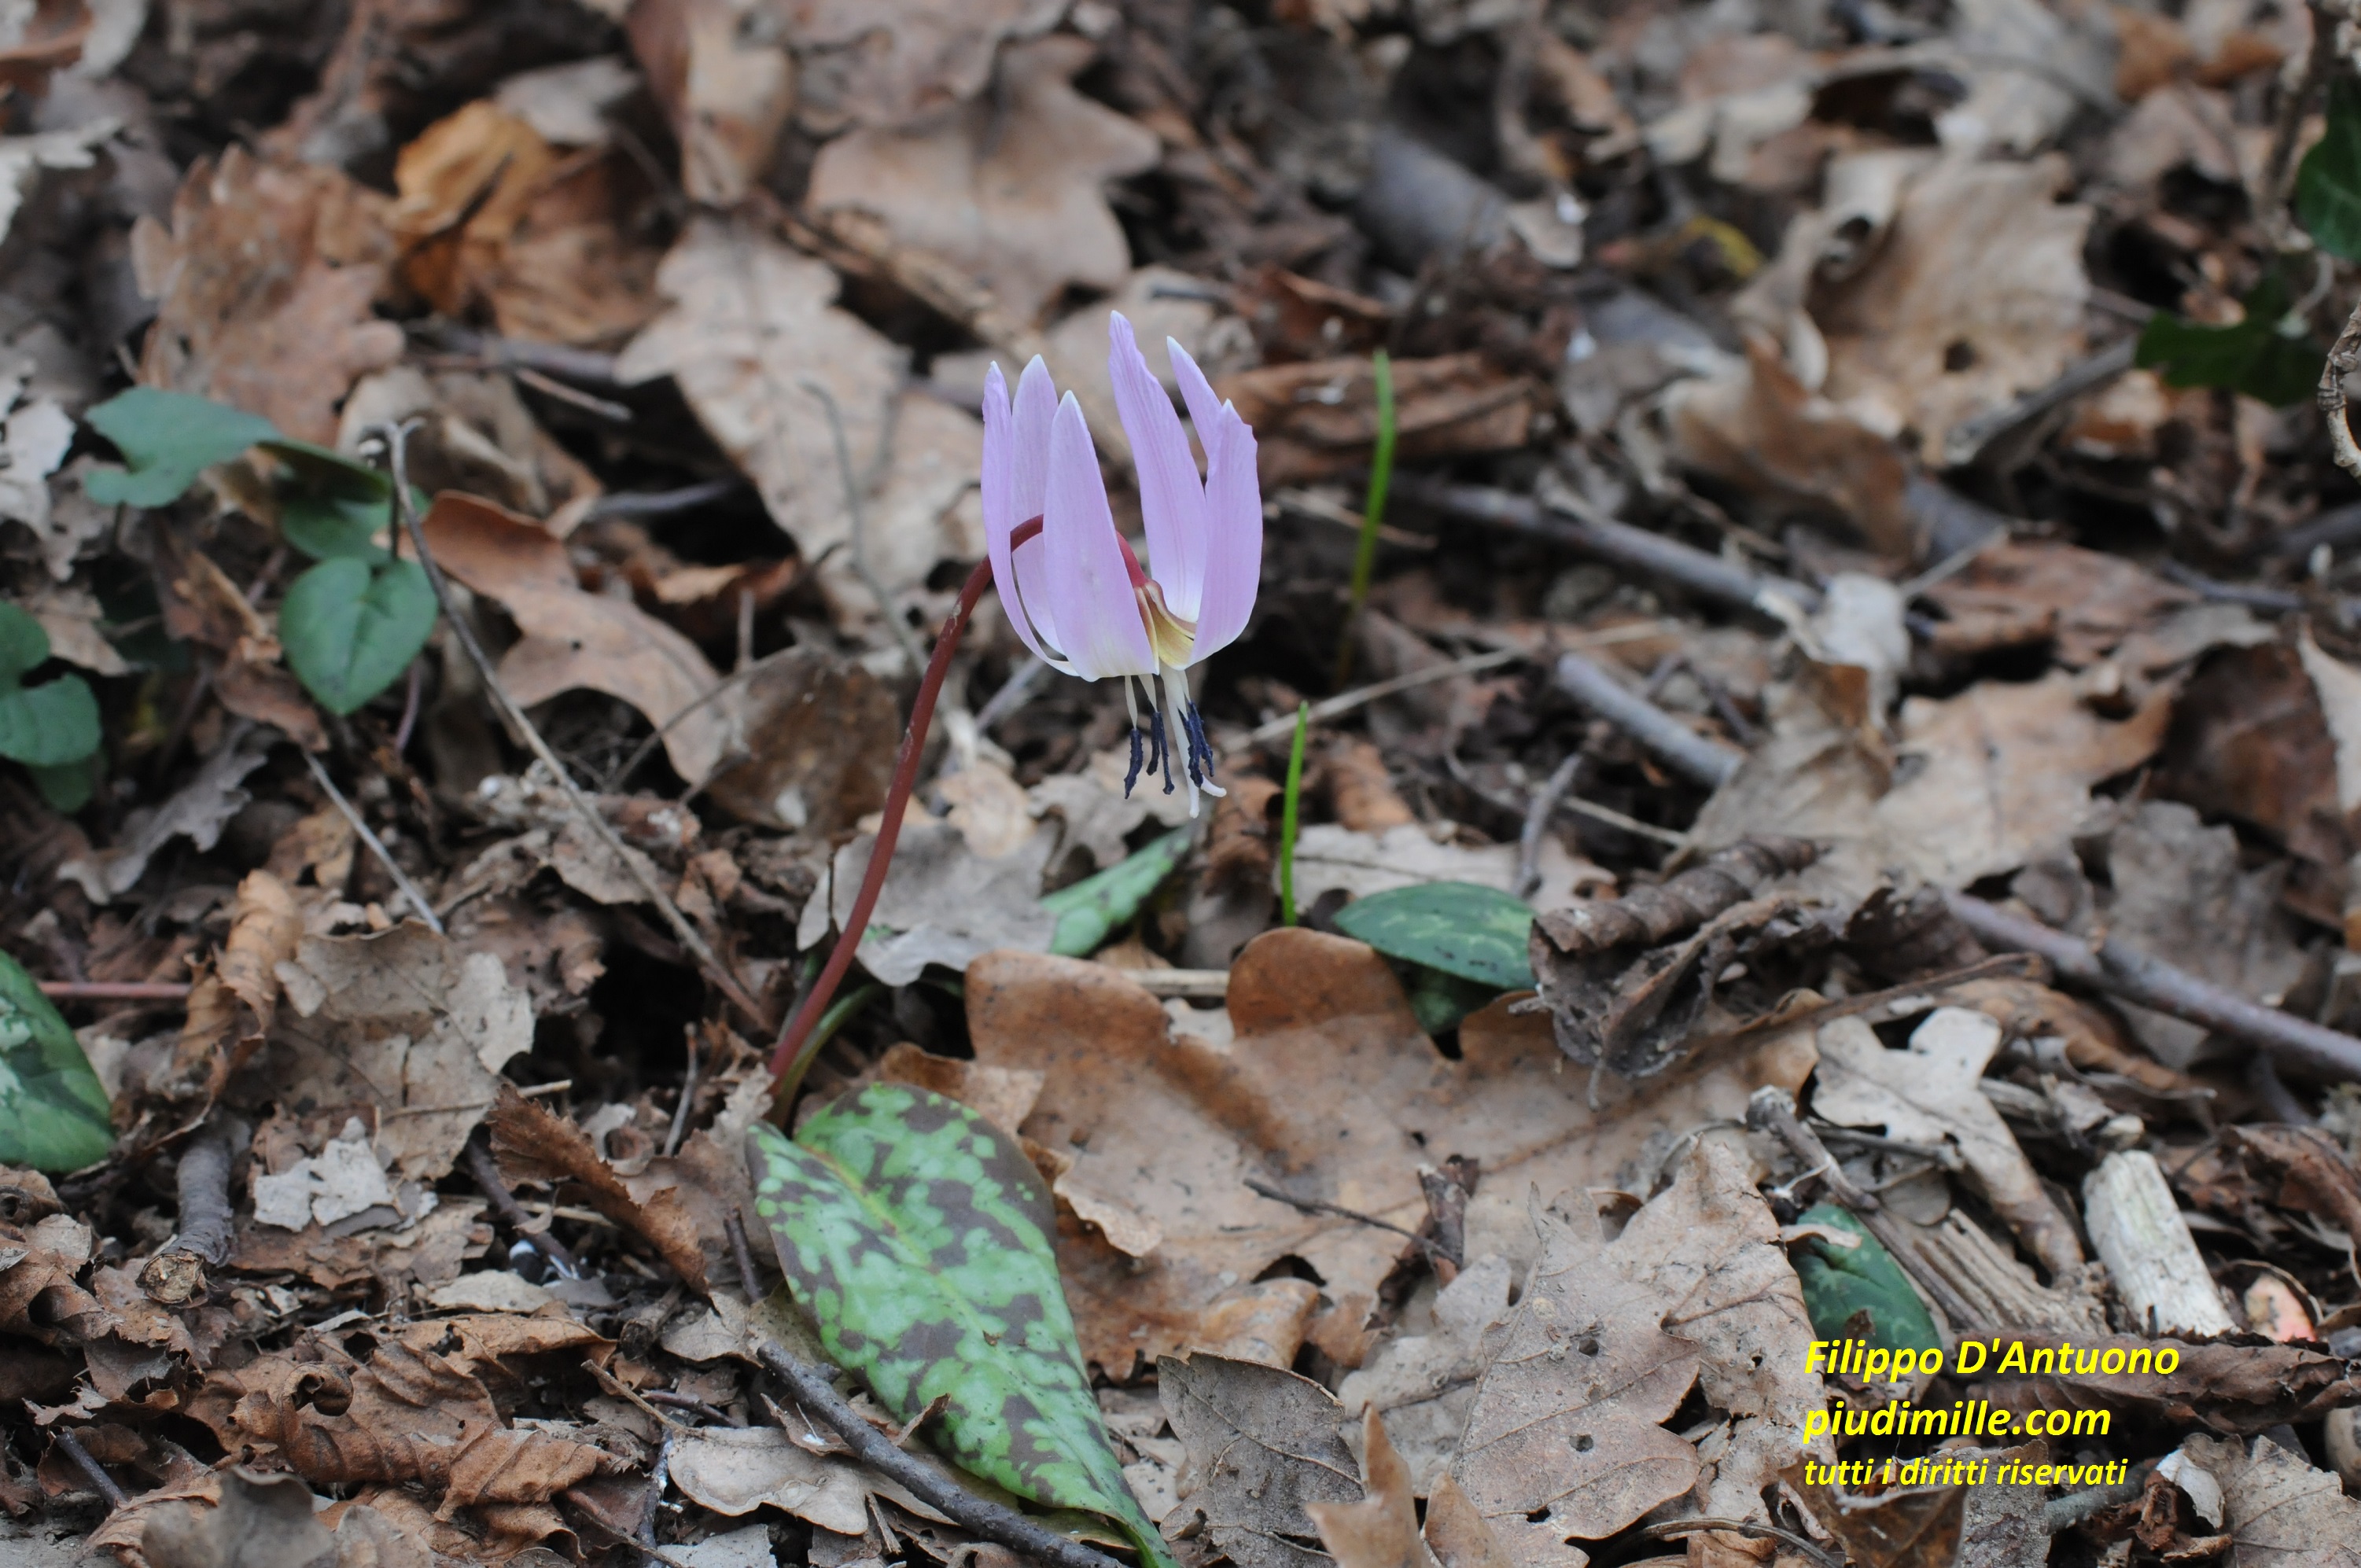
But also a whole plant can be interesting, when it has peculiar characters, such as these spotted leaves.
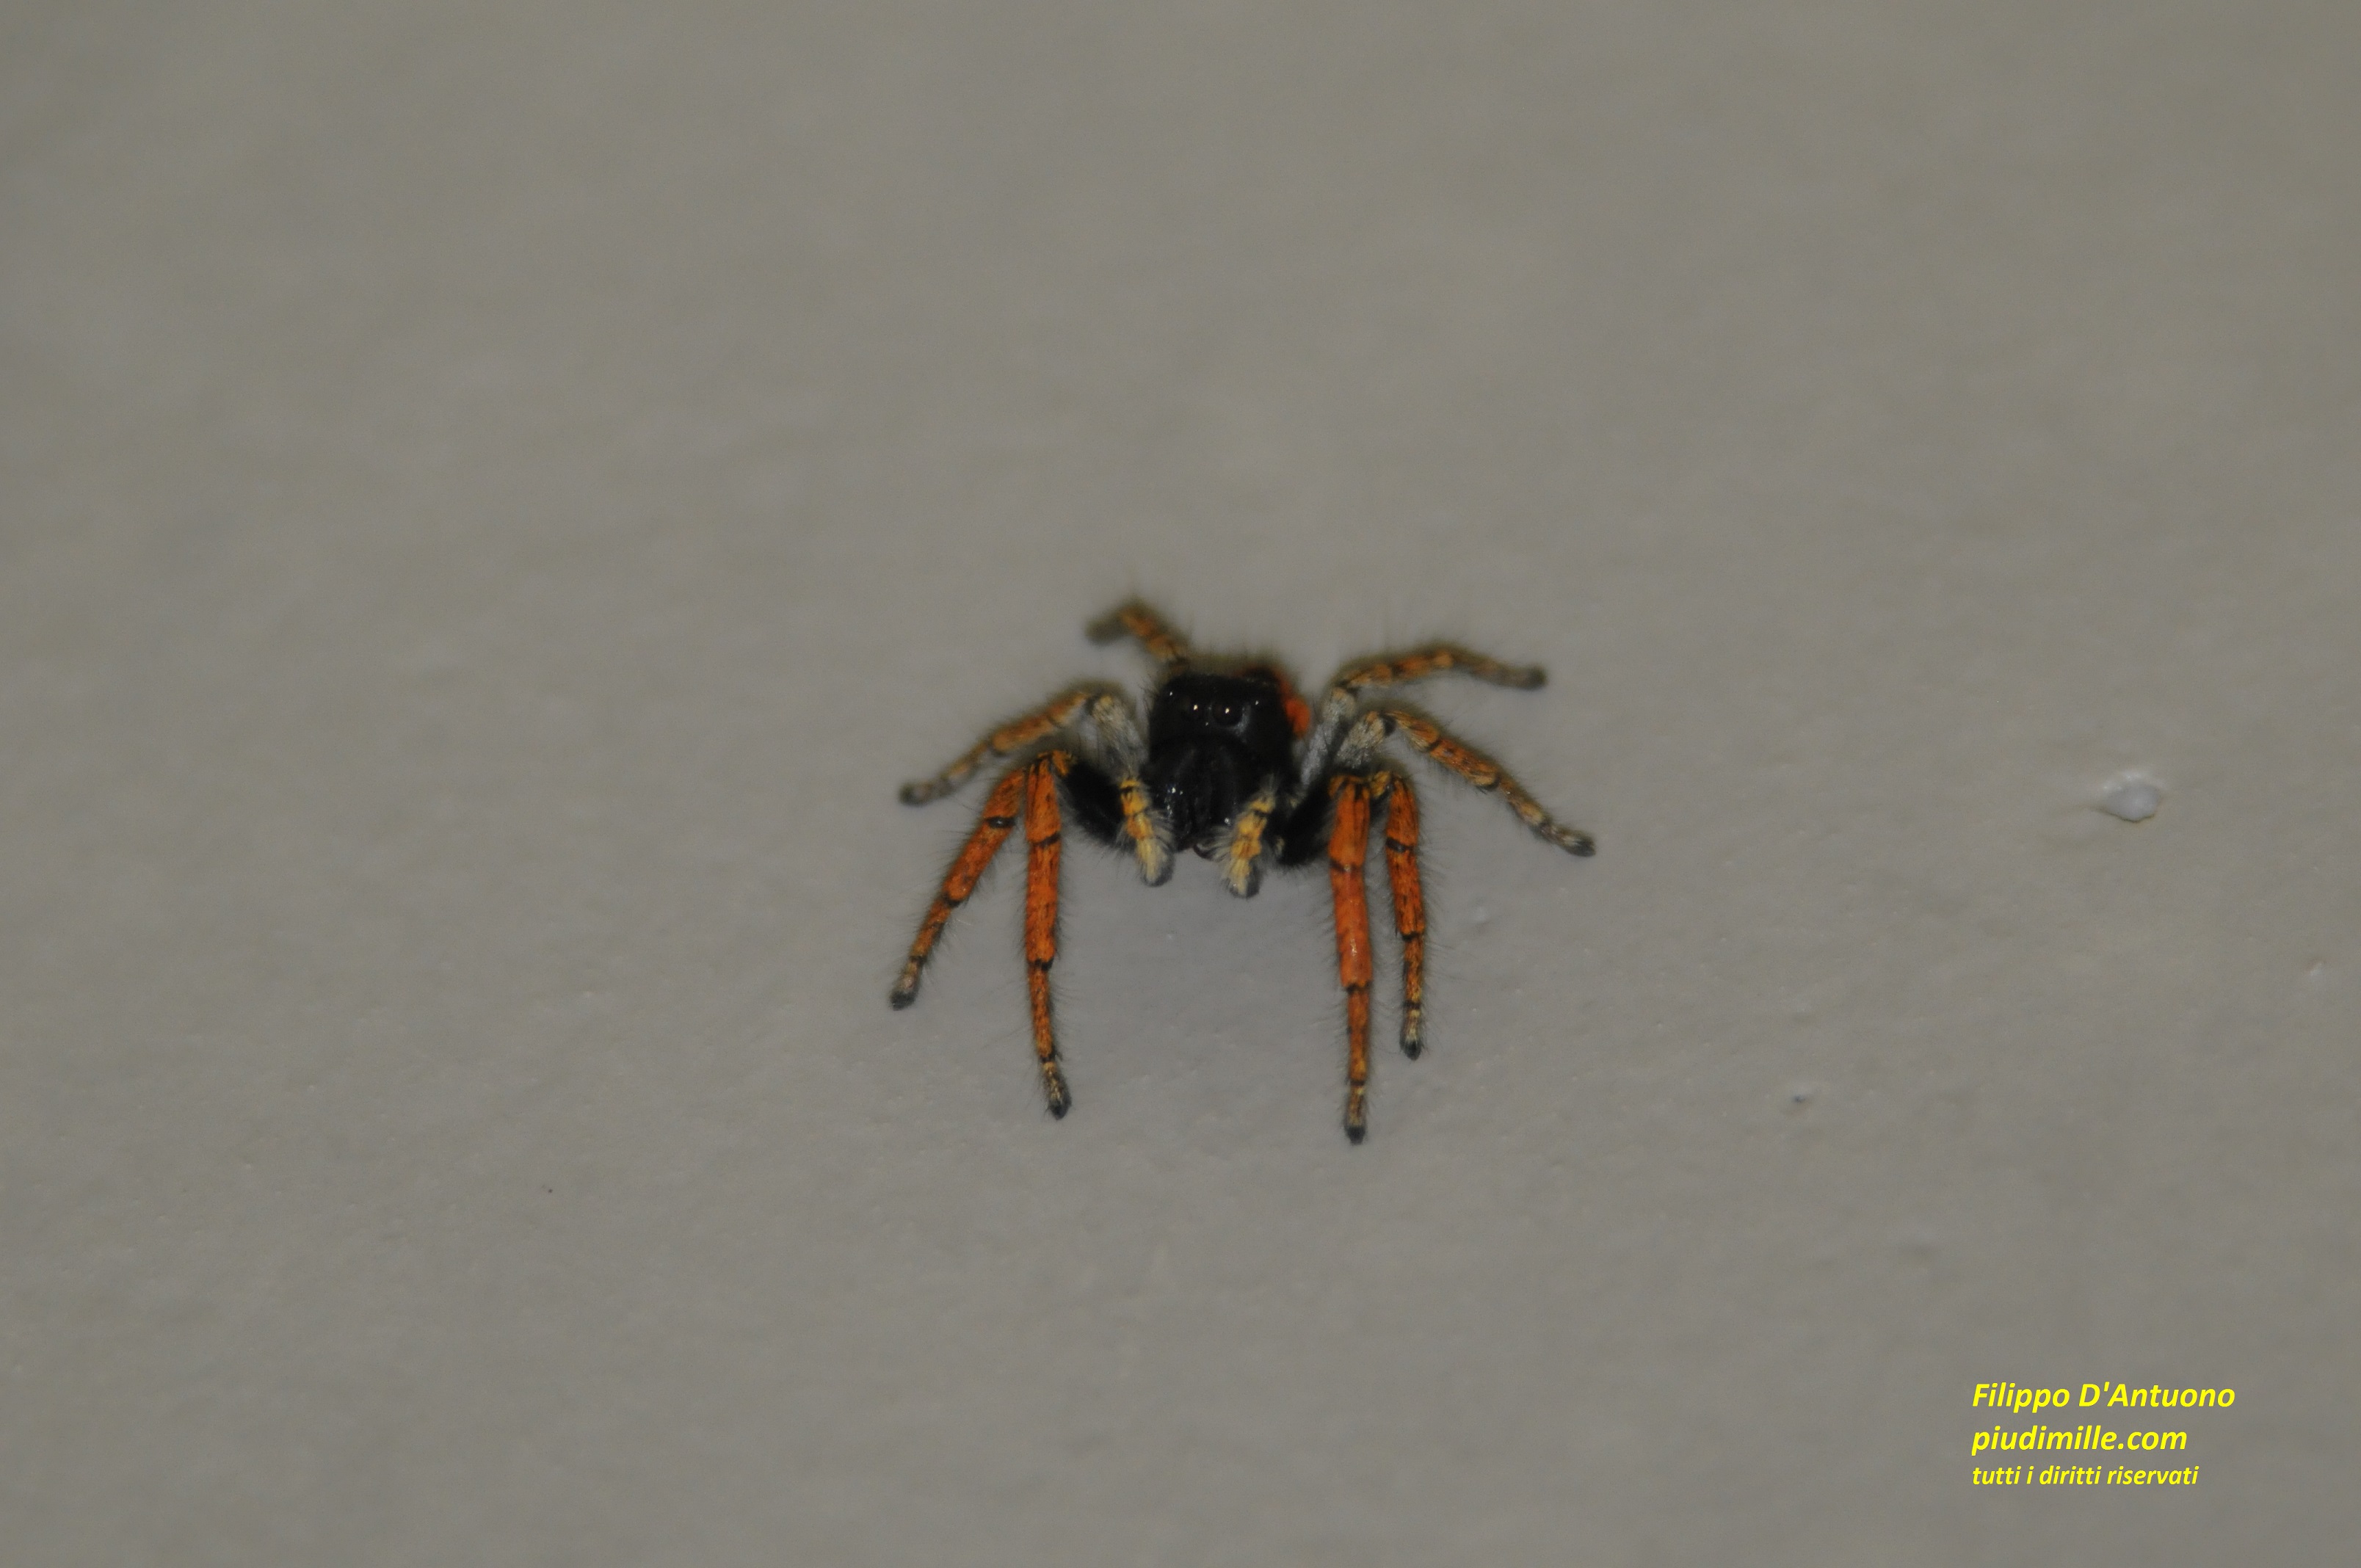
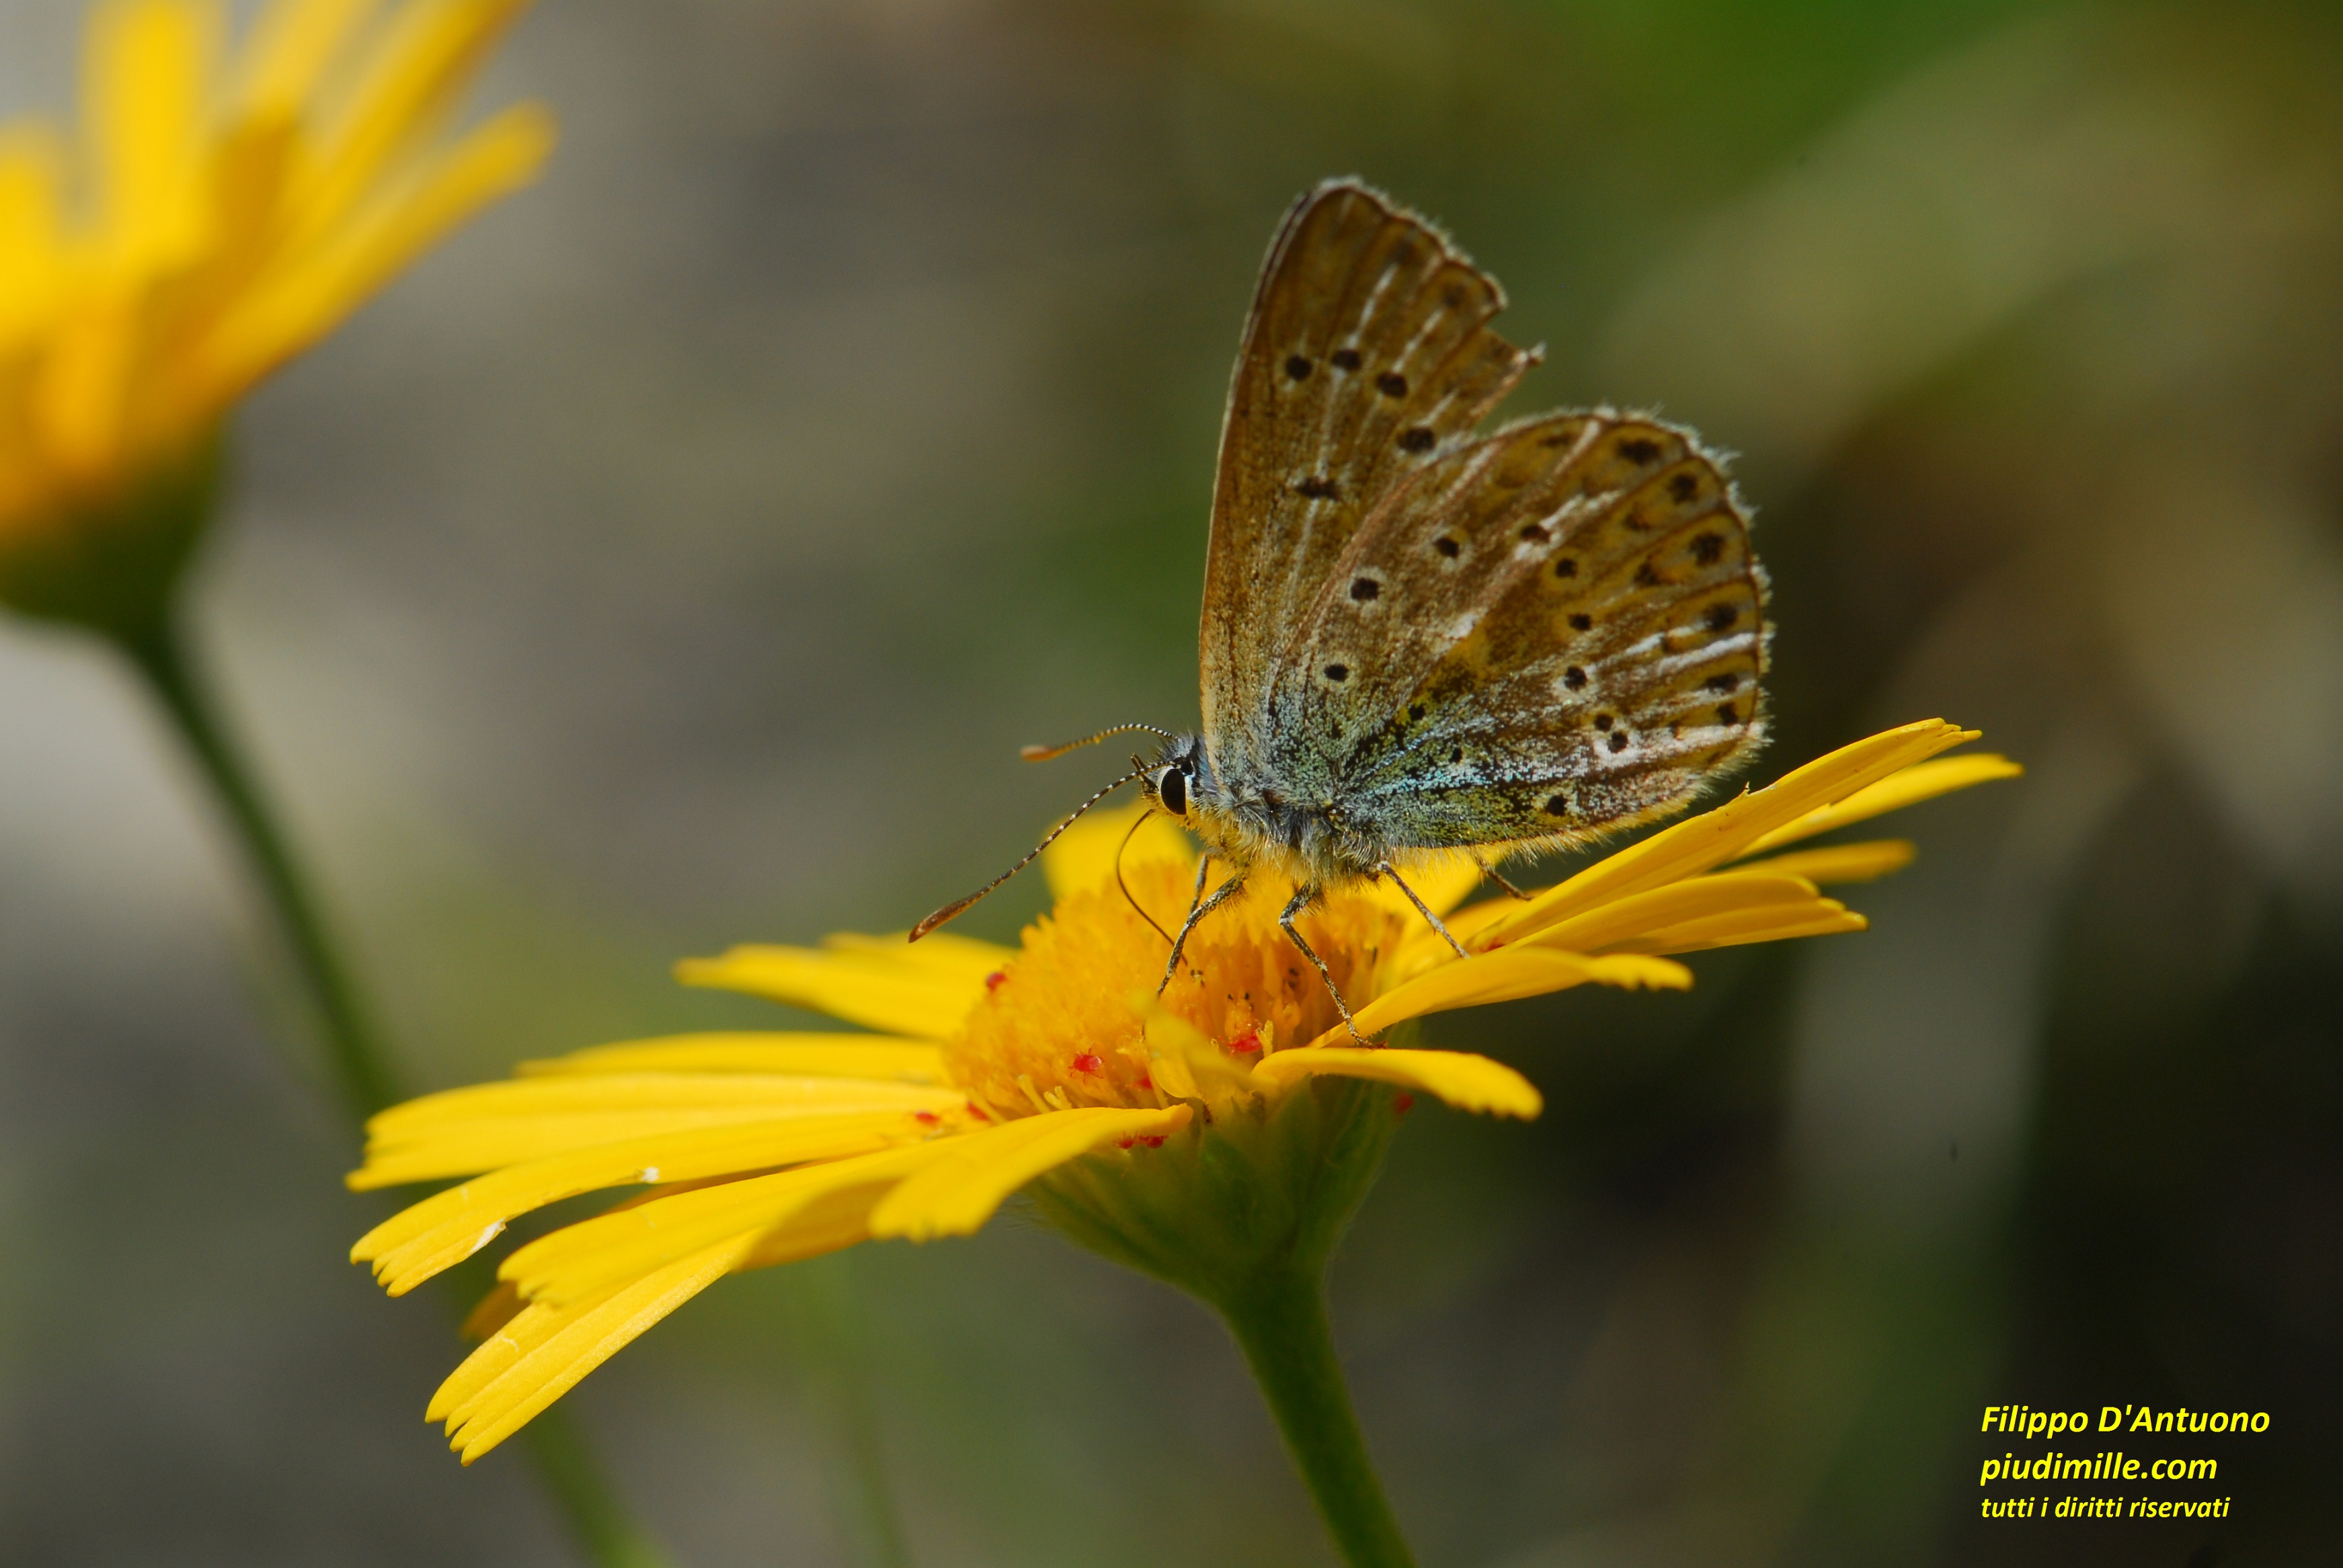
– find the critical point of your subject and focus on it. Generally it is the head with the eyes, for insects or small reptiles; the centre, with stamens and gynoecium, for flowers, etc.
– keep your camera as parallel as possible, with respect to your subject, for example the body of an insect that you shoot laterally.
– if the subject is static, so does not run away, take few shots by varying the composition and the diaphragm; with digital cameras this is affordable.

Eyes are a critical point to focus, in photography of insects
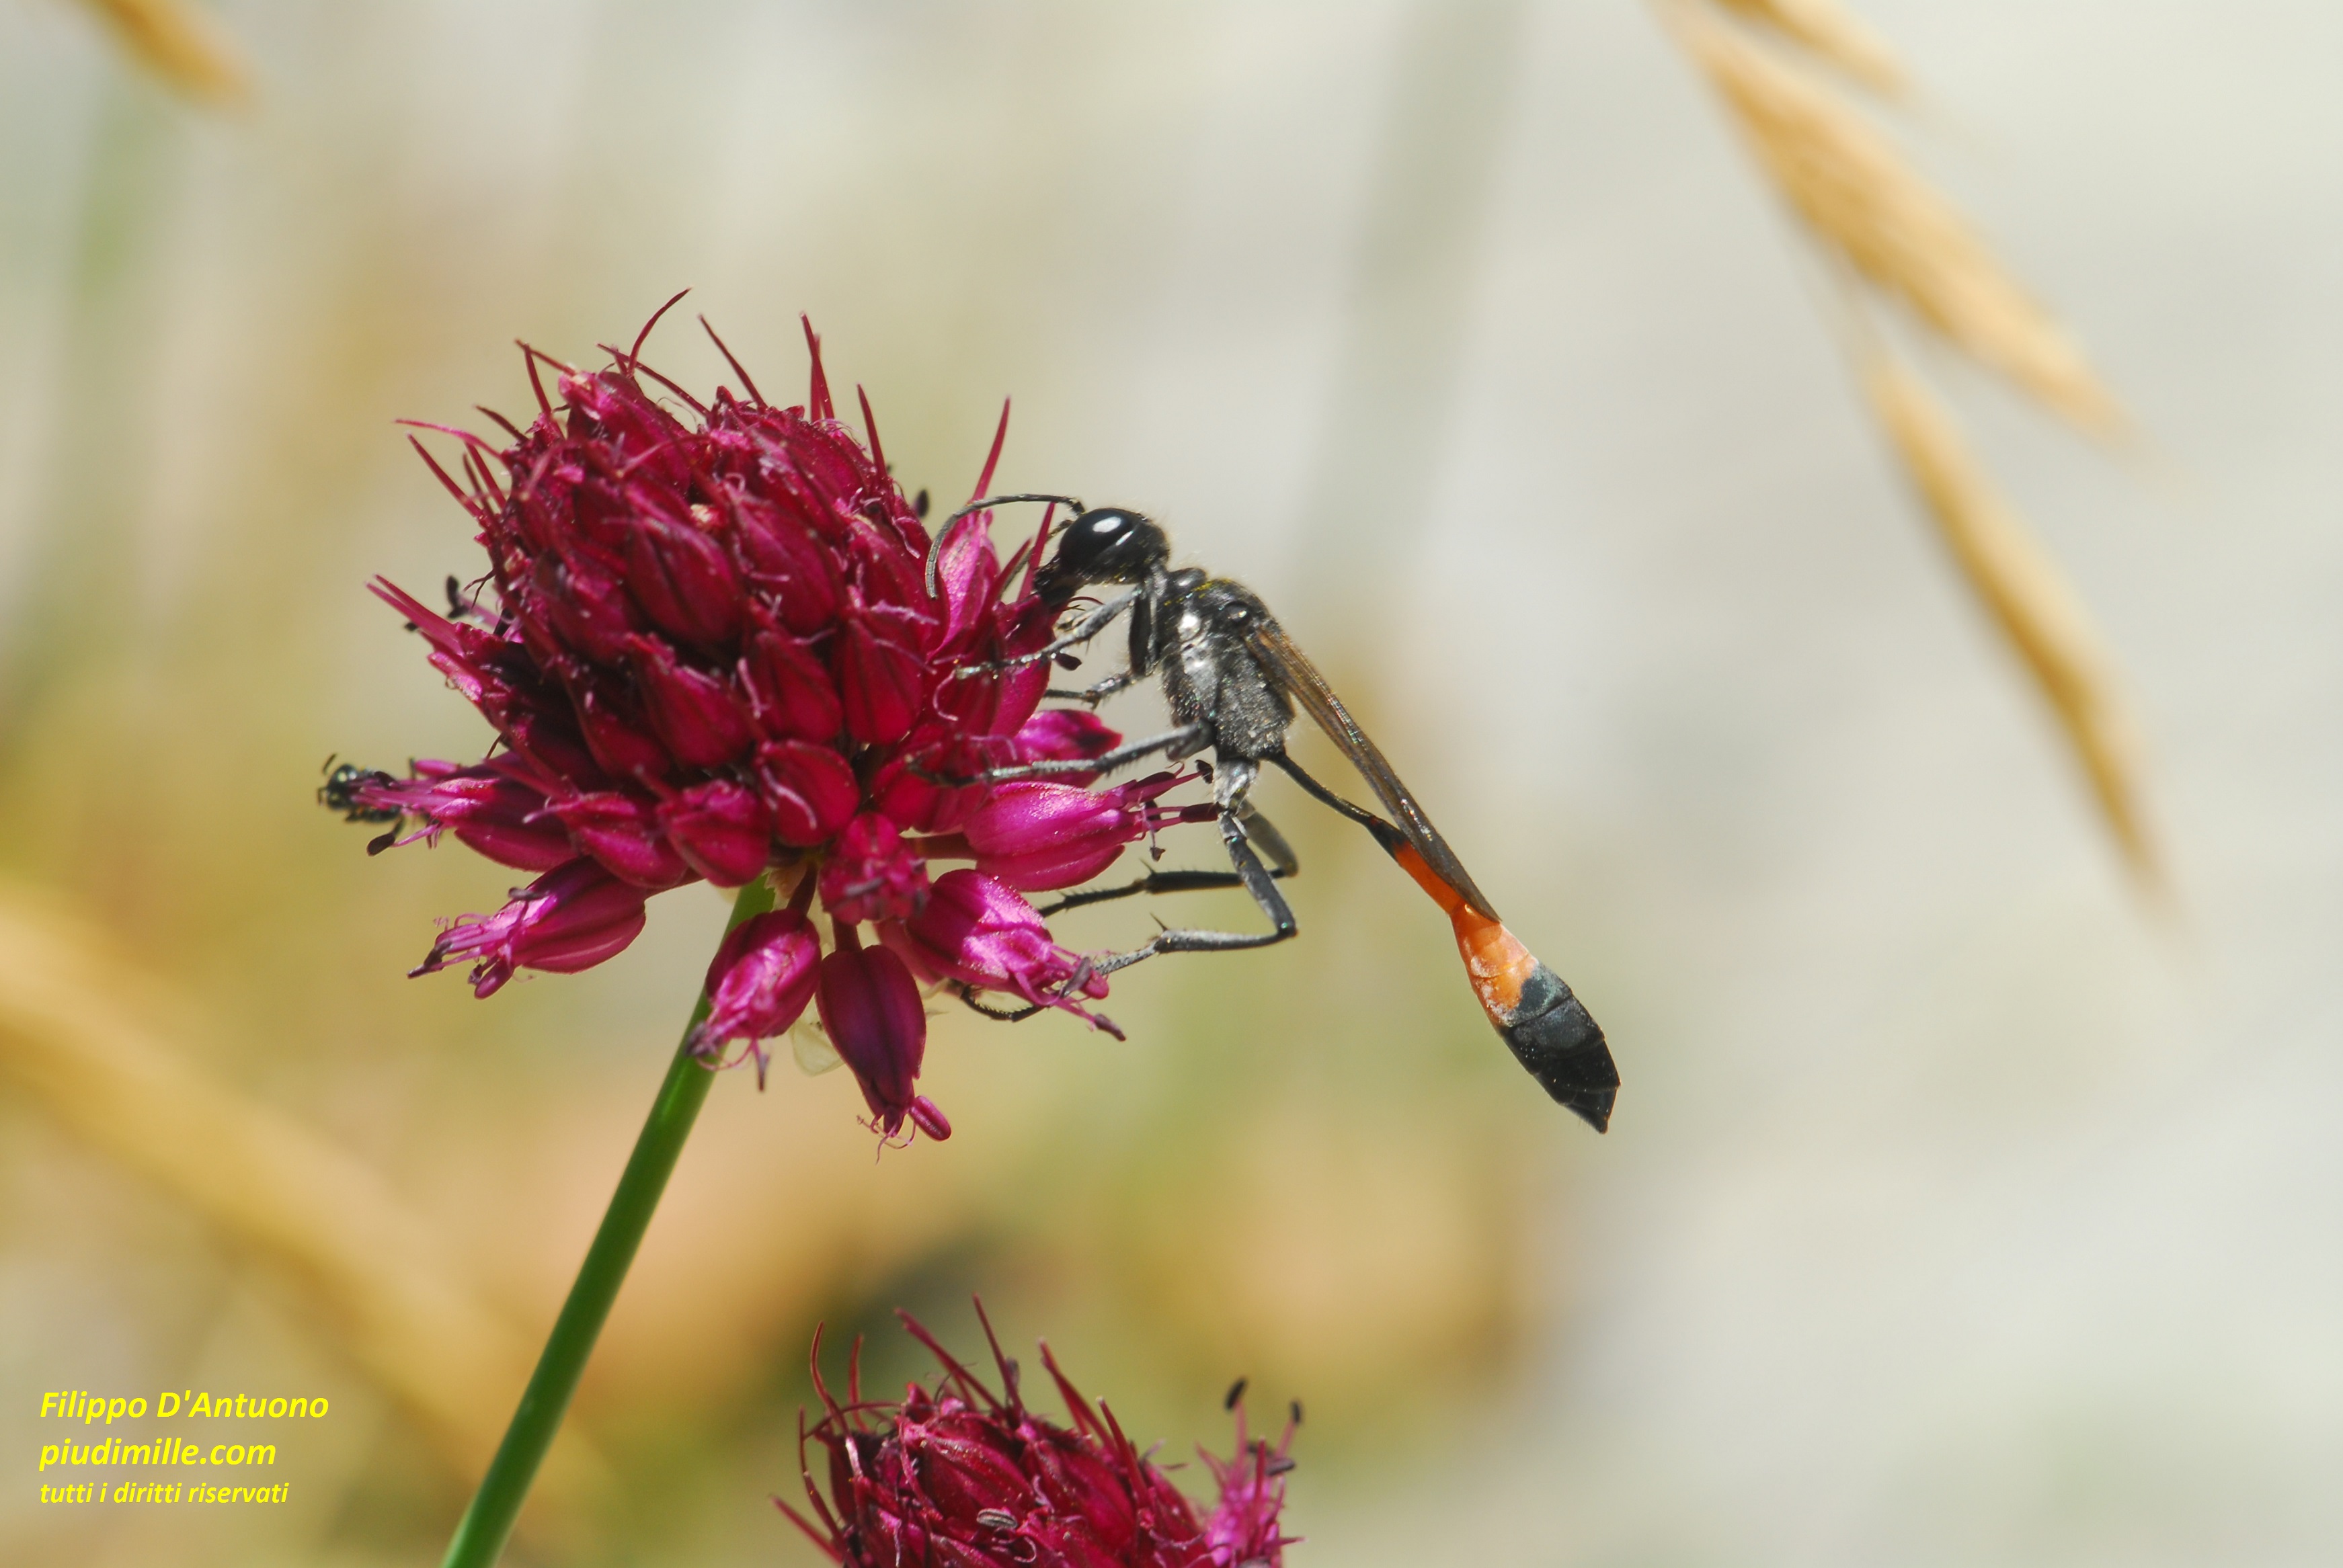
Having the camera parallel to the subject is fundamental for a complete close up focussing
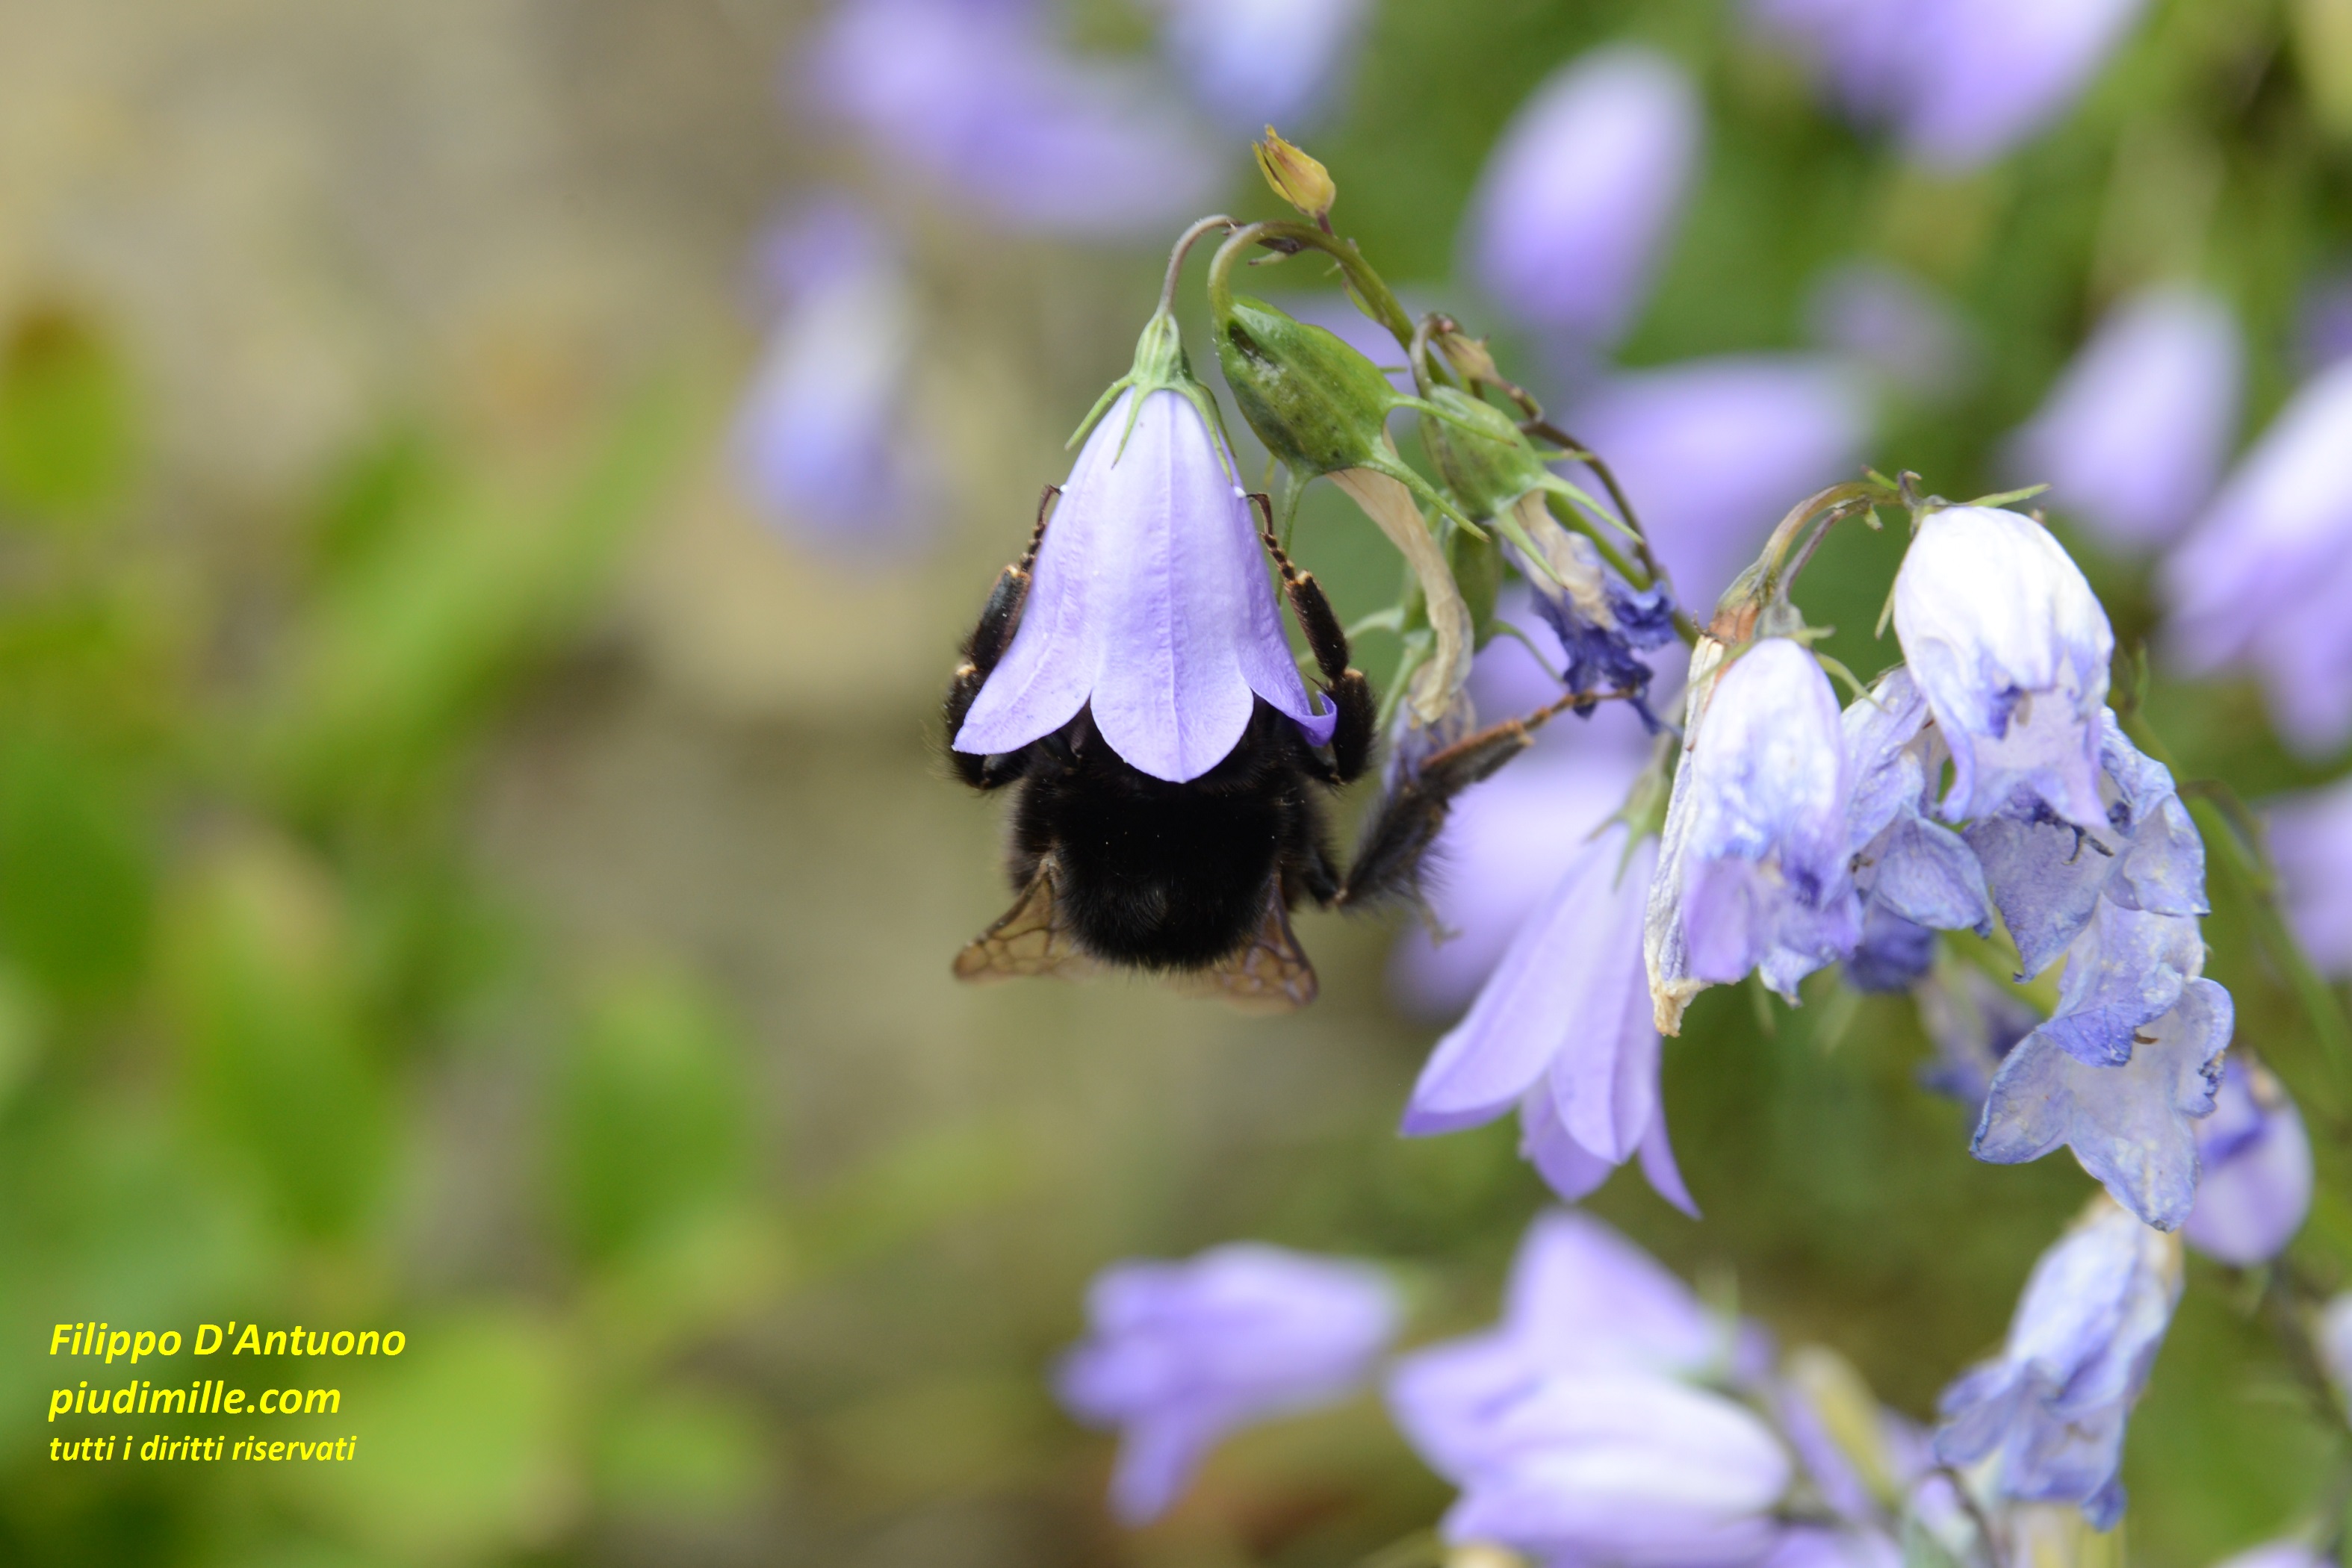
All the rest will also depend on your preferences. Some people like a lot a very low depth of field, that highlights a detail, leaving out of focus all the rest. Most people consider very favourably a background well out of focus, that allows sharpening the main subject. Personally I do not dislike a medium out of focus of the background, when it helps to catch the features of the environment where the subject is placed.
An uniform out of focus background may contribute to highlight the subject
Photography hiking. piudimille.com
A moderately out of focus background may give the idea of movement and of the environment in which the subject is placed
Shooting landscapes
For as strange it may sound, landscape photo is quite a difficult task. With landscape, I indicate all the subjects with a dominance of not specific elements, either distant or close; so, as an example, also forests, where there is not any emphasis on individual trees.
As told, there is a tendency of abusing of wide angle lenses, when shooting landscapes, making everything small and far. Our sight has a quite wide angle of view, but retains what is, for us, the natural size of subjects. Wide angle shots are better if:
– there is a main subject, rather close and well in evidence (e.g. a gully, an individual mountain, tree etc.)
– with the background of a wide landscape there is some subject in the foreground, like a group of trees, a rock, a water body etc.
– the landscape is composed of subjects on plains at different distance, rendering a sense of perspective.
In landscape shots we generally try to have all the subjects well in focus and, for this, wide angle lenses do help. Shooting landscapes with a telephoto can however be a good idea, since it drastically compresses the space, introducing a “dramatic” perspective.
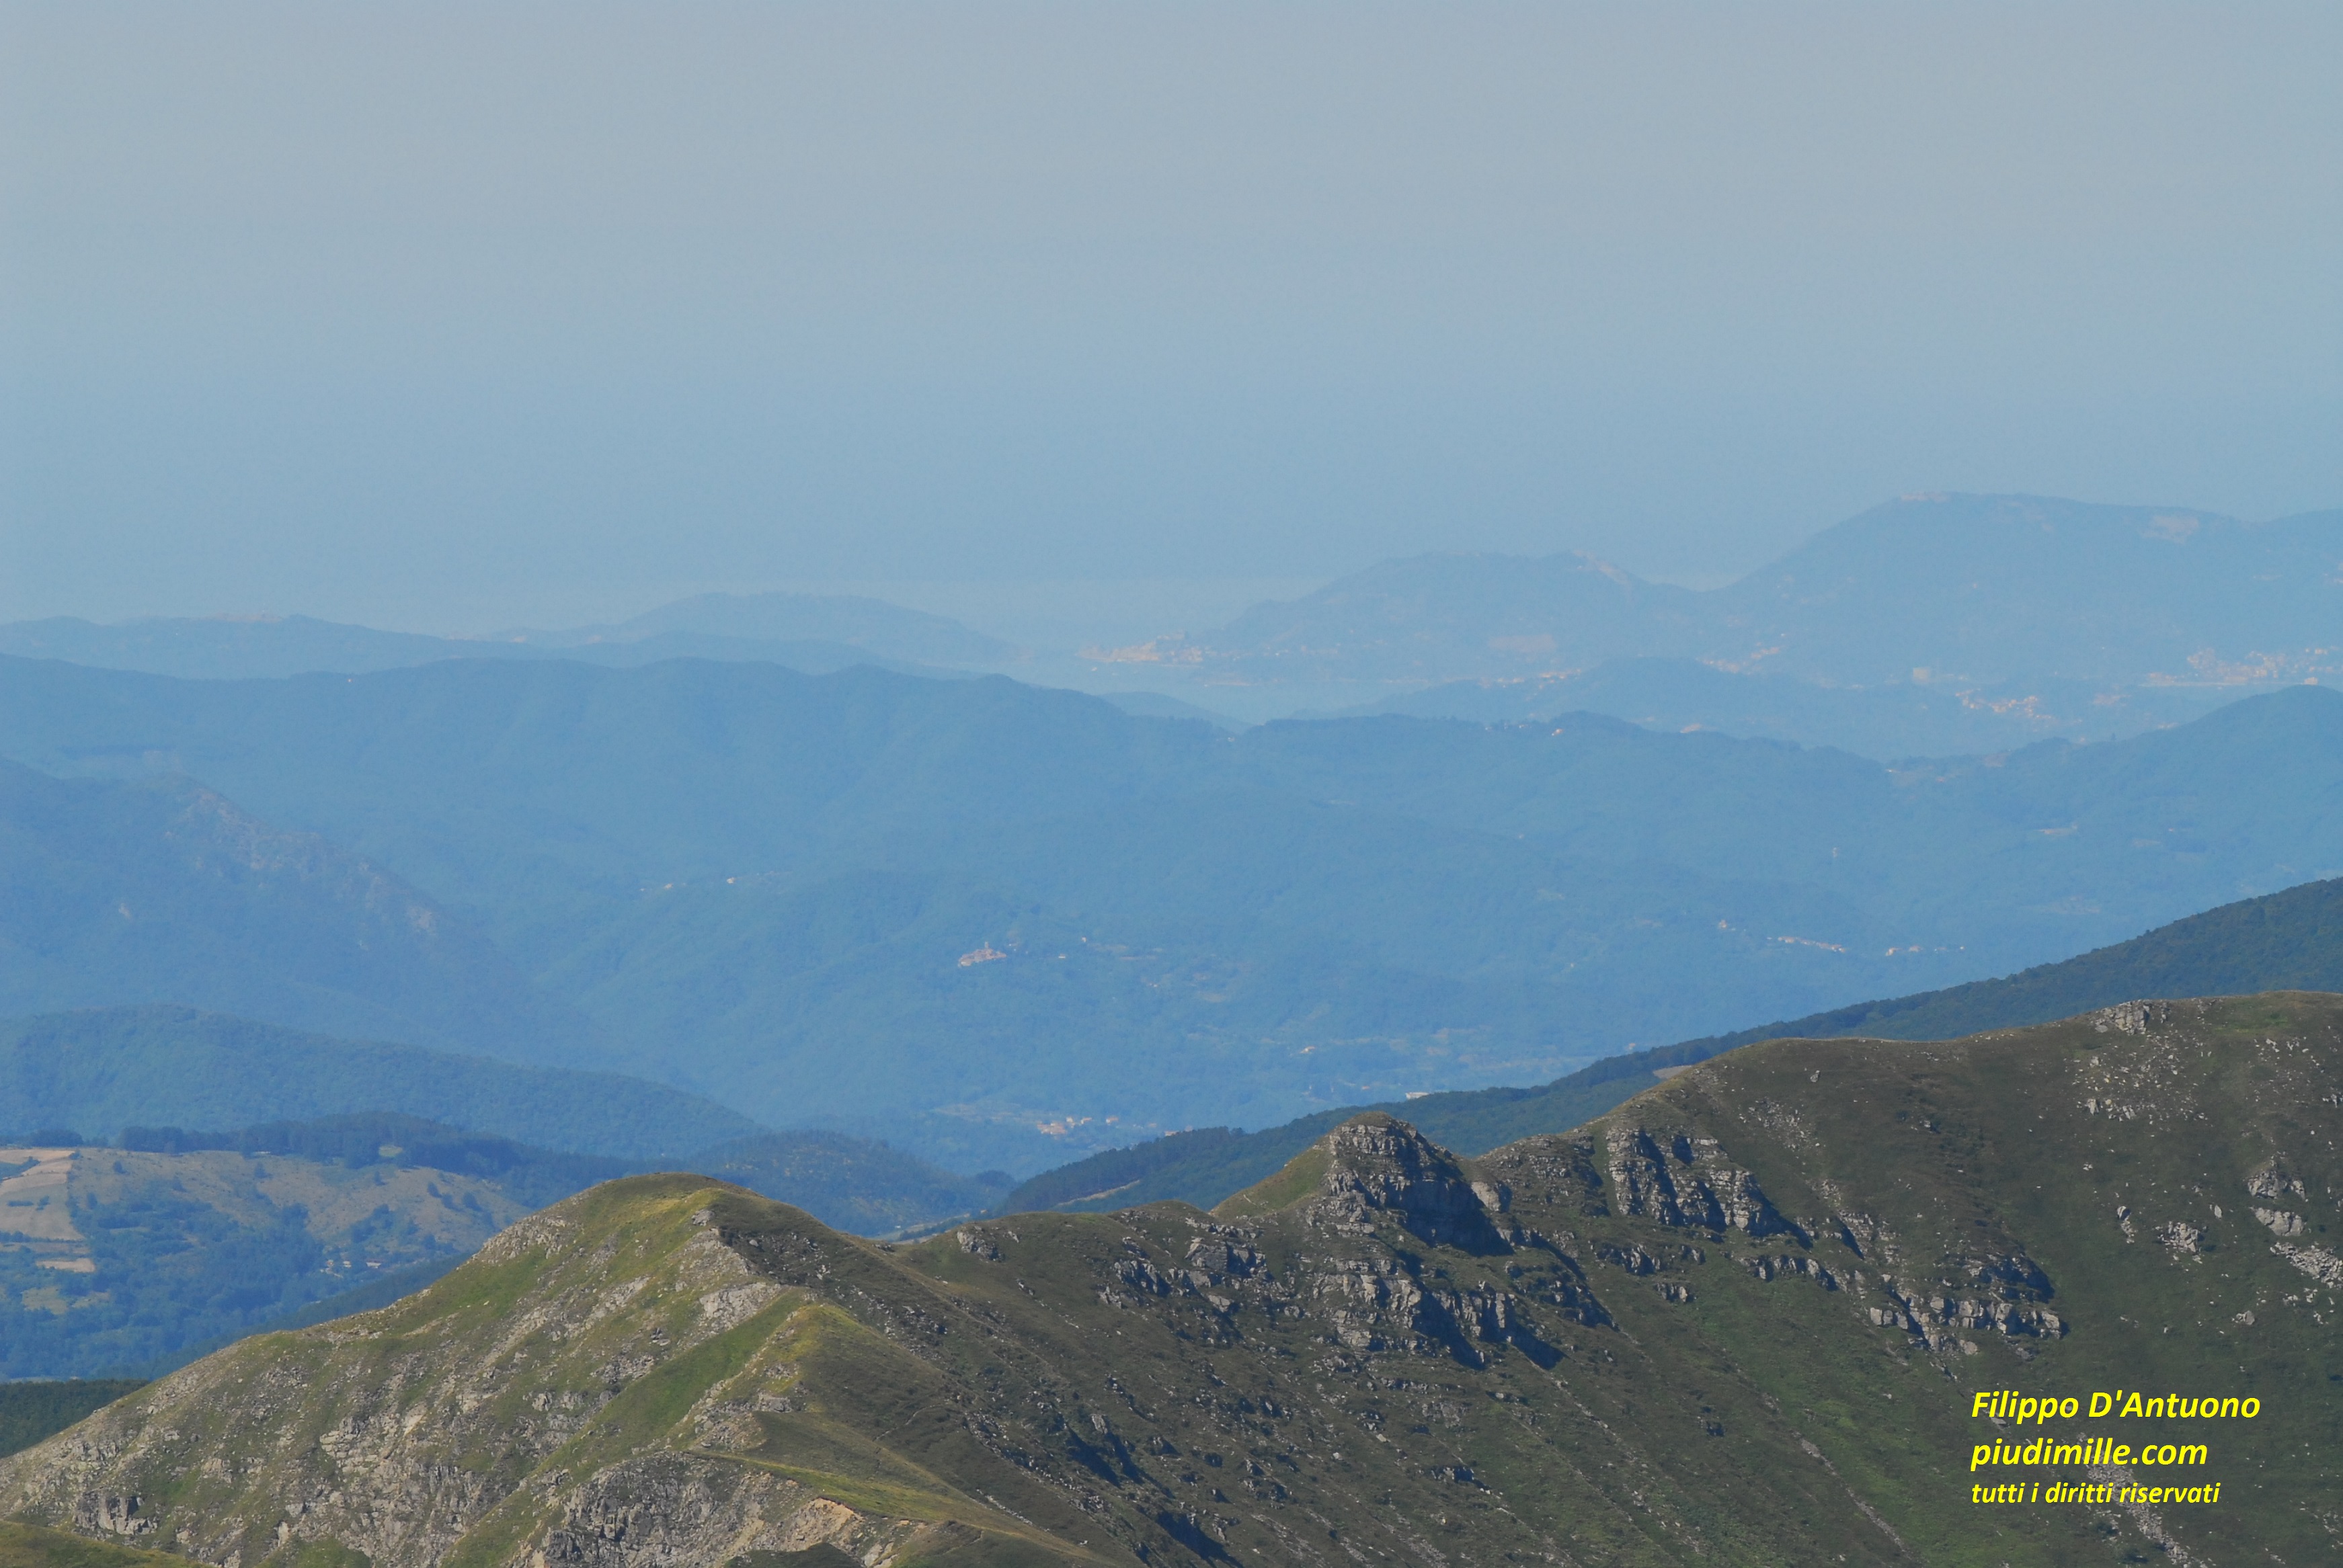
Light and atmospheric conditions are critical. Full sunlight days, with sharp contrasts between light and shade areas are generally enemy of good landscape pictures. Also humid and misty days are generally bot very favourable, , especially when shooting from long distance using a telephoto lens: what can be seen by eyes may result completely faded in the picture.
So, when to photograph landscapes ? Sometimes, when hiking, the answer is very simple: when we are there, there is no alternative. If you can choose, in nice sunny days it would be better to choose the moments with prevailing diffuse light, so close to dawn or dusk. Provided you can resist to shoot sunsets or sunrises, that are among the most difficult subjects, and the ones with the higher risk of becoming trivial. The days with veiled sky but clear air, like the ones preceding the arrival of a perturbation, are often perfect. Having the possibility of returning and repeat the same shots in different conditions, will certainly end up with satisfaction.
Photography hiking. piudimille.com
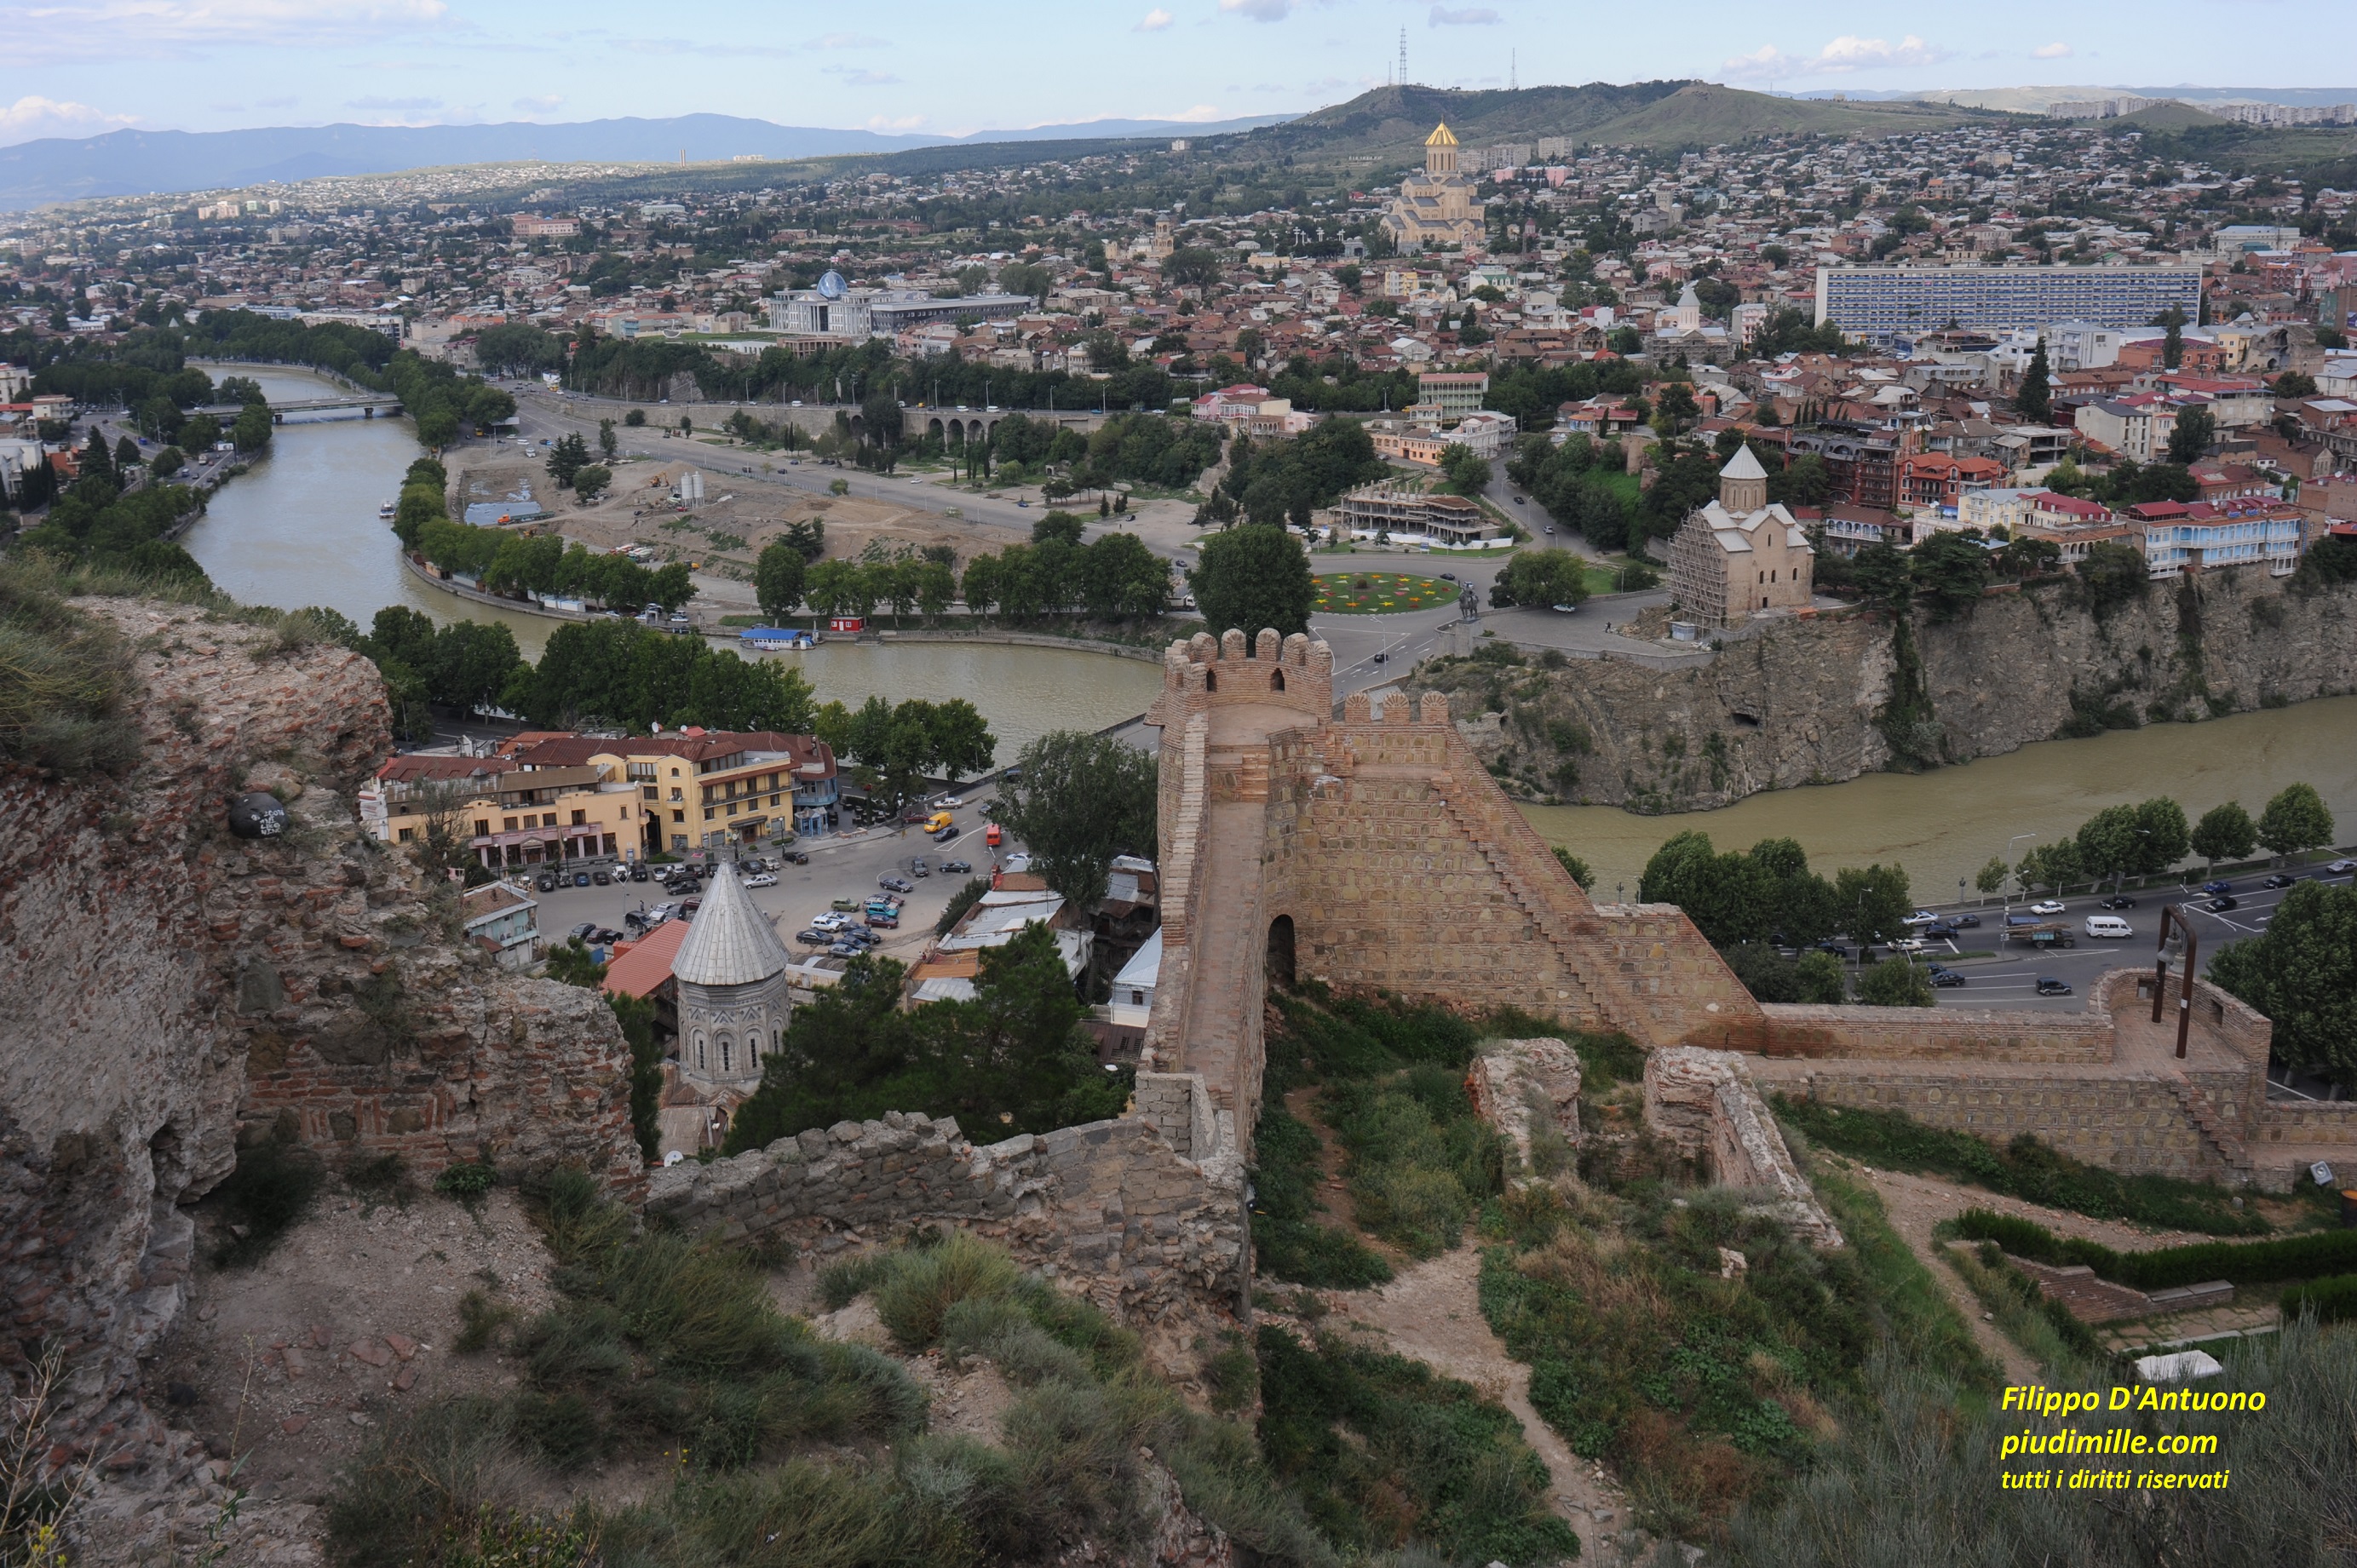
Shooting an ample and not well defined landscape, it is better to include some subjects in the foreground. A panorama of Tbilisi, from the castle hill
Subjects on different planes may create a better perspective and depth of view
Strong light contrasts are generally enemy of good photos. Lake Nero, Apennine of Piacenza.
Post-production or not
For me the answer is simple: no, since I never had the time and the determination to learn well, apart some very simple tuning of contrast and brightness. The camera is far less perfect than our eyes; so the picture is always different from what we see, generally with some more defects. Post-production should serve to bring the situation back to our reality
But, to do this, one must be: a) very competent; b) very honest.
The media are full of heavily processed images that, to be sincere, generally leave me quite cold; they could gain in aesthetics, but lose their soul. Let’s say that they are not only photos anymore, but a mix of personal interpretation; from an artistic point of view, this can obviously be an excellent approach.
Post-production could allow removing details that we do not want to see. Think about electric or telephone cables; they are everywhere; in certain situations you cannot get rid of them, whatever position you may find. With skill and patience you can remove them from your digital picture. But whoever could be conquered by your picture, and go to see the place, would also find the cables, that you erased. So provided you are able to remove them, the decision is yours.
Post-production also allows to improve the visibility of under and over exposed areas in sharply contrasted images, especially if you shot in the proprietary format of your camera. It is one of the possibilities to bring back your picture to a situation more similar to the one you remember. If you are skilled enough, stopping at the same time at the right point, use it.
Ah, I was about to forget: a thing that you will find written everywhere. If you have pictures taken in the .jpeg format, before elaborating them, make a copy. In fact, you will be for sure very clever, and will often save you work, to avoid losing your work. Unfortunately, jpeg images worsen their quality at each saving, up to a point to be simply thrown away. So, keep an unprocessed original.
Photography hiking. piudimille.com
Cables are everywhere: let’s erase everything in post-production …

… or tune the subject composition. Groups of mount Forato and Procinto, Alpi Apuane
Panoramic shots
Now I introduce two special cases of less invasive post production. Let’s start with panoramic pictures. Merging side by side different shot, we can reproduce the landscape in real size, as our eyes see it. This is really a “harmless” processing, but must be studied from the very beginning of shot composition, otherwise there is no hope. It is in fact necessary to take different shots, at the same focal length and, possibly, with the same light conditions, to include the whole panorama. I never seriously put myself on this.
Cutting and magnification (cropping)
Cropping indicates the selection of a part of an image and its possible digital magnification. It serves to enlarge a specific subject and eliminate all what is not needed. As an example, in the case you shot and insect from far, so it is small and lost among many other things, in your picture. Cropping is a relatively easy operation but the limit of magnification are determined by: a) the resolution of your sensor; b) a perfect focus of the subject; c) the absence of motion blur. But you will understand upon trying.
Photography hiking. piudimille.com
An example of cropping: the original image …
… and the cropped one
Managing your images
Forget that your effort is finished with your hike. You must still devote quite some time to your pictures. If you enjoy taking pictures, they will soon become some hundreds, thousands, tens of thousands. And, seeking for some, it will be impossible to find them. So:
- Immediately download the images from your memory card to a different storage device; an external disk is better than your computer hard disk, that can soon be filled. External storage device are now cheap and capable. But always have a multiple of two: it is absolutely necessary to have a full updated copy of everything. A simple strategy, then see further details below: download pictures to a directory with a generic name (e.g. “temporary”, that can also be on computer hard disk); once you finish working on your images, copy them in a final destination directory, with appropriate name, on both disks; or, transfer your photos in already existing thematic directories, on both disks. This procedure will allow you to keep everything update and avoid doing frequent full disk hardcopies that, if your material is a lot, may also require several hours. However, it will for sure happen that you make some confusion; so, always keep one of your disks as the main one, and update, and every now and then hard copy it on the other one. If you want to be almost perfect: fill your disks to less than half its capacity and first do the new hard copy, tagging it with the date of the day; only after, remove the old hard copy.
- Before, or just after downloading your photos from the memory card of your camera, to the temporary directory, mercilessly cancel all the bad ones and also a conspicuous part of putative duplicates.
- Give a name to all your photos: it should synthetically contain, all the information you need to find them using a search tool. Examples: a) sister, cesenatico beach may 2019 (but pay attention, if you have two sisters rather use their names); b) sunset mount cimone july 2014 (but pay attention: the word “mount” is generic, and will not be of any use for your search: you may omit it). Avoid capital letters, that are of no use. Important: try to use always the same name for the same subject; e.g. call a dandelion either “dandelion” or “taraxacum officinale”, otherwise you will have to perform double search; call your sister “elisabeth”, “beth”, “betty” or whatever else, but always the same way. To avoid following the name with letters or numbers, in case of several images with the same subject, (so a, b, c, or 1, 2, 3) keep the tag and number given by your camera, at the beginning of the name. This will also allow to avoid unwanted duplicates. If you shoot by different camera bodies, set different tag acronyms on each of them, so you will also be able to immediately understand which camera you used for any specific picture; also set the numbering to sequential mode, so that it will not be reset to zero at each download.
- The choice of your storage organisation is a bit up to you. You can name your directories on the basis of a subject category (e.g. “insects”, where you will store all the insect pictures, wherever you took them); or, you can use a criterion of “block of activities” (e.g. eastern holidays 2019, where you will transfer all the pictures of this holiday, irrespectively of the subject). These can be both valid systems; the second is perhaps faster and less complex, even if apparently less precise. But consider: if you shot a nice insect on a nice flower, will you put this picture with insects or flowers ? The important thing is to give consistent names to all pictures, to be able to effectively search for them, according to different criteria, when needed.
Photography hiking. piudimille.com
PROGRAMS
EVENTS
ARTICLES

Cicindela – tiger beetle
A story of photography and communication with a tiger beetle Cicindela photography and connection June 21st,